Centurion Mecha 31

Posted by Mangozac on May 29, 2014

We’re getting oh so close!

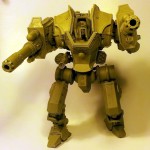
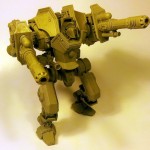
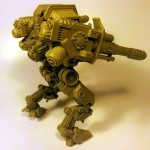
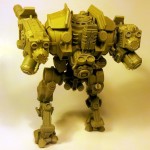
Consider these pictures to be of the “pre-release” kit design. As of this week I have moulds to produce them in this format and I have begun casting a few copies for a select few mates before I head off on an European vacation this coming weekend. I was showing this to my mate Jas a week ago and he suggested that in order to match the chest armour I really need to add some extra detailing to the thigh armour plates. I do agree and in fact would like to do another detailing pass over the entire upper legs, however that won’t be until the current leg moulds have worn out.

Excuse the poor pics: I really should get some daylight bulbs as even colour correcting for the standard horrible CFL desk lamps I’m using for lighting makes the resin look far more yellow than it is!

I forgot to take a photo of the completed Gatling cannon and the extra details I added to it. I am however really pleased with how it and the countermeasures launcher turned out.

This will be my last post for a few weeks. I’ve got some more big projects planned for when I return from holiday (in addition to volume production of the Centurion) – keep an eye out!

Centurion Update 30

Posted by Mangozac on May 11, 2014

This time it’s an update on the close defence systems!

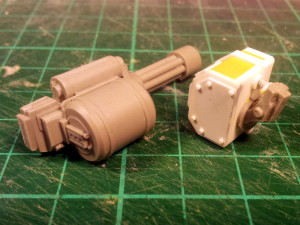
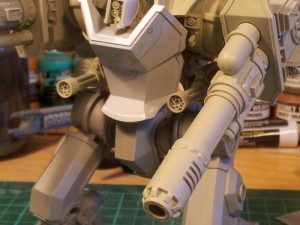
As discussed on the RA Forum I decided that I wanted to bulk out the torso silhouette a bit by adding some close in defence weapons. The weapon of choice was a gatling cannon so I put a design together. The intention was to have one on each side, limiting the design as I had to make it easily mirror-able (so that I didn’t have to scratchbuild two complete separate guns).

This is what I ended up with:
Centurion_WIP_111

The problem was that I wasn’t 100% happy with it. The gatling cannon design was OK and could do with some durther detailing/refinement. My main concern was that everything was just looking far too symmetrical: the mirrored main cannons and now the close in defence weapons. I felt that it made for quite a boring design, so the decision was made to ditch one of them in favour of something else. This was particularly annoying since I’d already made design compromises to make the gatling cannon easily mirror-able and I’d already made gatling cannon moulds for both sides!

I threw around several ideas for the “something else” before settling on something I liked. Initially my mate Seb suggested smoke launchers, but I didn’t like the aesthetic of the standard tank mounted smoke launcher. I toyed with the idea of a sensor pod and then just a plain armour plate (of which I even made a mock-up in styrene) but ultimately decided to return to some kind of smoke/chaff launching system. I was inspired by some photos I took aboard the US Amphibious Assault Vessel “Bonhomme Richard” as the guest of Battlefleet Gothic “royalty” Nate Montes last year and the countermeasures launcher pods mounted on the side of naval aircraft.

Here’s what I came up with: the galting cannon and smoke launcher. I realise the smoke launcher looks similar to a missile pod – they have very similar functions so it’s not surprising. Hell somebody can claim it is a missile pod on their model if they want!
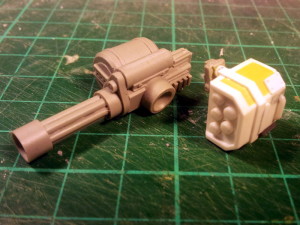
Centurion_WIP_112

Centurion_WIP_113

And here’s how they look on the model:
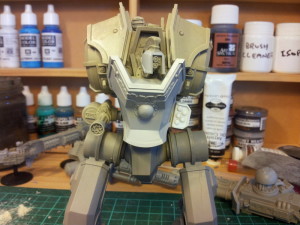
Centurion_WIP_114

There is another problem though: the gatling cannon sits out too far. This was a limitation of the mirror-able design and another thing I was never happy with. To prove the point I grabbed a tertiary cast of the cannon, hacked back the mounting socket and drilled a new one into the side of the cannon body. This brings the cannon in much closer to the torso and I think it looks far better:
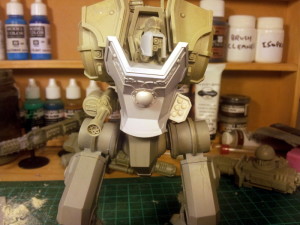
Centurion_WIP_115

Subtle, sure, but it’s just one of those things I need to do to be happy with it. OF coure, that was only a demonstration and I now have to do it for real. After some deliberation I decided to hack up the original gatling cannon master parts. They have no other use and I can always cast more from the now redundant moulds if need be. Plus I’ll take the opportunity to update the gatling cannon a bit more: it really needs another detailing pass!

I have a deadline of 3 weeks to get this finished and some samples cast – let’s see if I can manage it! Nothing spurs productivity like a deadline 😉

Centurion Update 29

Posted by Mangozac on May 2, 2014

While other projects have diverted some of my attention over the past couple of weeks, I have not neglected the Centurion! I’ve recently been discussing detailing of the chest armour with one of my close design mentors, Xeones, and we came up with a cool design based around laurel branches.

The problem was that it required laying out some quite fine and intricate details like the leaves. I did a test one night with some leftover Procreate on some scrap styrene but the result was really poor. That was several weeks back and I decided it was easier to ignore it for the time being (and focus on other parts of the model). With those other parts completed I had to get the chest armour completed.

After some more brainstorming I came up with an idea:

  • Draw the design in vector art (at scale)
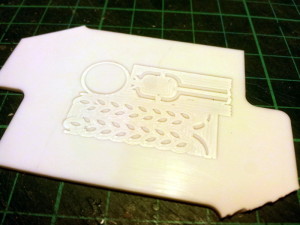
  • Use the CNC router to machine the shapes at a depth of 0.5mm into some 1.5mm styrene sheet. Areas surrounding the shapes would need to be milled down 0.5mm also. This effectively leaves a 1mm thick sheet with 0.5mm details protruding.
  • Use a sharp blade to slice the details off the sheet
  • Glue the details onto the armour

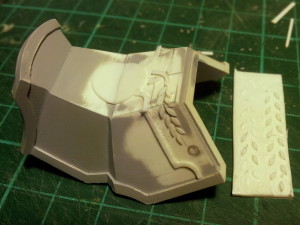
It seemed feasible so I gave it a go. Here are the results half way through and I have to say I’m really pleased! The process of slicing the parts from the styrene sheet tends to curl them up a bit, but straightening them isn’t a big deal. The edges are all a little bit crisp but some running around with sandpaper will sort that out.

This is what the milled parts look like. I used a 1mm cutter and you can see the marks where larger areas of styrene removed:
Centurion_WIP_109

And here’s the result. WAY quicker and easier than sculpting by hand!
Centurion_WIP_110

Once I’ve completed the other side I’ll hit it with some primer and smooth things out a bit where necessary. Stay tuned!