WIP: Zeus Frigate 5

Posted by Mangozac on February 21, 2013

I haven’t been feeling happy with the weapons battery design so last night I threw some styrene together to try out the more common square cannon design. The hull area around the cannons still needs a lot of work and detailing, but I do much prefer the square cannons themselves. They really make this ship look like a scaled down version of the Zeus Light Cruiser. I know some of my followers prefer the domed cannon designs but I think this has sold me…

Frigate_WIP_11

WIP: Warhound Titan 5

Posted by Mangozac on February 19, 2013

Well over the weekend I decided to do a test of the asphalt planed for the diorama road. The other guys on the RA forum concurred with my reasoning that the Warhound would make a mess of standard road asphalt it walked on. I figure large main avenues of an Imperial city may be reinforced to support the weight of such heavy vehicles as superheavy tanks, but a smaller street would have just standard pavement, which is relatively thin and weak.

So I wanted to model heavily damaged asphalt, damaged not only by the Warhound’s steps but also potholes and other general traffic which causes potholes. To achieve this I wanted to try out a technique I read about on a military modelling site some time last year. Unfortunately I don’t have a link, nor can I find any references to it now. The idea is to use florists’ foam underneath a standard asphalt recipe (dirt, plaster, glue and black paint) so that once the asphalt dries it can be deformed by applying pressure, creating very natural looking cracks and damage.

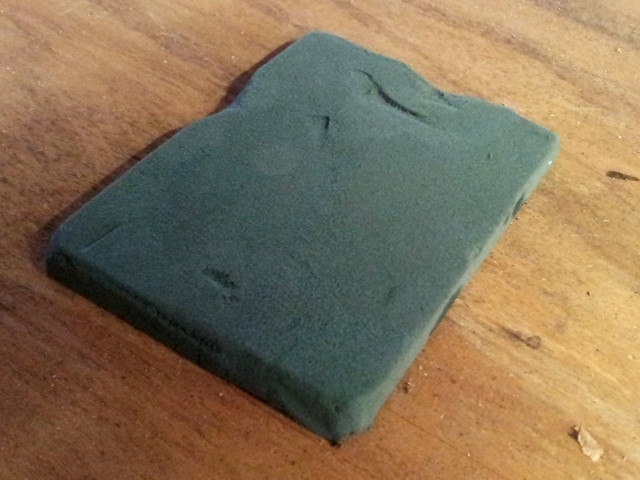
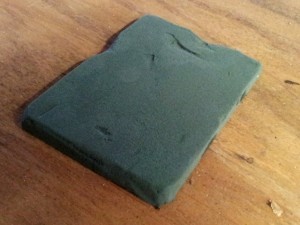
So we start off with a slice of florists’ foam:

Warhound_WIP_8

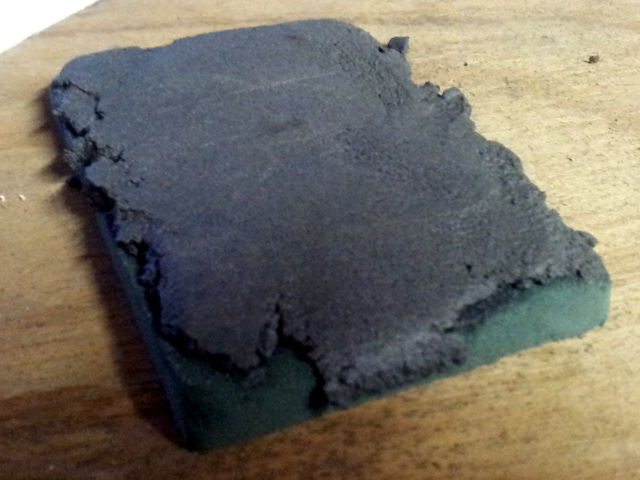
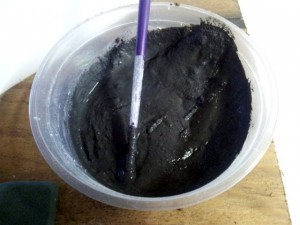
Then mix up some asphalt. I used dirt (I was in a hurry so just grabbed it from the backyard but usually you would want to sieve any impurities out), plaster of paris, a little PVA, black acrylic paint and some water. You really need to make sure you don’t skimp on the paint: in the end it turned out far too light (although remember in real life asphalt fades as it ages, so unless you’re modelling pristine new pavement you don’t want it to be totally black).

Warhound_WIP_9

Apply the asphalt mix to the foam. Note that the mix won’t actually stick to the foam so it can be a little tricky. To smooth it out I ended up placing a piece of cling film on top and then using a glass bottle as a rolling pin. The only disadvantage of doing this is that it can leave the top surface a bit too smooth, so you may need to rough it up again afterwards. I’ve read that you can use some sandpaper on the cured asphalt mix, but I’d be weary of sanding marks.

Note that you don’t want the asphalt to be too thick. In real life the actual asphalt layer is only about an inch thick (generally atop a bed of crushed rock) so try to get your model asphalt down to about 2mm thickness (which is still far too thick according to our scale, but for practicality will work well).

Warhound_WIP_10

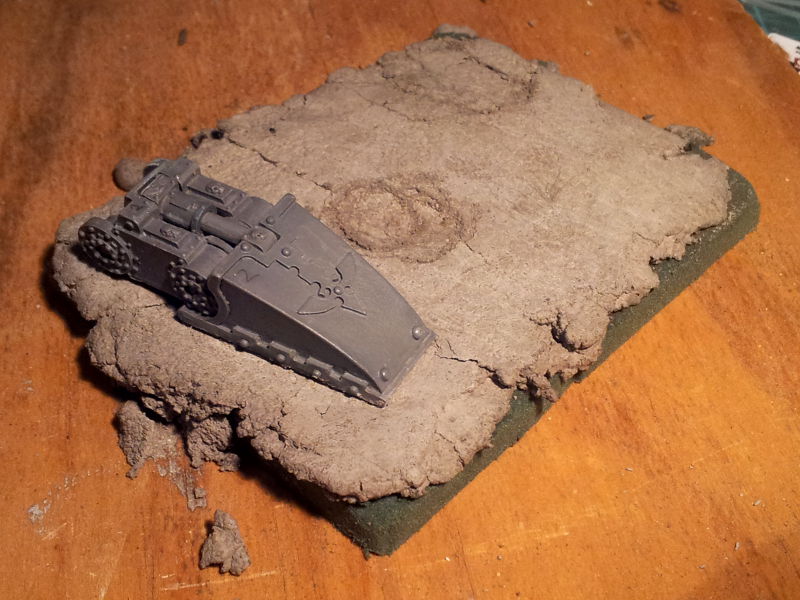
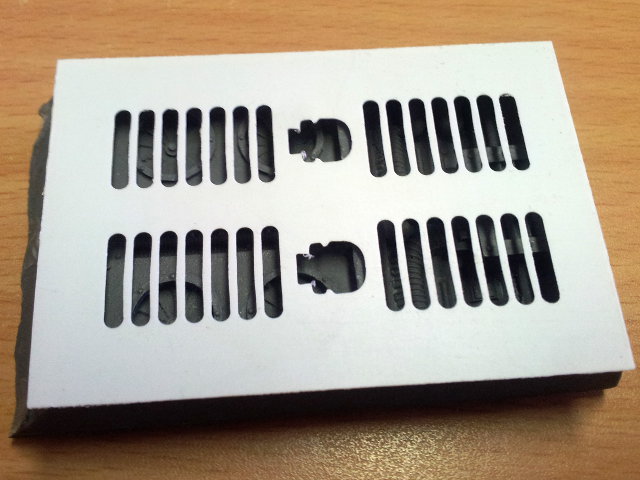
The weather here has been pretty wet so it took the asphalt about 48 hours to cure properly. I tried doing some impressions earlier and later and found that the most realistic results came from doing it later. It’s hard to tell but the Titan toe has been used to compress the asphalt is it sitting on and in person it gives a really authentic subsided/crushed effect. It would look even better with a thinner layer of asphalt (I applied it too thick). The pothole looks great though! You can see that once it dried the colour was nowhere near dark enough.

Warhound_WIP_11

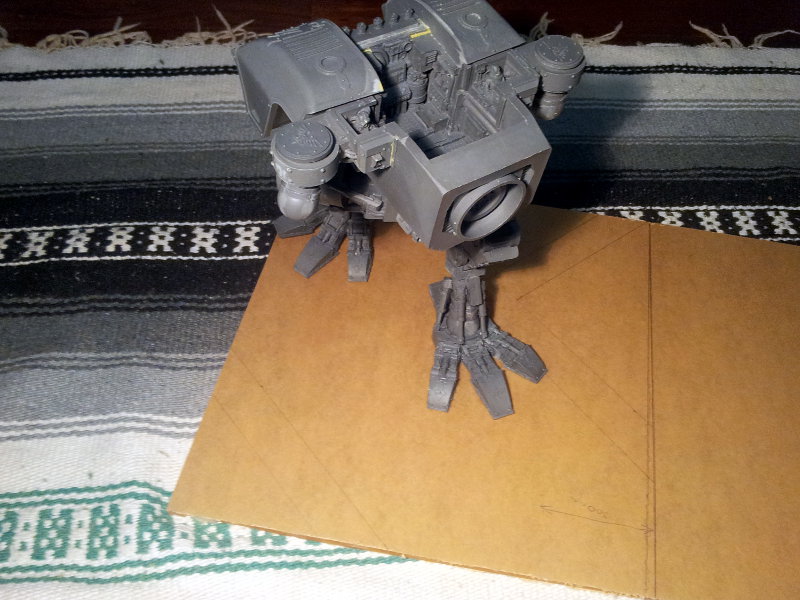
So the next step is to start roughing out the diorama! I did do some priming of the Warhound last weekend so I might even begin putting down some basecoats soon enough. Although I’ve got a pretty hectic couple of weeks ahead of me so it might be a little while before the next update…

As always, happy hobbying!

WIP: Warhound Titan 4

Posted by Mangozac on February 15, 2013

OK so this post doesn’t really deal with the Warhound itself but rather the diorama, for which I’ve been doing a bit more research:

Buildings:
As mentioned before I’m going to use a Pegasus Large Gothic Building kit, which I’ve already got ordered. They’re not particularly cheap (although admittedly much better value than GW buildings), but will provide all of the walls needed for the diorama (and then come). I must say though I think they look far more appropriate for an Imperial city than the GW Cities of Death buildings (unless they are heavily modified).

While rummaging around my (actually relatively small) hobby stash I found a GW Manufactorum building kit. I’m not keen on using any of it’s panels in my diorama as in my opinion they are quite unsuitable for this kind of standard city section. Upon opening it however I was delighted to discover that it contains a few of the gothic building accessories (such as lamps and buttresses) – including a couple of spares that I obviously kept when I sold all of my leftover CoD bits ages ago! There should be enough for the small section of city on my diorama. Still the lesson of the day is: NEVER SELL YOUR SPARE DETAIL BITS, regardless of whether you think you will use them!

The buildings will be flat roofed and I’ll probably build an aircon/air purifier unit on the roof of the main corner building to add interest.

Furniture:
I want to have a few pieces of furniture inside the buildings so I did a bit of searching. One thing I discovered is that there is a lot of awful looking 28mm scenery out there! I eventually stumbled across Fenris Games who have some really nice quality accessories.I’m planning to get:
Empty Bookcases
Filing Cabinets
Study Desks
They also do Filled Bookcases but I’m still deciding if there would still be books on the shelf of a war-torn city. I can’t see why not?

Road:
I have to decide if the roads are concrete, asphalt or stone. I’m thinking asphalt, since it would provide the kind of contrast with the concrete sidewalks and kerbing that I want. Can anybody suggest otherwise? I’ll put a manhole or two in the road, and a storm drain along the kerb somewhere.

Since a Warhound would weigh many, many tonnes I was wondering what its impact on the road would be. Would its feet break up the asphalt? Concrete probably wouldn’t suffer as badly. Should I make imprints in the road where the Titan has stepped, and sink its feet in slightly where it currently is?

Getting really excited about this diorama and finally building a highly detailed city section!

WIP: Warhound Titan 3

Posted by Mangozac on February 13, 2013

I keep promising to post pics of the overall progress so I’ve got some really quick, terrible, low light, blurry shots to share tonight! Yay! Here’s all of the cleaned up and washed parts mounted on skewers and ready for priming/painting. I’ll probably do the priming on the weekend.

Warhound_WIP_6

I also started planning the diorama layout on my piece of 8mm perspex. The solid line on the right is where the perspex will be cut to size. The light pencil lines show the T-intersection that the Titan will be walking around. The size of the street should be approximately to scale. At this stage I’ve abandoned any ideas of doing a snow terrain in order to save a lot of potential for grief ๐Ÿ˜‰

Warhound_WIP_7

That’s all I’ve got for now! Better pics next time I promise!

WIP: Zeus Frigate 4

Posted by Mangozac on February 12, 2013

This project isn’t dead! Yeah I’ve been distracted by Warhound assembly, but I have been sneaking in some styrene work in-between ๐Ÿ˜‰

Just a quick update to show how things are looking now with the fattened forward hull. The entire ship is looking quite beefy now – quite a contrast to the “lanky” nature of the GW frigates. The other side of the forward hull still needs a lot of fine detailing. I should make up the other three cannon turret domes on the lathe tonight…

Frigate_WIP_9

Frigate_WIP_10

WIP: Warhound Titan 2

Posted by Mangozac on February 7, 2013

After discussing with some of my mates on the RA forum, I decided that the grille as it was (with the skull cut outs) was no good. The cut outs just weren’t well enough defined. So I went back to the drawing board and ended up with a design that I’m very pleased with:

Warhound_WIP_4

All of the clean up of the model is done and it’s just the last few bits of assembly (well as much as can be done before painting) left. I had to buy another tube of Zap-a-gap 5 minute 2-part epoxy as I’ve already used up the first one I bought!

I’ll post some pics of the assembled kit before I start painting.

WIP: Warhound Titan

Posted by Mangozac on February 1, 2013

It’s funny how we (yes, I know others of you are the same) go through phases of hobby activity. Personally the latter half of 2012 did not get a whole lot of hobby attention but since Christmas I’ve had my mojo back and have been tearing into my projects. Interestingly, there seems to be a pattern to this as the same thing seems to happen each year: Summer inspires a lot of hobby work and in Winter I tend to retract a bit. It should be the other way around so that in Summer one doesn’t have to be continually choosing between the beach and hobby time (fortunately I live close enough to the beach that I don’t have to commit large blocks of time to one or the other)!

But I digress!

As is obvious by the post title I have myself a Warhound Titan. I bought it in the first half of 2012 and while I did a bit of cleanup work on it over the rest of the year, over Christmas I felt inspired to get the project going full swing. The very positive response I got to the painting of my SAW also gave me the confidence I need to feel that I can do a decent job of painting the Warhound, which is also an epic task.

Cleanup and assembly has been a big job. There are a LOT of parts and they pretty much all have some mould lines to be removed. All have gates that need removal too. There were a few badly cast and damaged parts but I elected to repair them myself with putty rather than screw around sorting out replacements. All of the joints have been pinned and I’m using Zap A Gap 5 minute epoxy for any important joins. I decided early on that I wouldn’t bother with the interior for 3 reasons:

  1. It’s intended to be a static display model in a case so nobody will be looking inside
  2. Getting the body to assemble properly so that the internal parts all line up nicely is a pain
  3. Painting the interiors would add a lot of time to painting

One thing I did want to do was something interesting for the grille that covers the cooling systems on the top of the carapace armour (rather than the boring brass etch grille supplied). I played around in Inkscape and came up with what I felt was a cool, suitably 40k style design. 10 minutes with my CNC router and some really thin styrene sheet produced this:

Warhound_WIP_1

Warhound_WIP_2

Warhound_WIP_3

To be really honest I’m not completely sold on the skull (yes, that’s what the centre cutout is supposed to be) design. The problem is that I couldn’t come up with anything else that I felt more appropriate routed out in that style. Imperial eagles are too detailed. And I wanted to have a fair amount of open area to show plenty of the details underneath. I’ll think about it some more as I continue assembly.

The other thing I’ve been giving some consideration to is the diorama base for this one. I did a test last night and while I’m pretty sure it will be stand freely without a base (despite the “walking” pose, which you’ll see soon), it won’t be super stable. Plus a nice base really completes a model! Inspired by this Warhound (I’m planning to do a blue and yellow Warp Runners Legion colour scheme too) I am considering a snowy setting (primarily because I haven’t done snow before, and to not do something new wouldn’t be keeping with my hobby masochistic tendencies). But I also don’t want to do such a featureless expanse as featured on the SAW diorama. So I’m now starting to think “snowy ruined city street”, inspired by the building modelling work featured on a recent Eye of Terror blog post (seriously that is one of the best Imperial building ruins I’ve seen anywhere).

The one thing I need to do is make sure I don’t go overboard with the base size: the SAW diorama onlyย just fits into my display cabinet (the base has to be oriented in a specific, non-ideal way). The Warhound is also a very large model (similar footprint as the SAW and a lot taller). Suddenly I wish I didn’t get rid of all of my Cities of Death bits on a previous clean out (although I do have an unopened Manufactorum box sitting around)!

I’ll post some pics of the Warhound itself as assembly nears completion. But really, we’ve all seen assembled Warhound pics a million times before. They’re pretty commonplace nowadays. I wonder if Forge World ever anticipated the sheer number of them they would sell?