Centurion Update 26

Posted by Mangozac on February 21, 2014

Ermagherd! It’s alive!

Centurion_WIP_102

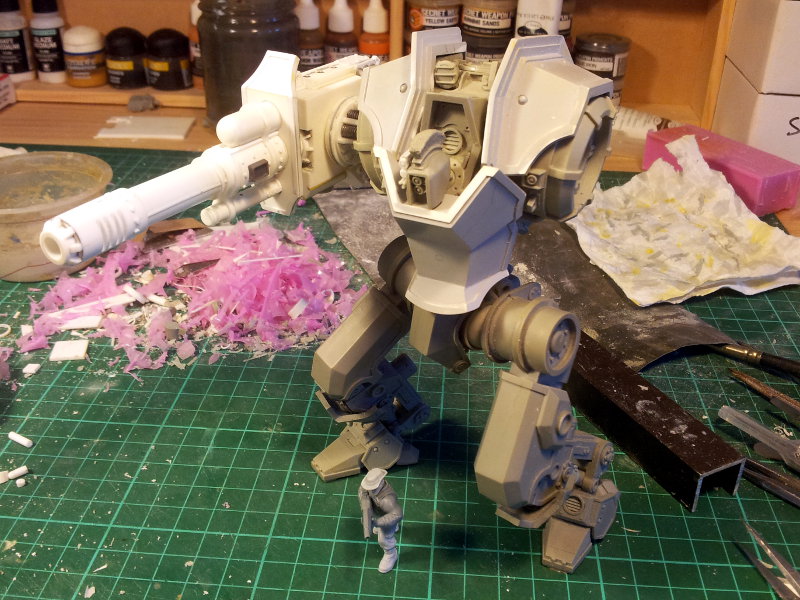
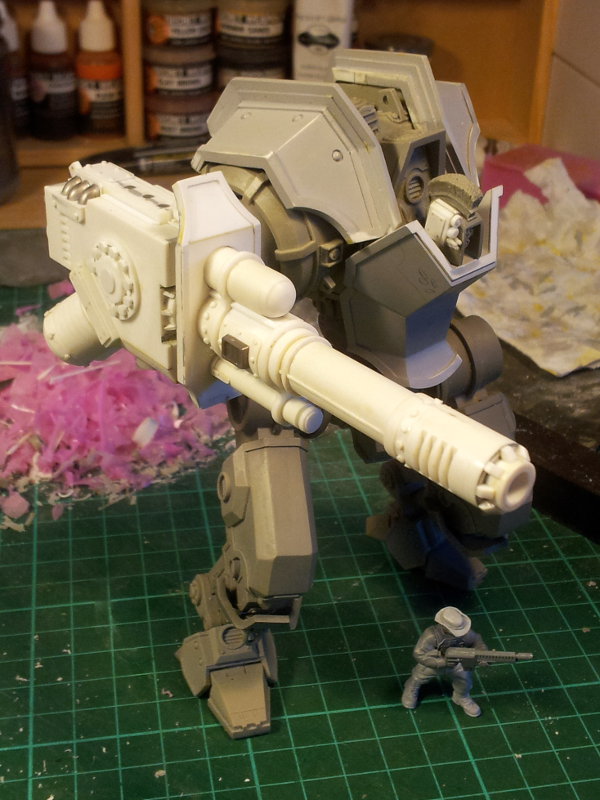
The rest of the torso parts got moulded up this week and I finally got some copies done in resin. This has finally allowed be to fully assemble the entire model. Properly. With glue rather than blue-tack. To say it’s exciting is an understatement. As is often the case I apologise for the poor photos – I just snapped them quickly before I headed to work this morning.

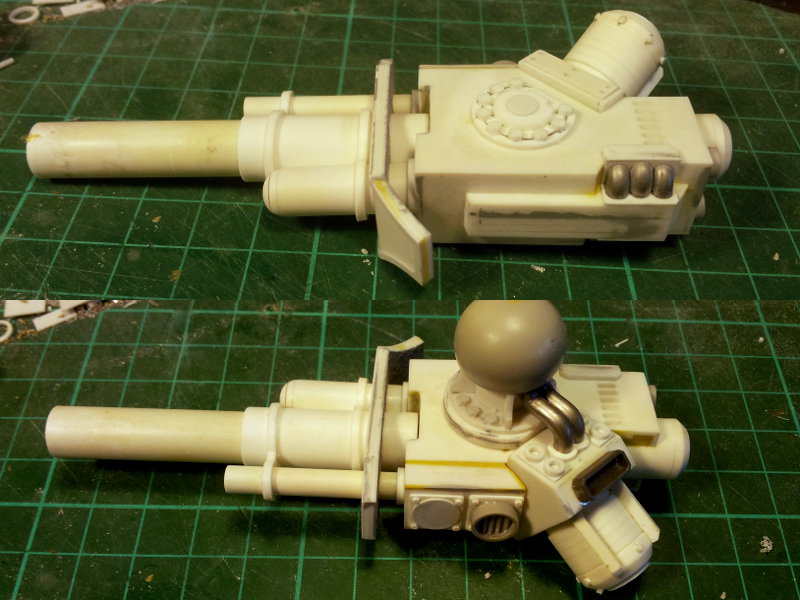
You can also see the cannon design – in particular the muzzle. This is the third iteration of muzzle design and I’m really happy with it. The cannon is pretty much finished now, although seeing it all assembled I can’t help but feel that the barrel is a little too long. I might shorten it a bit.

The armour plates are still the master parts so they’ll be going into silicone next. I have some sculpted surface detail planned for the chest armour – I just need to find a moment where I’m feeling particularly sculpting-able. Which will probably be never so I should just bite the bullet and do it.

Centurion_WIP_101

I’ve also been doing some work on a resin head copy. I decided that this ranged weapon variant of the Centurion would require more targeting systems and that would be a perfect solution to add some head details. I’m still not sold on the choice of sensor elements – I may swap out the trio of tiny antenna parts for another disc shape.

Centurion_WIP_103

The last thing I need to do is finalise the pilot’s arms and where they attach to the control “sticks”. Again for when I’m in a sculpting mood 😉

Centurion Update 25

Posted by Mangozac on February 16, 2014

Progress continues and I’m really excited with how the cannon is looking! You can see the detailing is coming along nicely (yes, those are more lifting points on top of the body). I machined up the muzzle today but I’m not 100% sold on it. I machined in three equally spaced muzzle brake slots, but in retrospect a muzzle brake on an energy/plasma weapon probably isn’t the brightest idea 😛

Centurion_WIP_100

This shot also débuts my new scale reference: a great little figure from my mate Steve at Mad Robot Miniatures. I’m sure he was quite chuffed with assembling this combination of parts for an Aussie like myself 😉
The figure is standard 28mm heroic scale, so should give you an idea of just how much of a “big freaking gun” this is!

Centurion Update 24

Posted by Mangozac on February 7, 2014

Detailing of the cannon continues. I’ve actually been finding it a difficult process as the cannon body is quite large and has a lot of plain, flat surfaces which are just creaming to have some interest added. Of course, vents are always a staple detailing fallback (especially on something that would generate lots of heat like a plasma cannon), but there’s only so many of them you can add before it’s a bit overboard. I will of course add some lifting/tie down points and I have some more ideas for what to do with the outboard side.

The stumpy arm that connects the cannon to the shoulder has turned out really nicely. It looks quite solid and also passes a few power cables and the like. The entire cannon design is symmetrical and many parts, including the arm, are designed to be able to attach from both sides. While this may limit design choices slightly (everything has to be mirror-able), it’s a lot less work than having to build two of these things (even with the CNC cut parts).

I’m still deciding exactly how I’m going to split it up for casting, but I have a feeling it will be four parts: arm, cannon body, barrel assembly and front armour plate. I could mould it with the armour plate already connected to the barrels, but the mould lines would run through the centre of the plate, making them a pain to clean up…

Centurion_WIP_99

Oh, one other thing I wanted to talk about was the piping. I needed something about 3mm in diameter to use as pipes between the shoulder and cannon body and as details on the top of the cannon body. While I could use styrene tube wrapped in 0.7mm diameter solder for straight sections of ribbed tube, this looked really poor if tight curves are introduced.

I’m a massive fan of the Dragon Forge Pewter Power Cables, as they are so easy to work with and will facilitate bends as sharp as 90 degrees while retaining that nice, ribbed profile. Unfortunately, the largest size he does is 2.15mm diameter – a little bit too small for what I needed.

I tried heat bending some styrene rod but could not get a consistent, clean bend without any warping. Similarly using tube reinforced with some solder wire inside.

The solution is very similar to the pewter power cables. Metal rod facilitates sharp bends while retaining the circular profile so I decided that some thicker diameter solder wire would be the way to go. 3mm is 1/8″ and that sounded like it would be a common size. I knew I didn’t have any but I checked with another engineer friend of mine and he was kind enough to donate a 150mm length to me. It saved me having to buy an entire reel!

The solder behaves absolutely perfectly for this kind of application. To bend it I drilled a 3mm hole in a block of timer, inserted the wire and then just bent it over with my thumb. Because the solder is so soft it can be cut fairly easily using just a sharp hobby knife! It is easy to accidentally mark the solder though, so you have to be careful handling it. I inadvertently made a couple of marks with my fingernail, but not deep enough for me to worry about too much 😉