Posted by
Mangozac on April 26, 2014
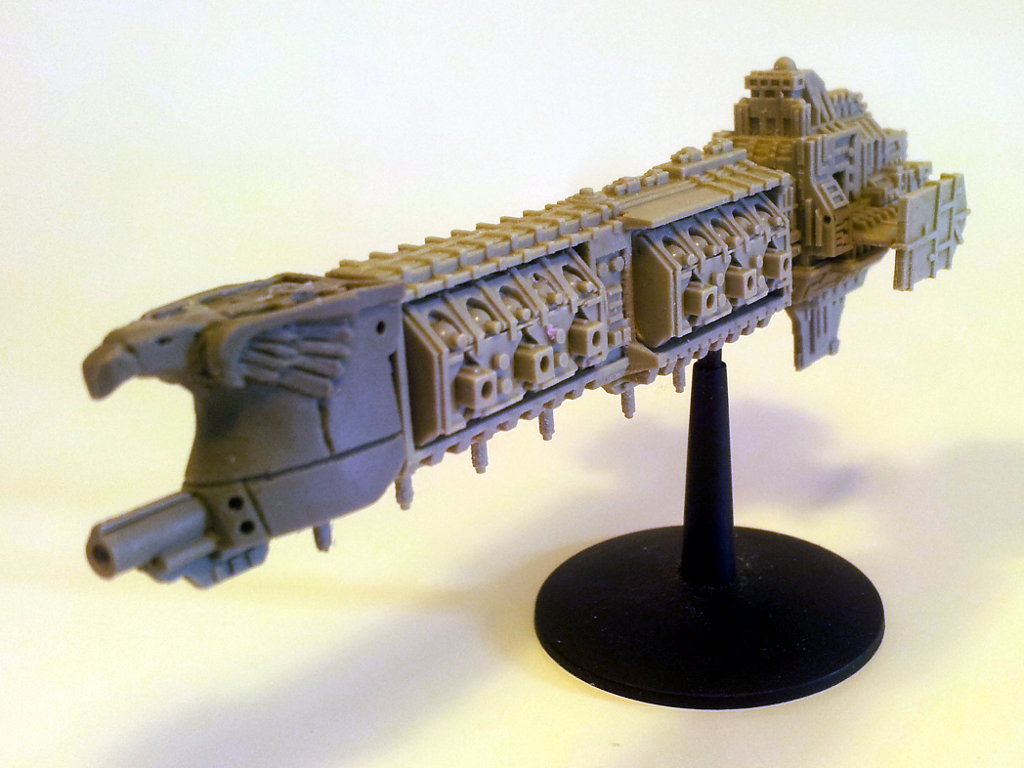
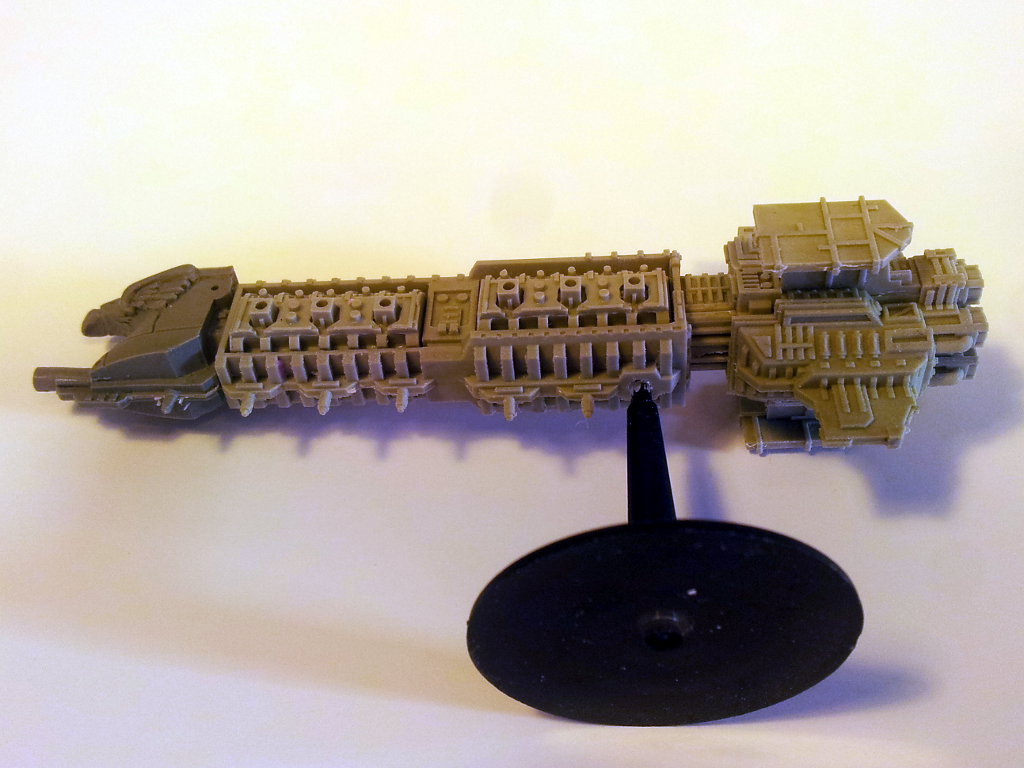
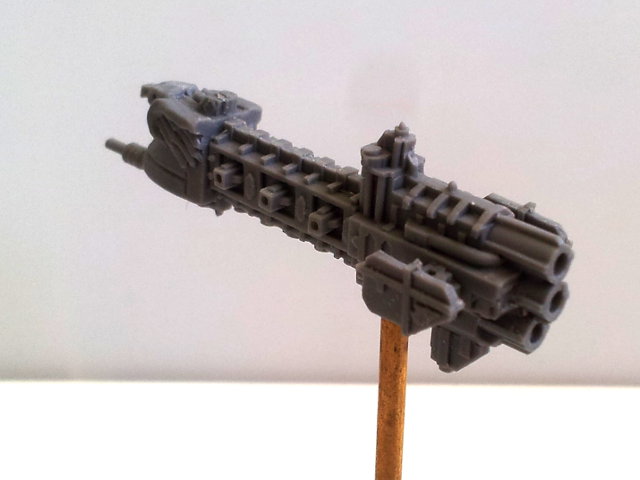
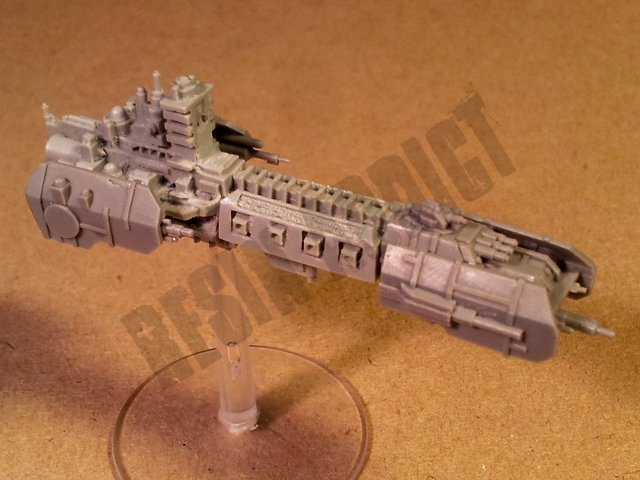
 You read it correctly: not a Light Cruiser but a full blown, cruiser size, Zeus pattern ship design!
This project began following prompting from friends that I need to round out the Zeus fleet with a distinctive cruiser model, different from just slapping a Zeus prow on a plastic GW Imperial cruiser. Scratchbuilding larger ships takes a significant amount of time, something I just don’t have at the moment!
At around that time I was contacted by a fan of my work who goes by the screen name Armand. He wanted to share with me some pictures of Battlefleet Gothic style models that he was creating in 3D and some of which he was even having printed! I was impressed with his work and had an idea: why not get him to create me a 3D model to use for the Zeus Cruiser? I have contacts for getting high resolution 3D prints done economically so it would definitely be feasible!
Over the following weeks Armand and I exchanged many emails as he gradually put together the model and I gave him feedback on certain design decisions. He came up with some really cool design ideas also! There was a bit of a hold up as the printer I had originally planed to use was too busy so I ended up trying out another printing service. The print finally arrived this week so I wasted no time in moulding it up and casting a copy!
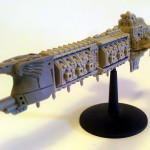
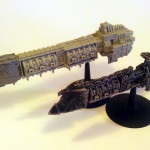
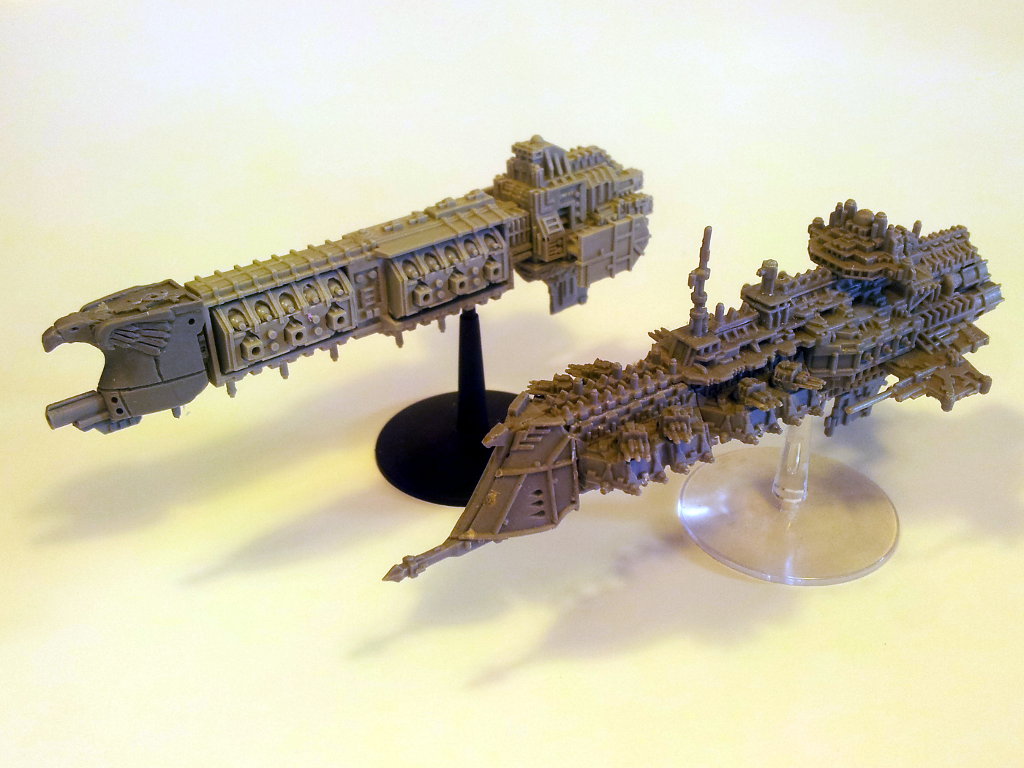
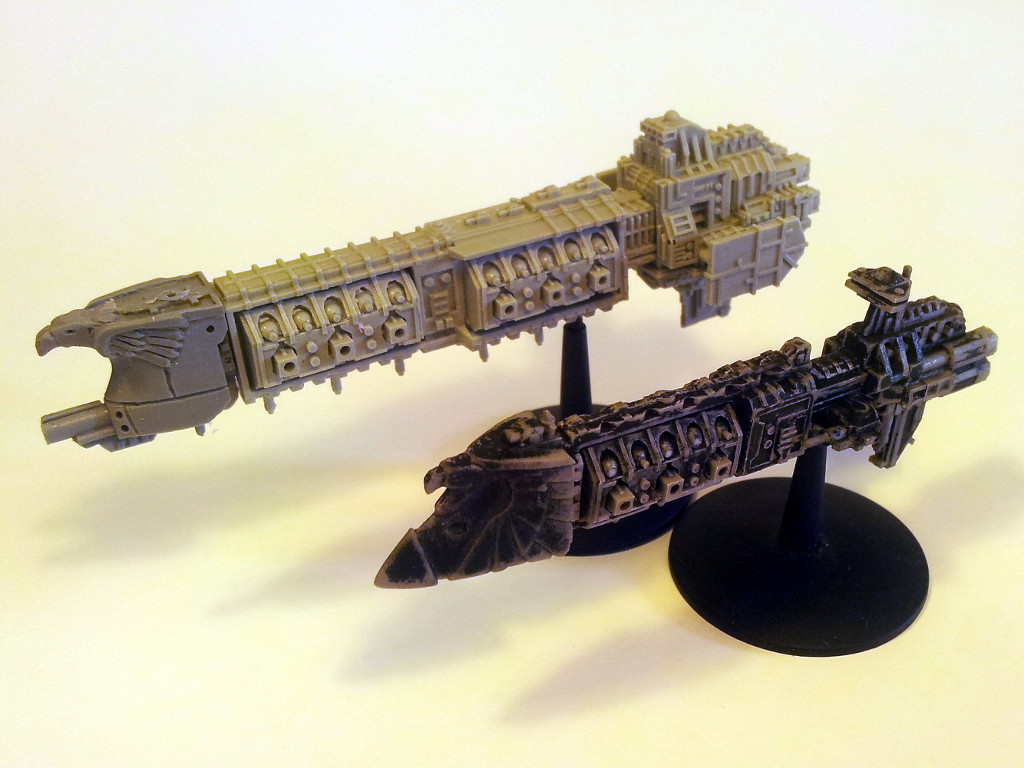
I’m very pleased with the result! As you can see I’m using my original Zeus Prow sculpt and the weapons batteries I did for the Zeus Light Cruiser with the new hull. Also note the size comparison with the standard Imperial cruiser: length is quite similar but the Zeus Cruiser is a lot more streamlined.
Thanks to Armand for his fantastic 3D modelling work – it certainly made this project a lot easier than it would have otherwise be!
Enjoy! Following tomorrow will be a Centurion project update!
Posted by
Mangozac on July 23, 2013
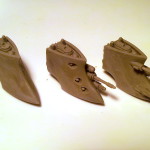 The first in-house product has been added to the RA Shop: my space ship Spear Prows.
Initially they had proven very difficult to cast so I didn’t produce many of them but due to popular demand I have remoulded using a new orientation and now make them available for your hobby pleasure!
If you’re interested in buying some just follow the link above and follow the ordering instructions.
Posted under
News,
Showcase
Posted by
Mangozac on June 10, 2013
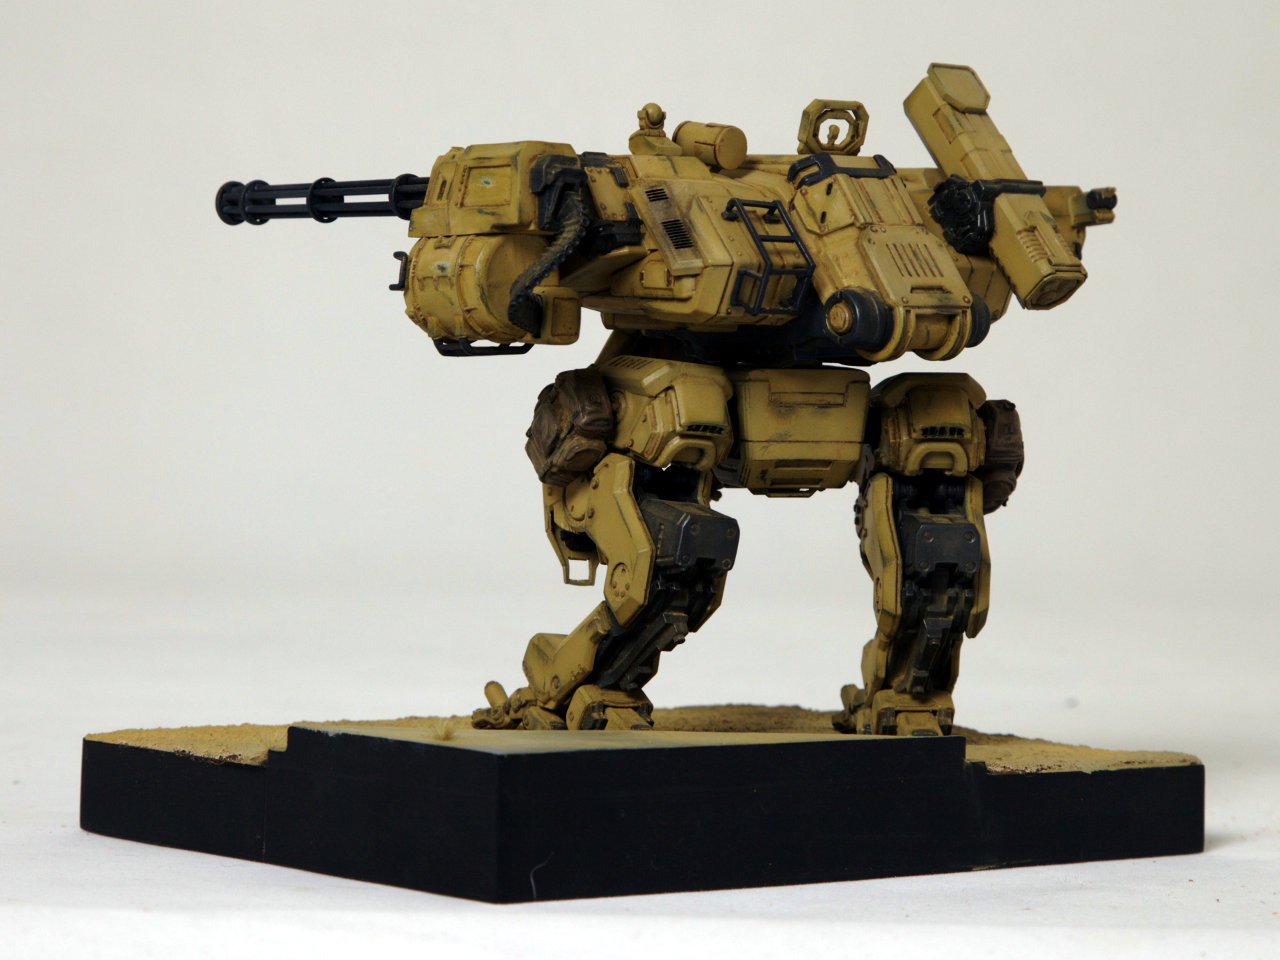
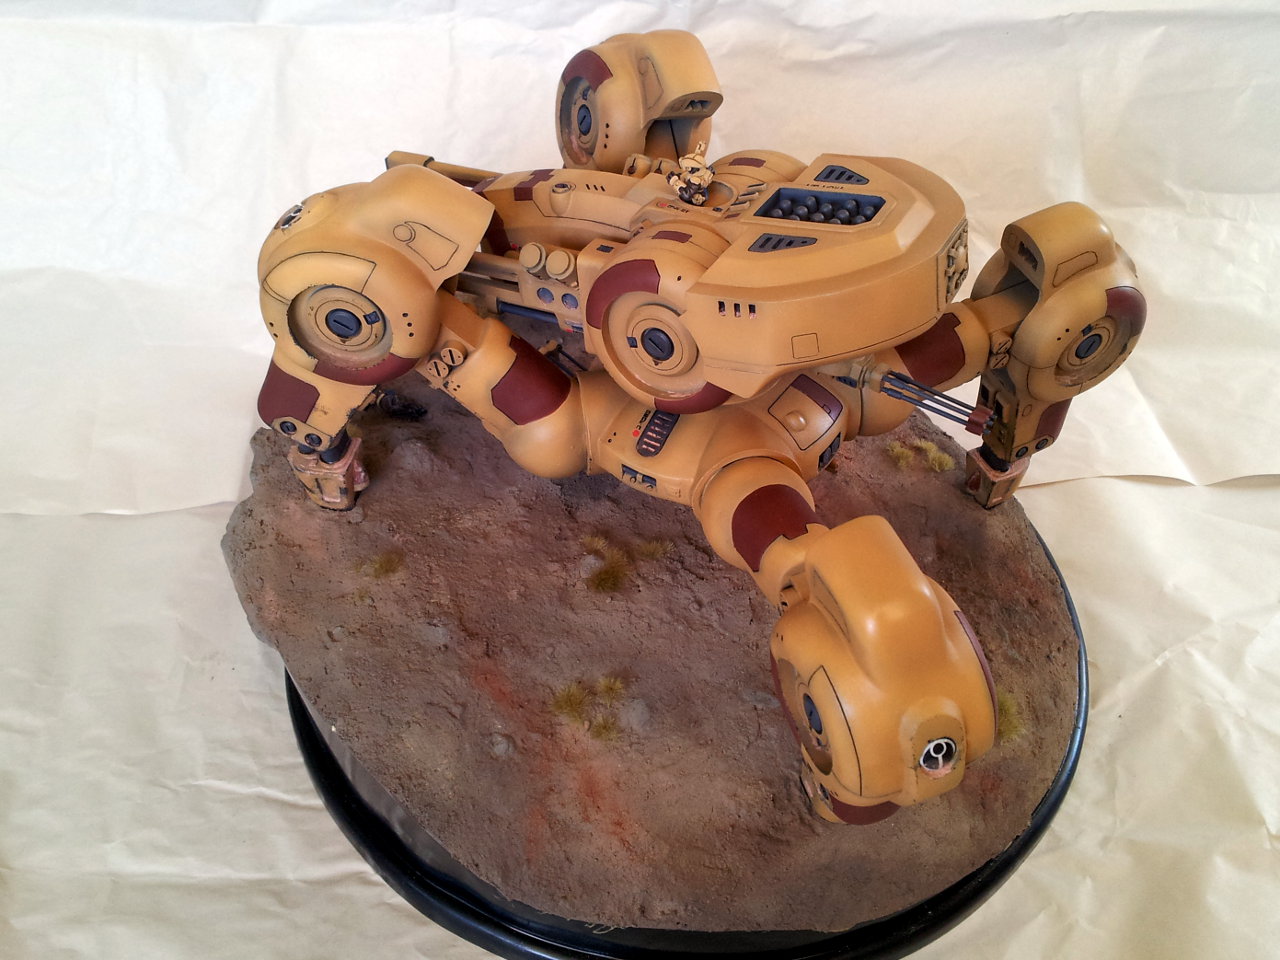
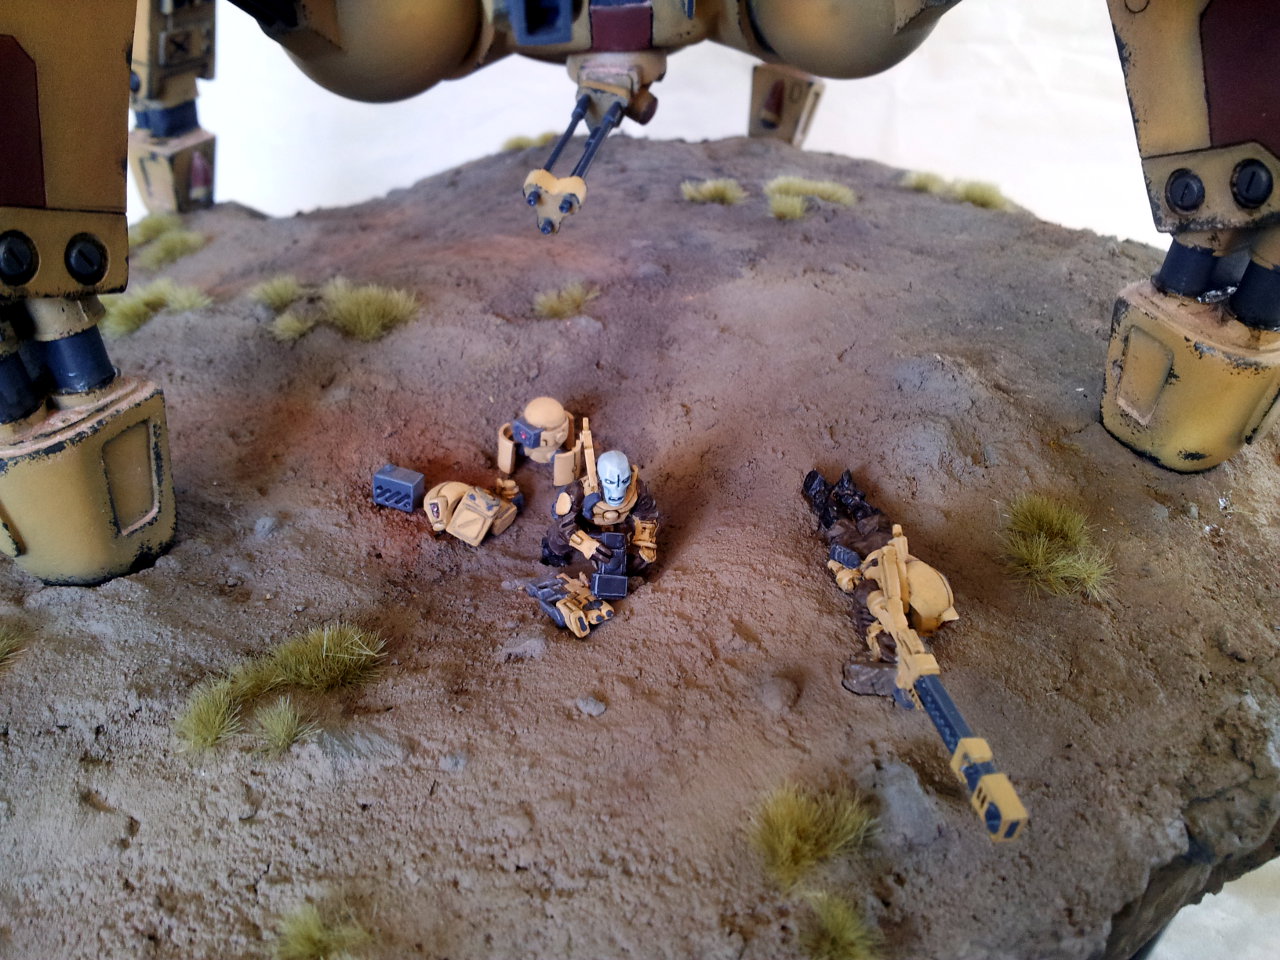
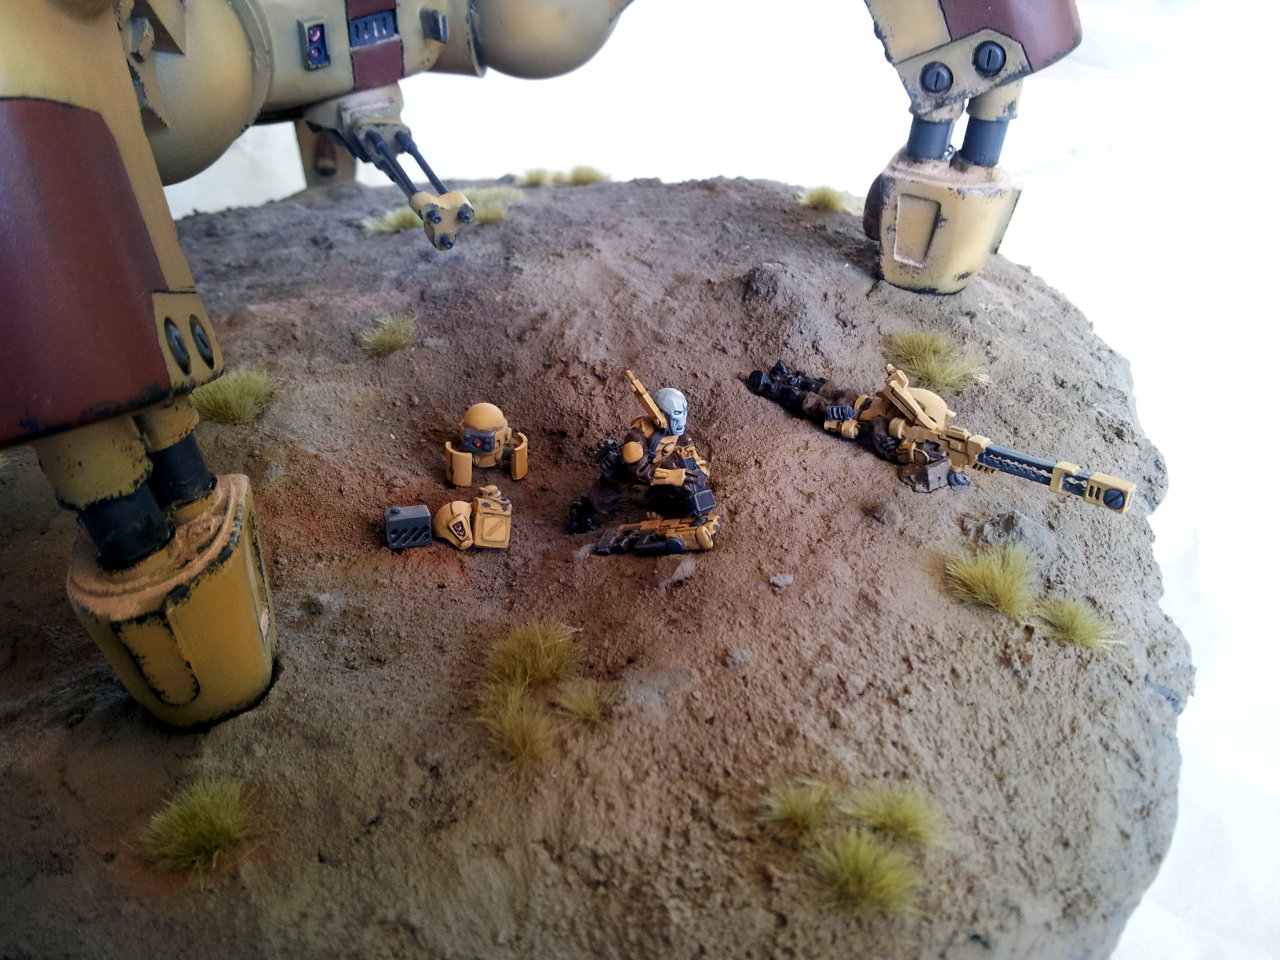
As with everything I do it took longer than planned, but the Fidder is finally completed!
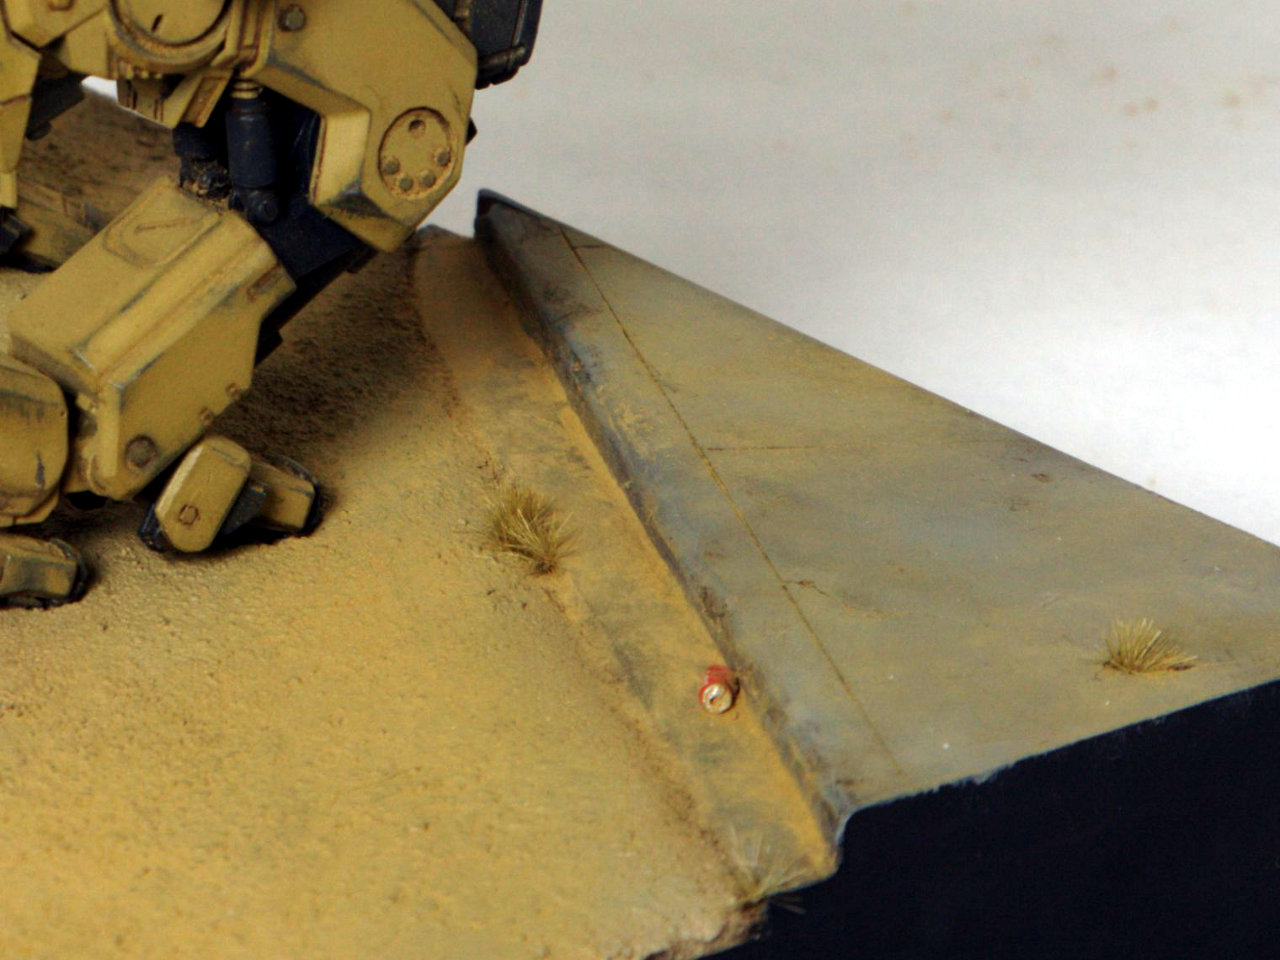
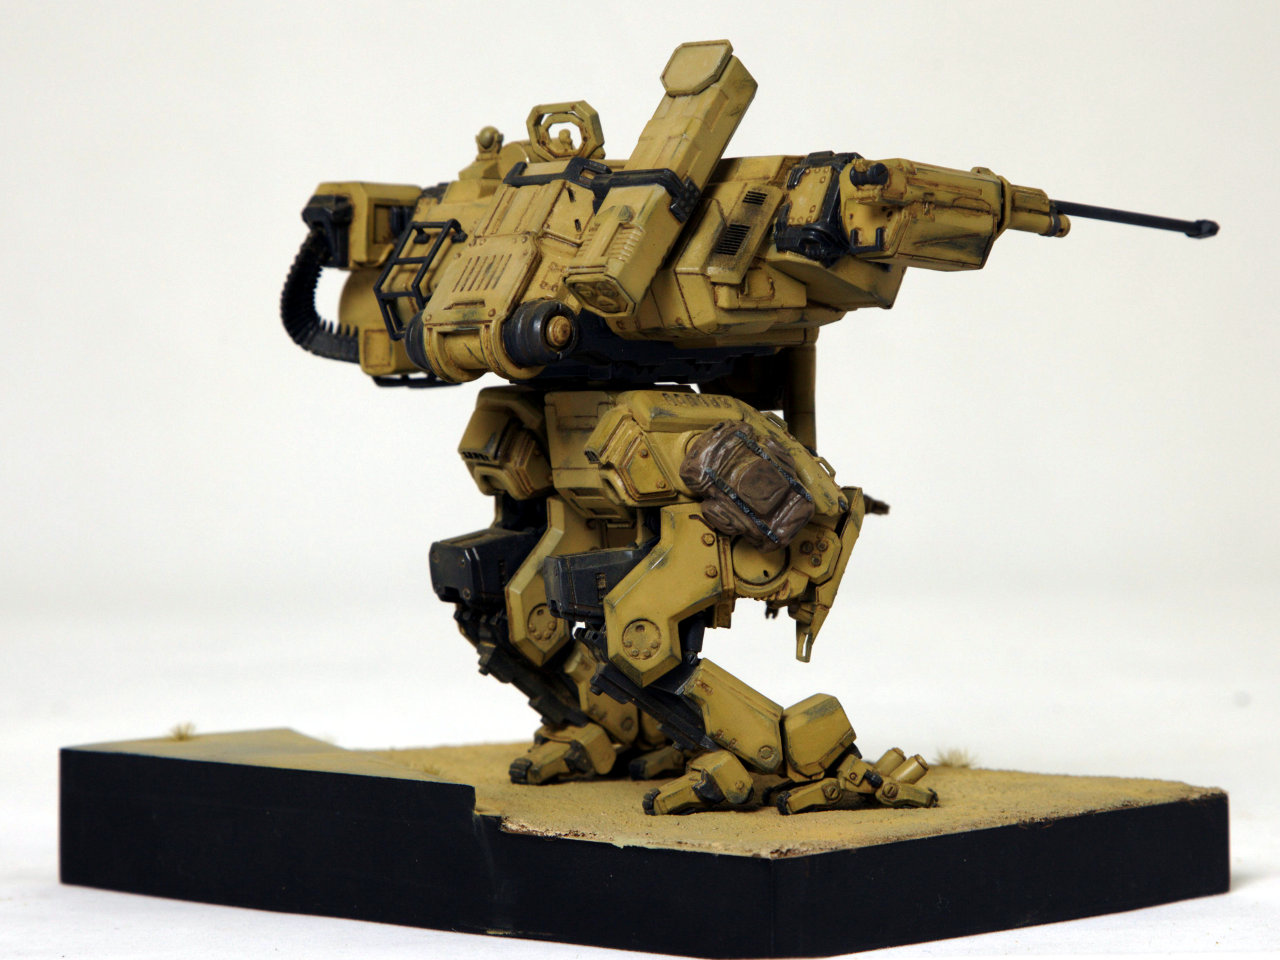
I spent my long weekend finishing off the base so that I could do the pigment “dusting” to both the base and the model at the same time (to ensure the tones are correct). The base has turned out fantastically, especially after the pigments were added – they really pull everything together.
I’m very pleased with the concrete sidewalk on the base – I’ll share the technique on an upcoming post for my Warhound diorama (that’s next on the agenda). It was coloured by airbrushing with a custom Vallejo paint mix and then discolouration was applied using some oil and enamel paints. This step really makes the difference and makes it look like real, dirty concrete. A dark wash was applied to the joins between the slabs. I do have to note how much better these oil washes look than trying to achieve the same effects with acrylics. After the oils had dried I misted a light coat of Tamiya TS80 Flat Clear spray over the concrete to dull it down a bit.
But by far my favourite detail is the Coke can in the gutter. It was a last minute addition that came to me in a moment of inspiration. It’s simply a piece of 2.5mm styrene rod with a crinkle pattern carved into one side. A small hole and a piece of microstrip make up the ring pull on one end. It was then primed and painted with Vallejo silver. The sides were given a coat of semitranslucent red (in order to retain some of the metallic sheen of the silver underneath) and finally “Coke” was painted on the side in white with my finest brush. It turned out fantastically and as my girlfriend pointed out it gives a really good reference of scale.
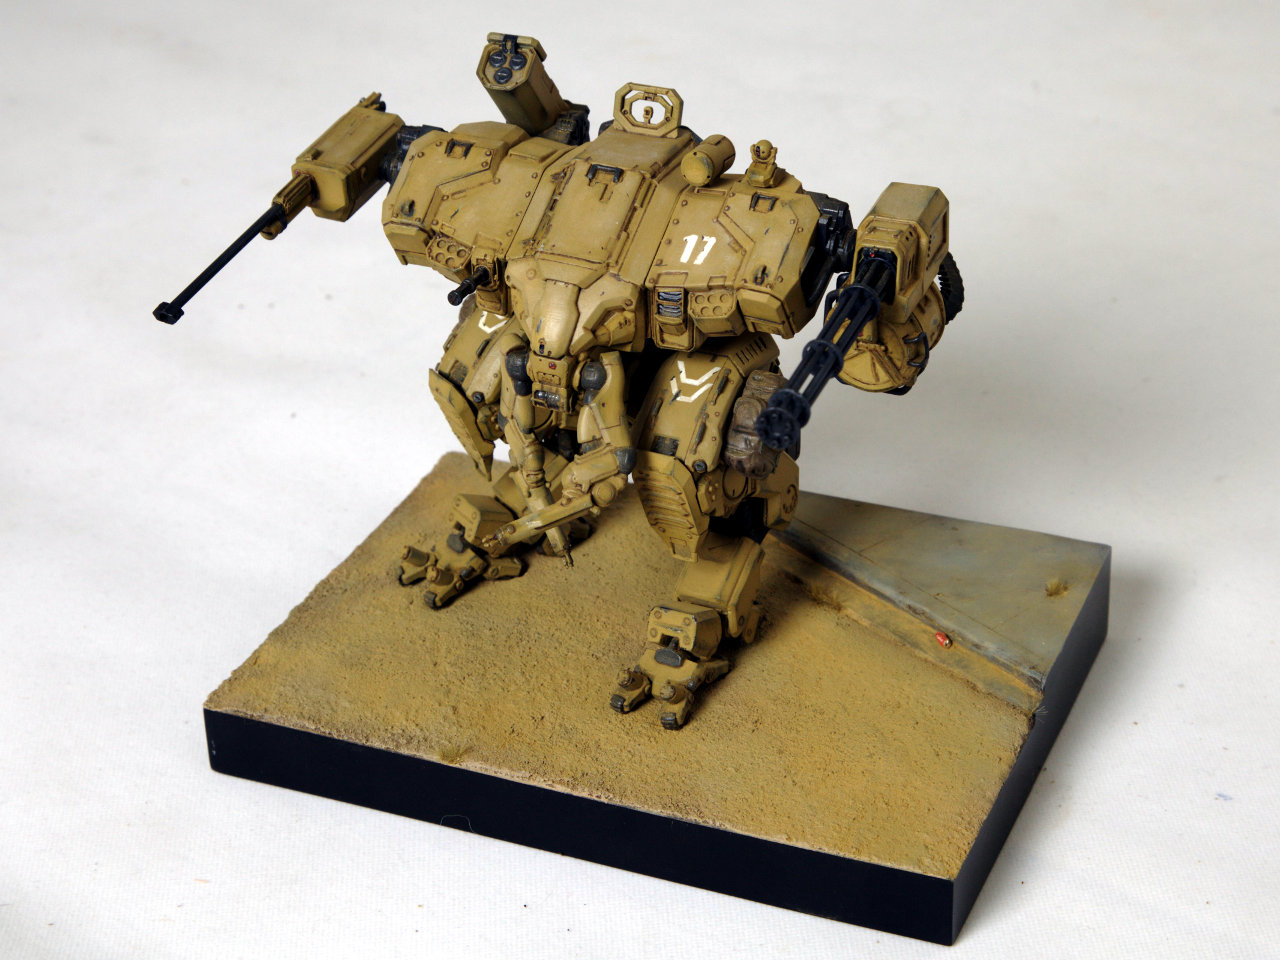
As I said above, it was the pigments dusting that really brought it all together. Despite the concrete looking dirty from the oil paint application, it needed to be covered in dirt to simulate the arid environment. In particular the gutter needed to be very dirty. I mixed up a nice colour using Secret Weapon Yellow Earth, Green Earth and Slate Grey pigments and applied it everywhere. It was deposited in heavy clumps in the gutter and then some Tamiya X20A thinners were dropped on top to settle it down. Once the thinners had evaporated I feathered it all out a bit and the result looks great.
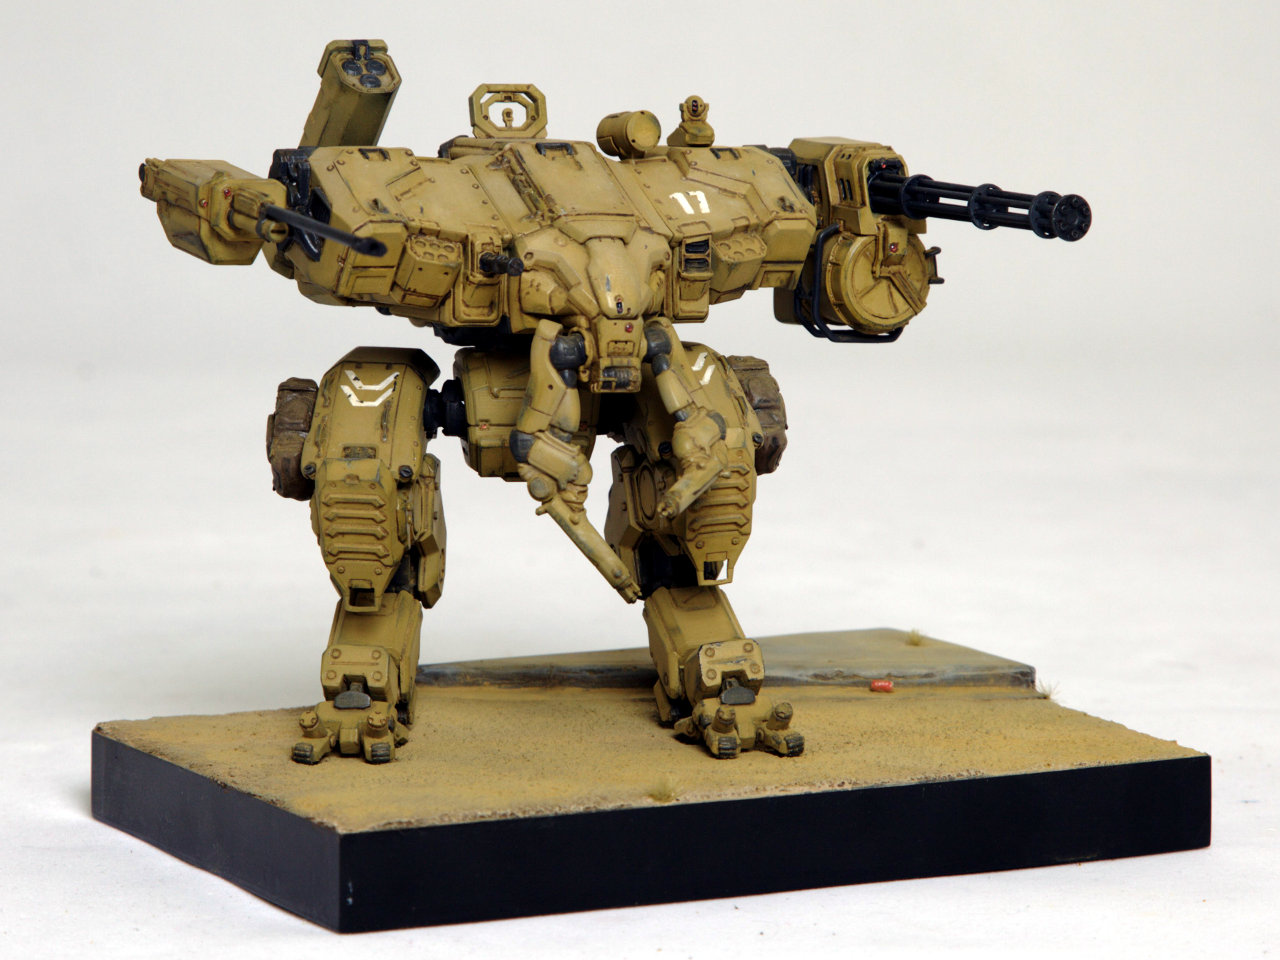
All in all it’s been a very satisfying project. As always I’ve learned a lot of lessons along the way! The biggest change that I think would have helped would be to add some warning sign and other aircraft style decals in a few spots. I just didn’t have any handy when I was at that stage and didn’t want to delay things waiting for some to arrive via mail order!
I do also have a 1/35 soldier figure to add to the base but the intention is to sculpt a futuristic looking helmet/visor system for him first. I’ll get around to that one day and he can be added to the base then 😉
On to the pics!
I’ve got to give a shout out to my girlfriend Kat for taking the pictures with her super expensive camera in her home studio. Thanks! 😉
Posted by
Mangozac on March 16, 2013
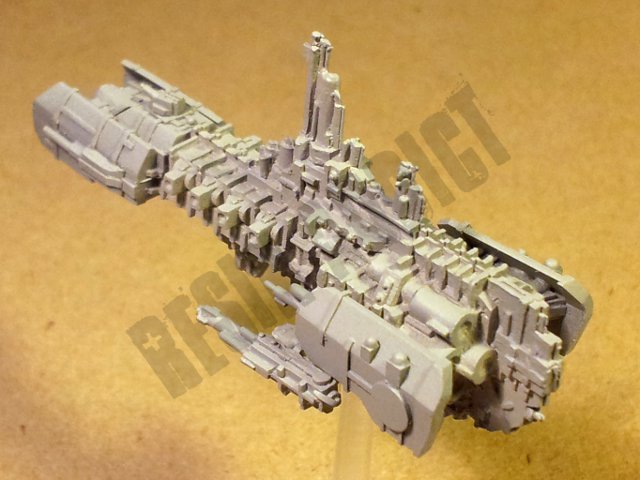
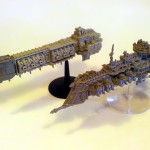
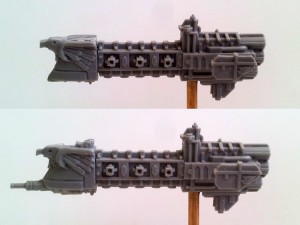
So it’s finally done! This model is pretty insanely detailed considering that the overall length is 40mm ignoring the prow cannon. I have to say I began to worry about my sanity while making up those tiny arches flanking the rear section of the hull! As you can see there are two prow styles: a standard prow and one with an underslung lance and upper weapon battery turret.
Pretty pleased with the result, and definitely glad to get this one out of the way (it’s been a year since I started it, although work on the model was only performed sporadically over the course of about 2-3 months).
RA buddies Vaaish and Xeones want me to do a Space Marine prow variant, to which I’ve agreed, but that won’t be for a few months (those guys are flat out with other projects for a while anyway). They’ll have to send me some concept art first though! In any case pertinent updates will be posted here!


Posted by
Mangozac on January 20, 2013
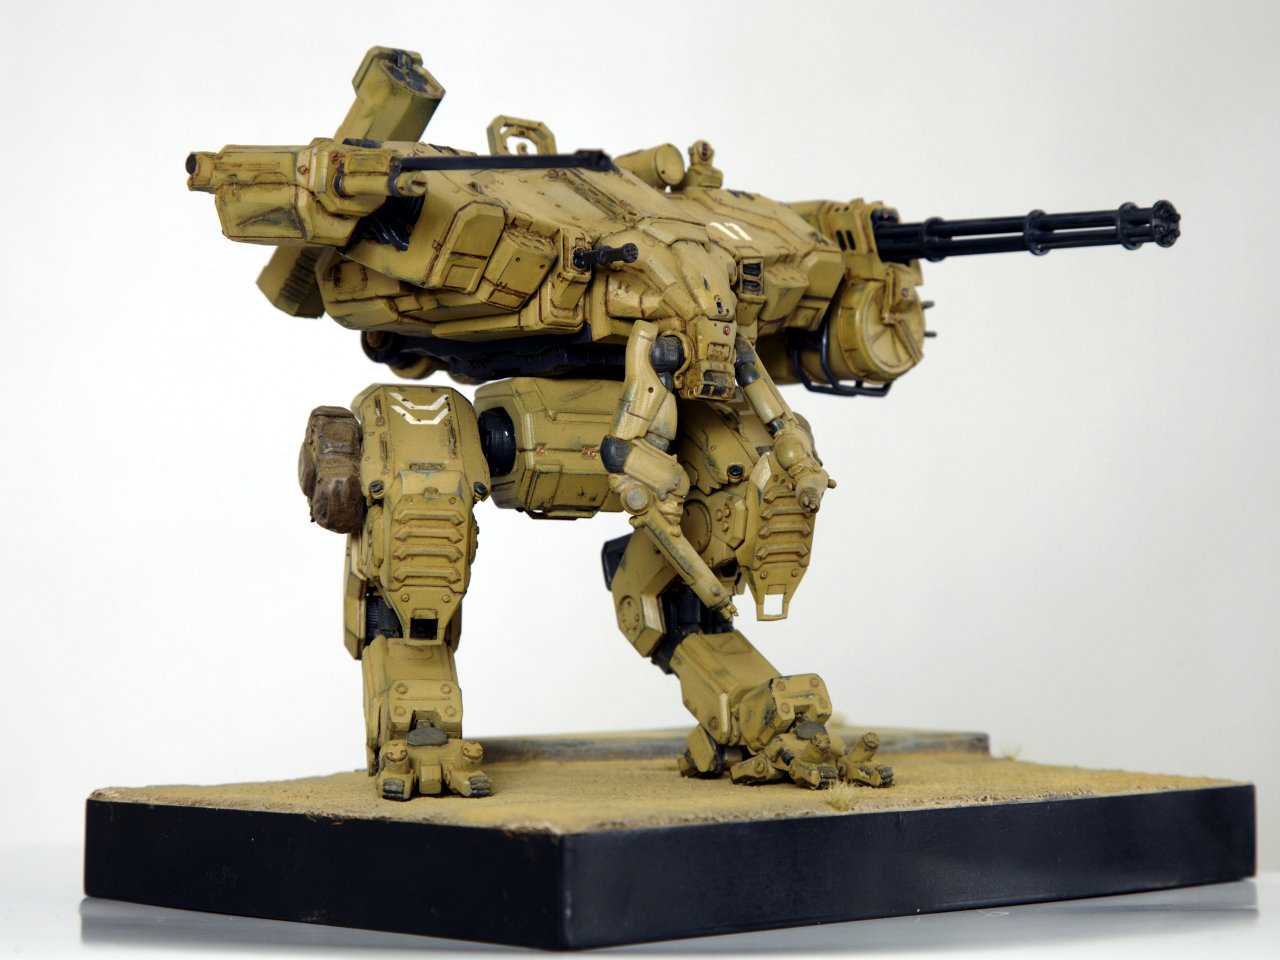
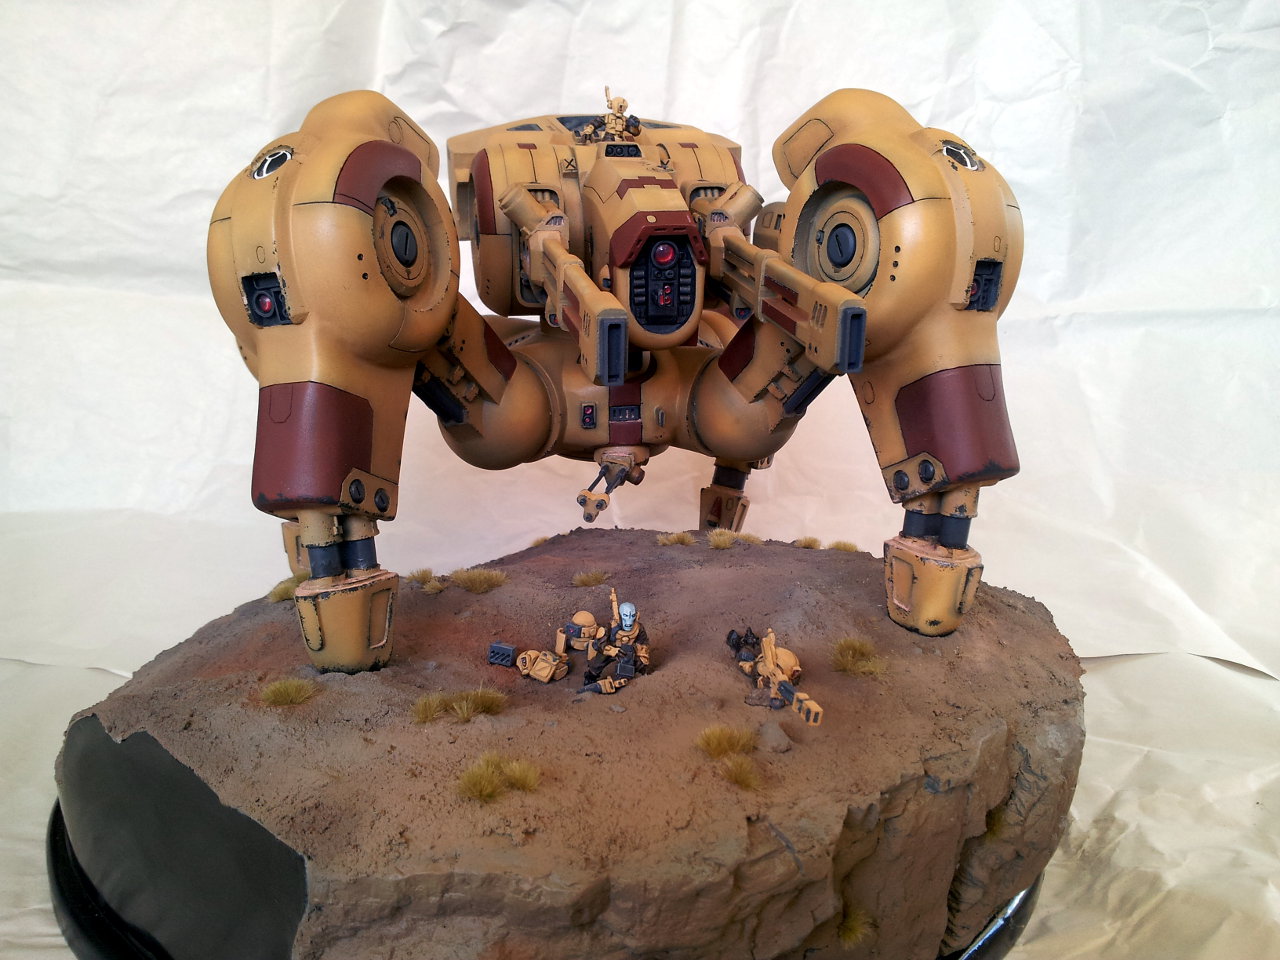
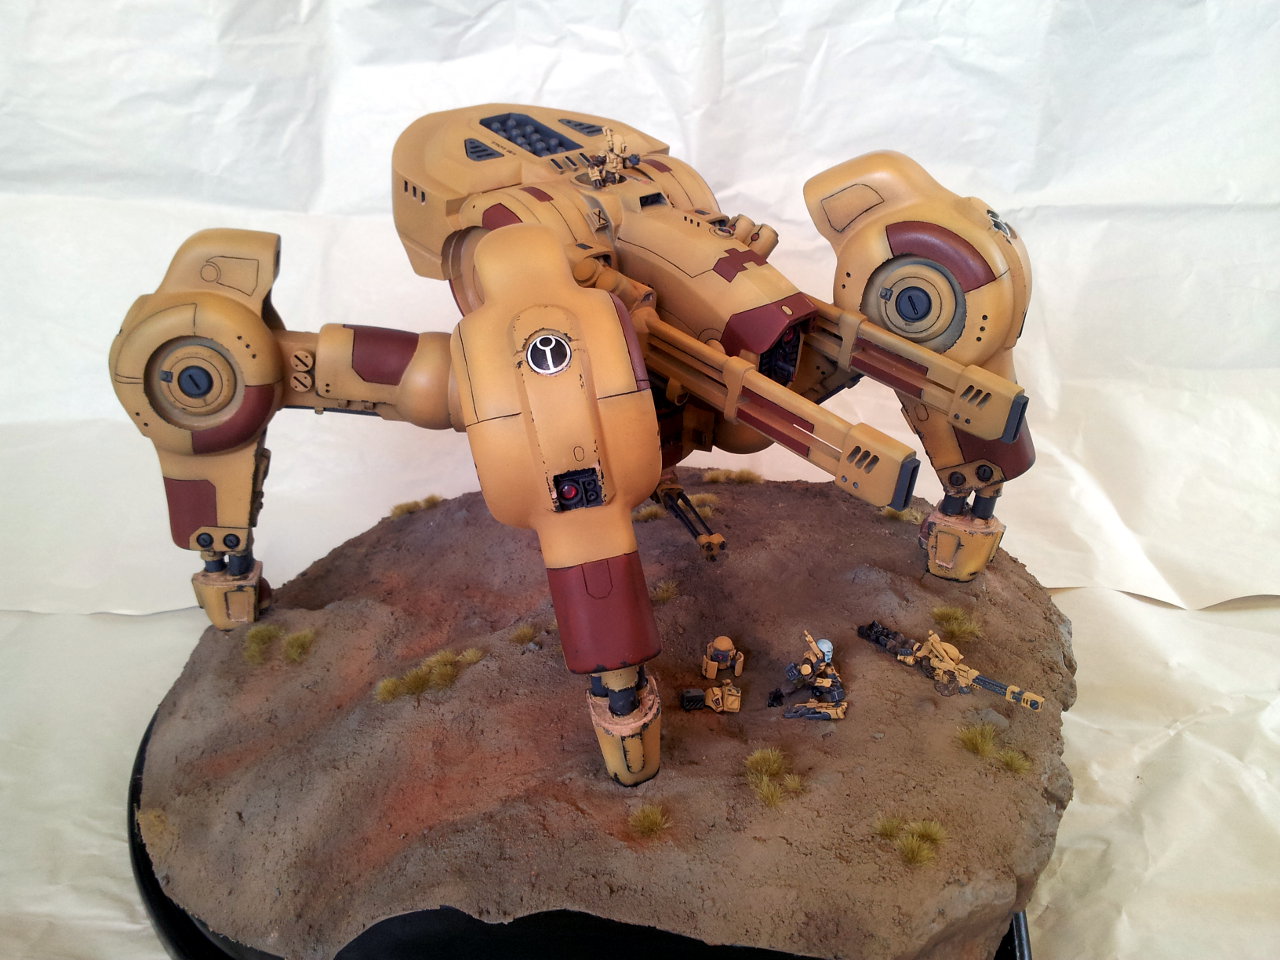
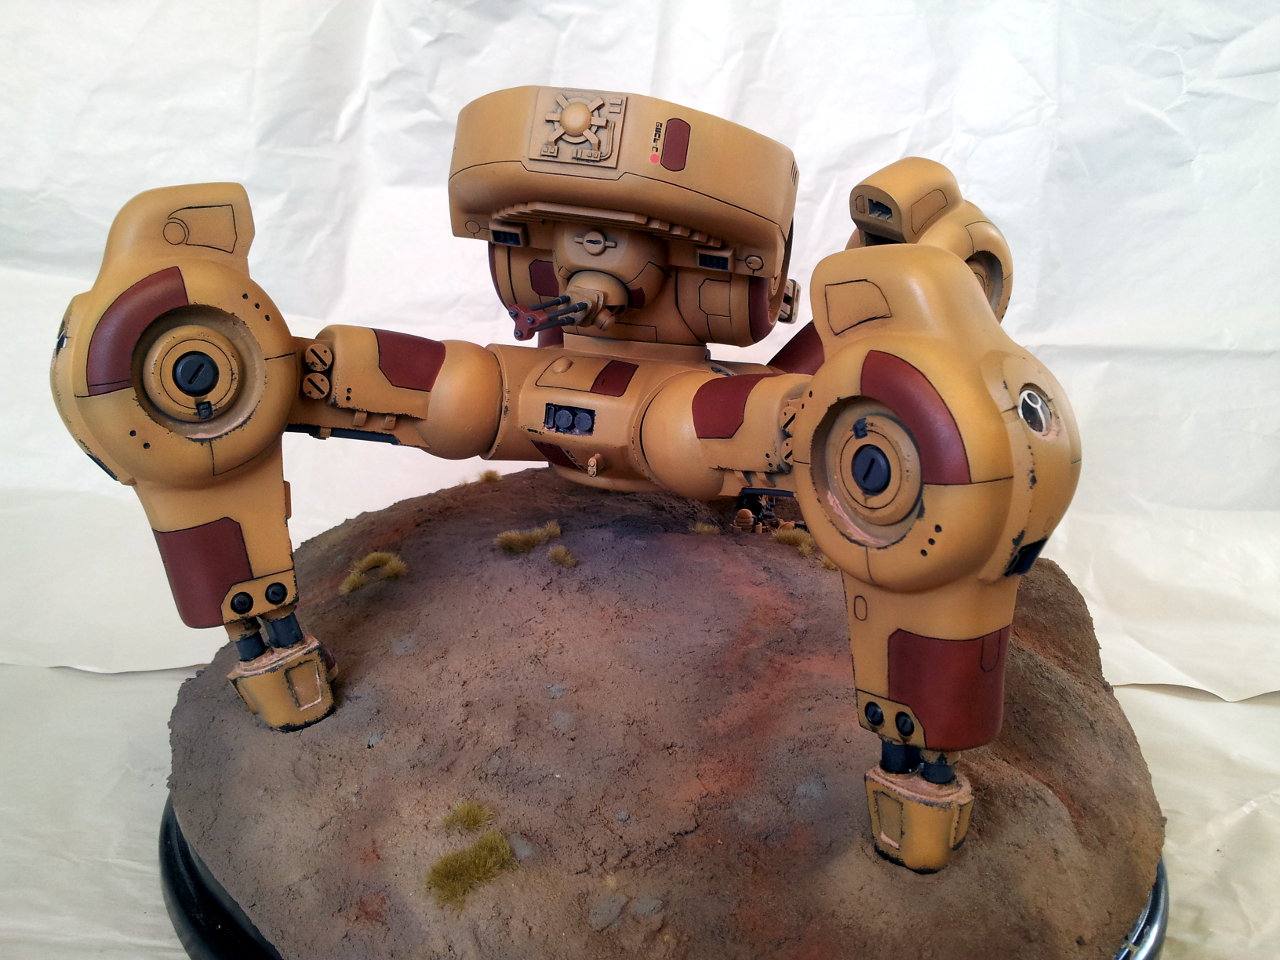
Epic does not even begin to describe the journey that has been this project. From such humble beginnings in early 2008, far before Resin Addict was even dreamed of, I embarked on my first scratchbuilding project. The sheer amount I learned along the way was just mind blowing and after two years of construction it was finally completed. The problem was that after such an epic modelling project I found myself burned out and since I didn’t play 40k any more I had no desire to actually build up one of my own!
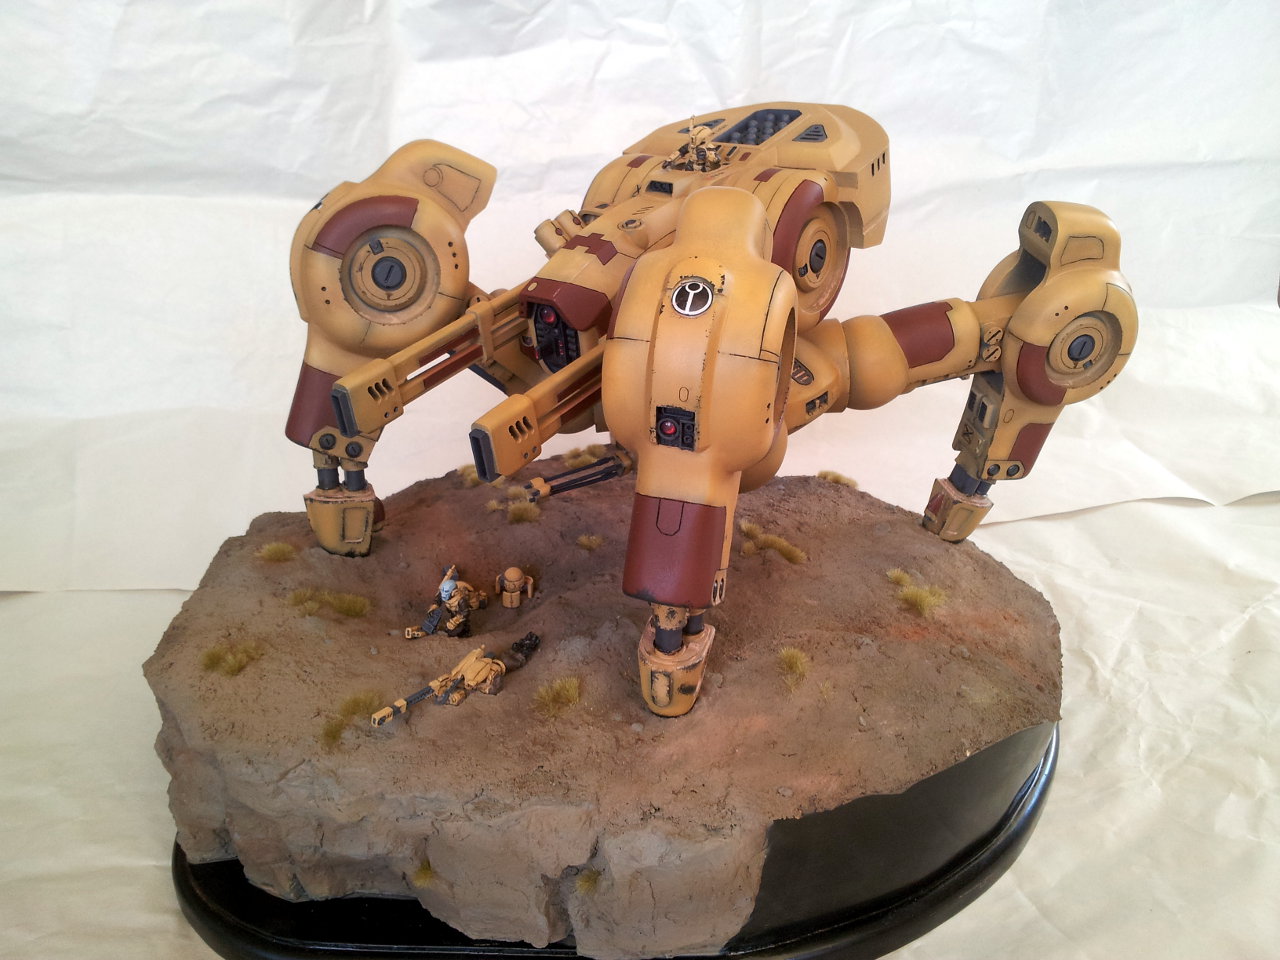
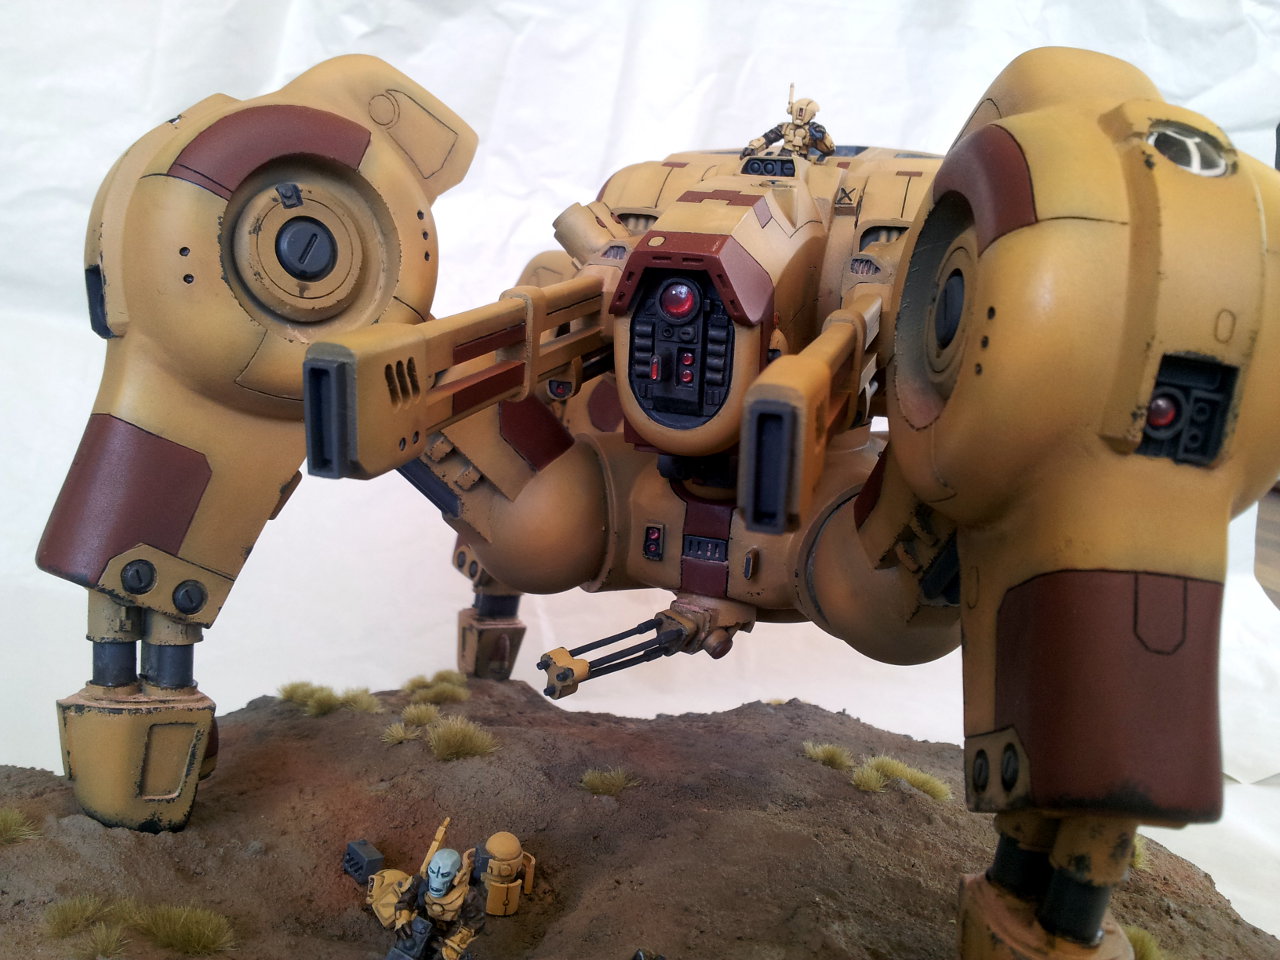
It was over a year later that I decided I was ready to build up my own SAW kit to proudly display. The problem is that it has taken me almost another two years to finish the damn thing! Due to the size of it just making the base was a mission in itself.
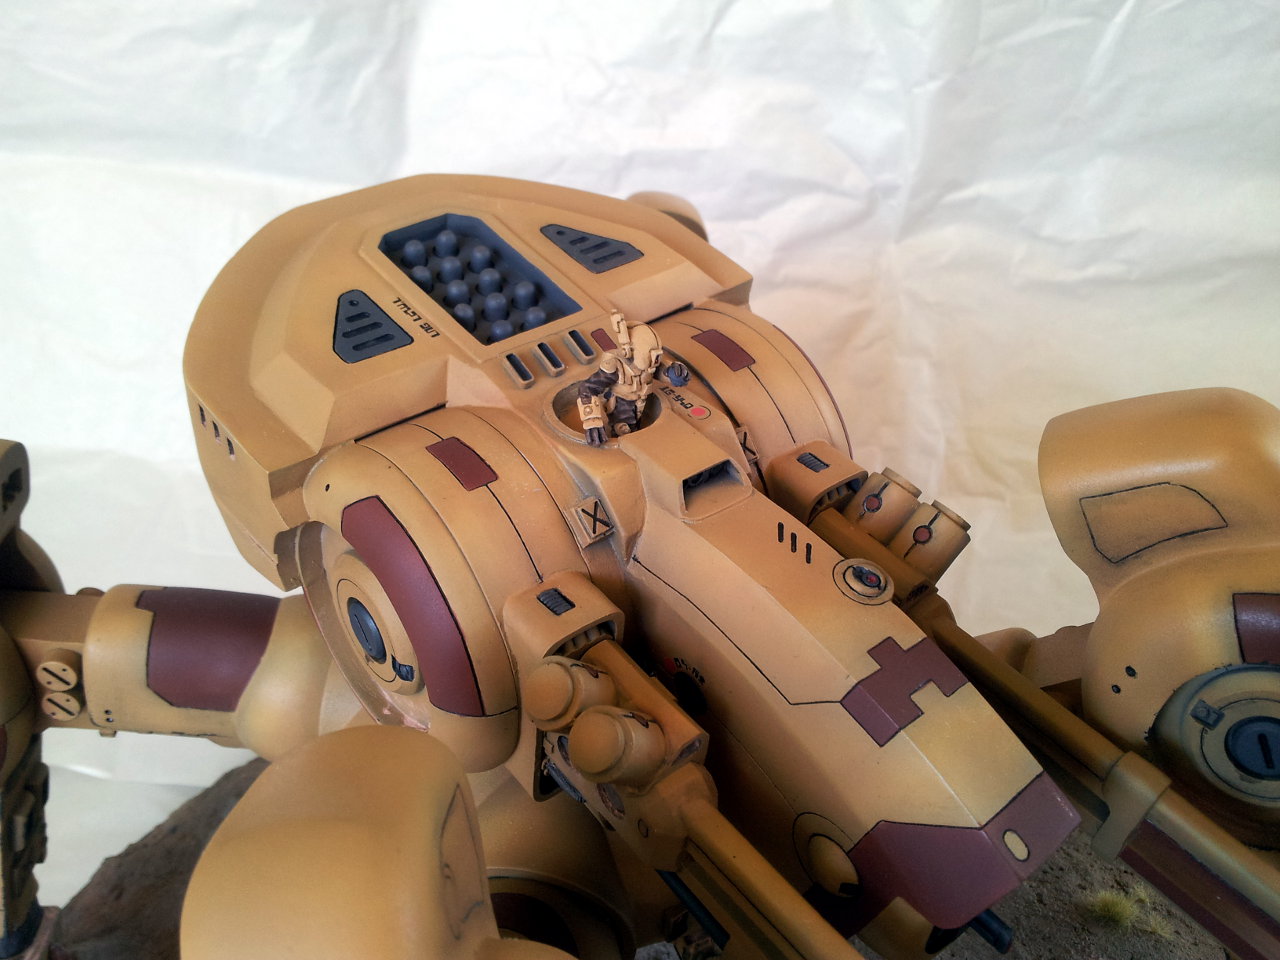
Just like with the original scratchbuild, painting has been a massive educational adventure too. This was my first time using “advanced” modelling techniques such as airbrushing, clear coats, oil paints and using pigments for anything other than rust. I screwed up a lot along the way and the finished model still isn’t perfect, but it’s good enough that for now at least I’m happy to call it done.
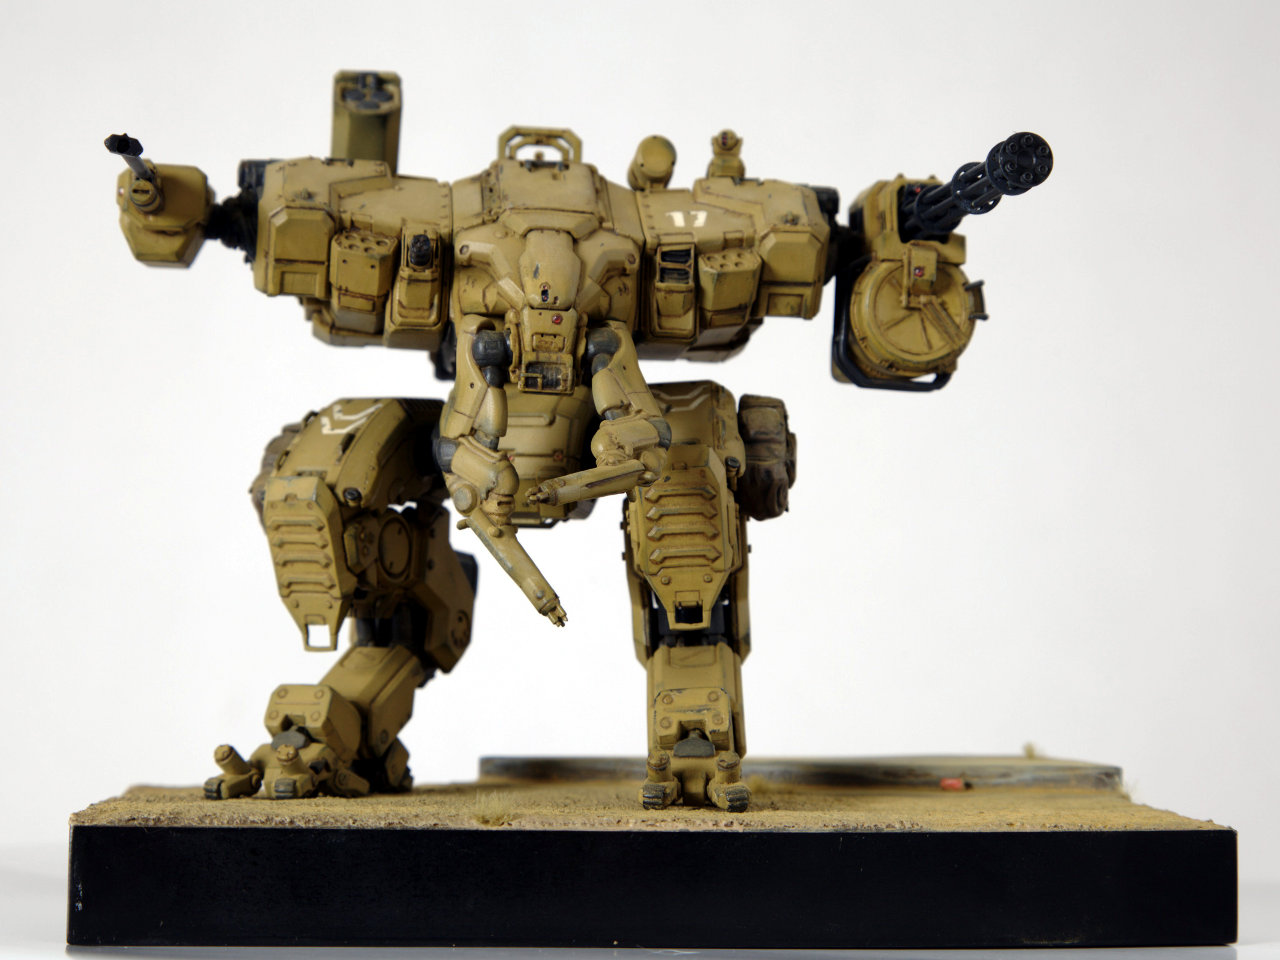
So enough jibber-jabber and on to the pictures. Thanks to our beautiful Queensland Summer weather light levels were perfect to take photos this morning. I didn’t take a massive number of shots – I figure I can always take more another time if need be 😉
The next project I’ll be completing is a new BFG ship, followed by painting either a Warhound Titan or an FDV1Mako kit from Filbot (yet to decide which one to do first). I guess I’ll get stuck back into the Centurion again some time this year so I can get it finished off…
Enjoy!
Posted by
Mangozac on September 15, 2012

Yes I am aware that this is the first project I’ve completed in the best part of a year! I’ve been busy!
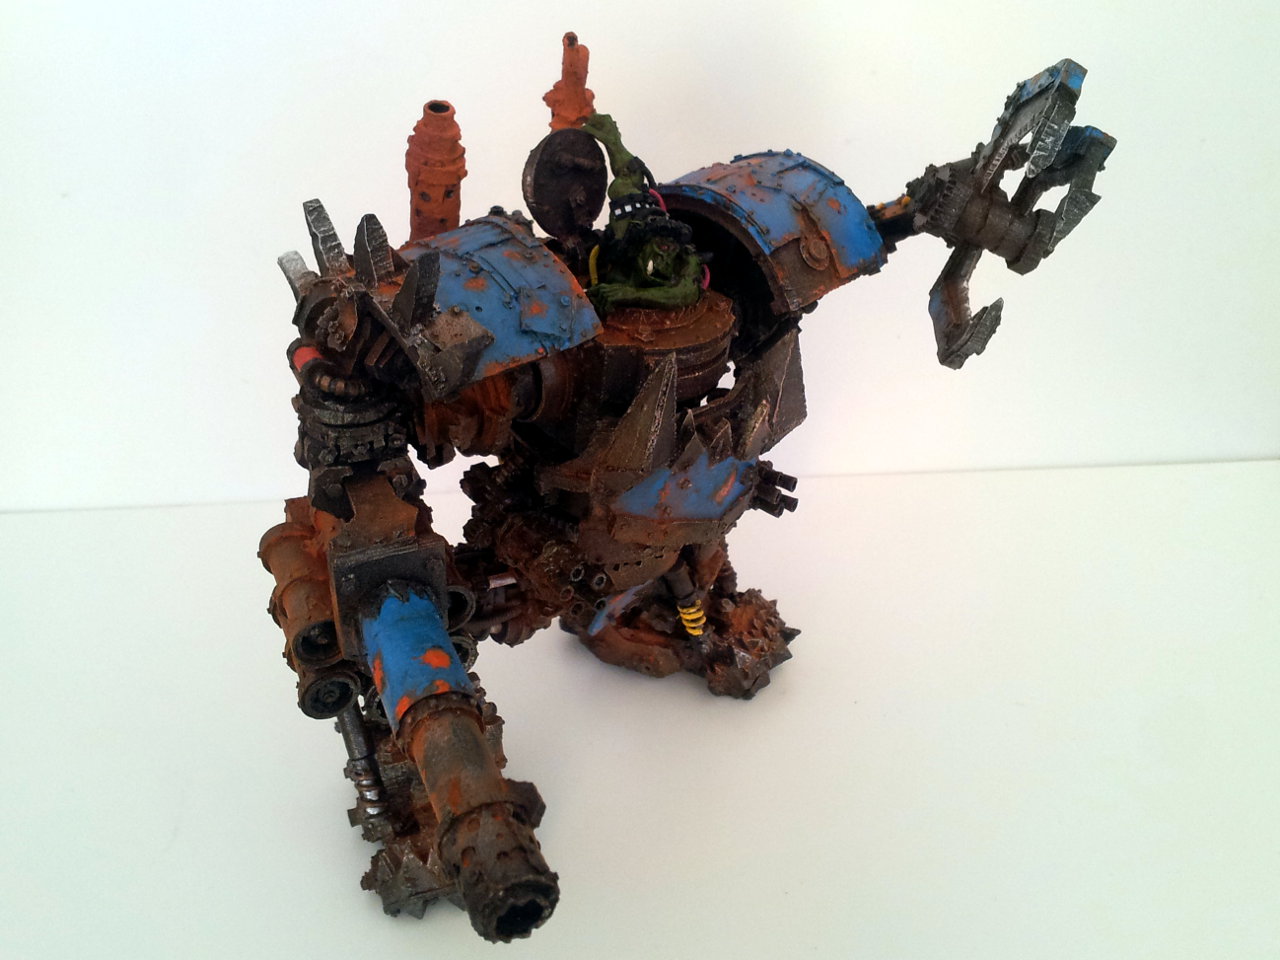
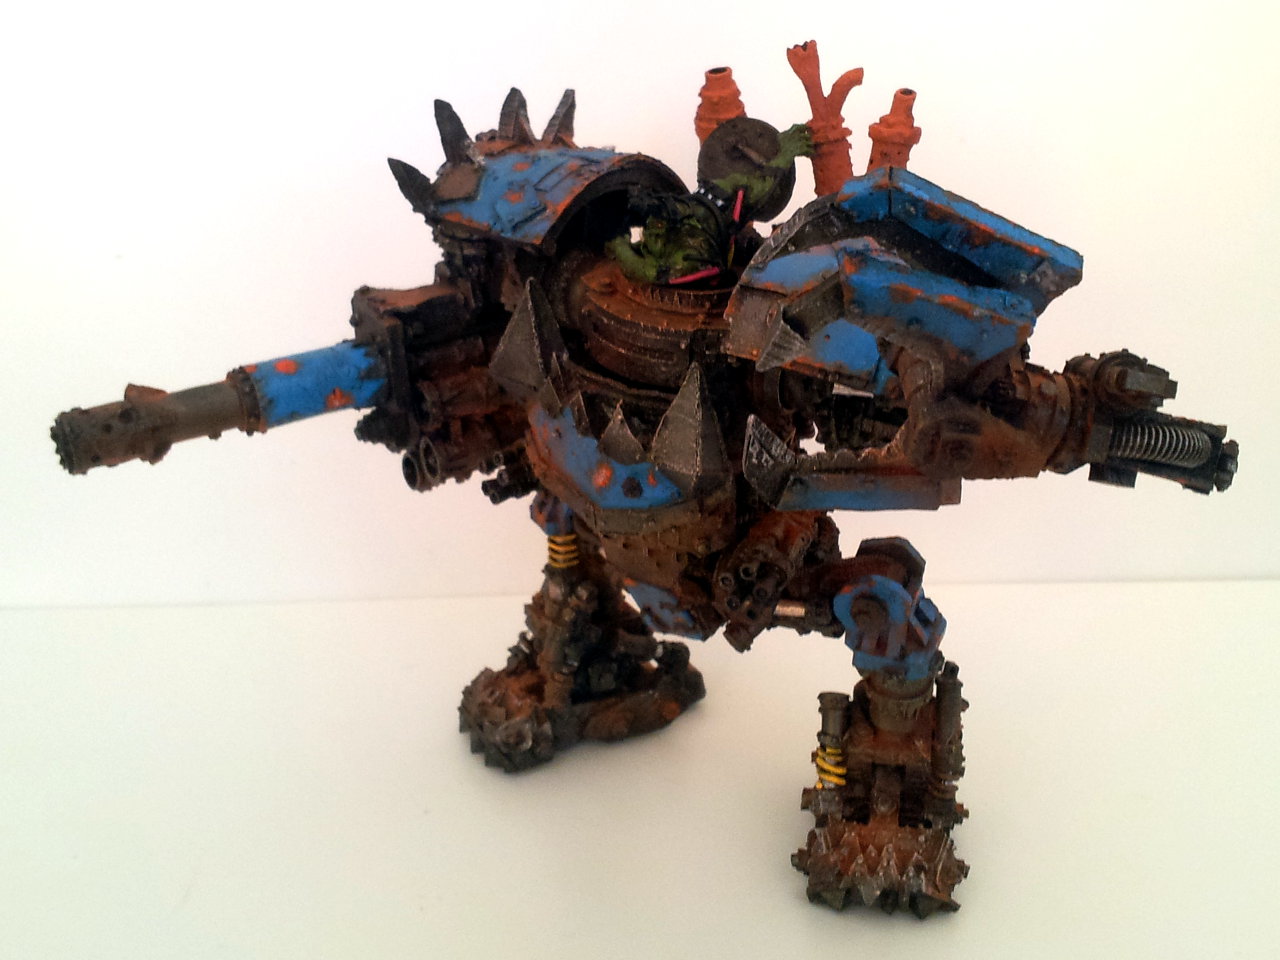
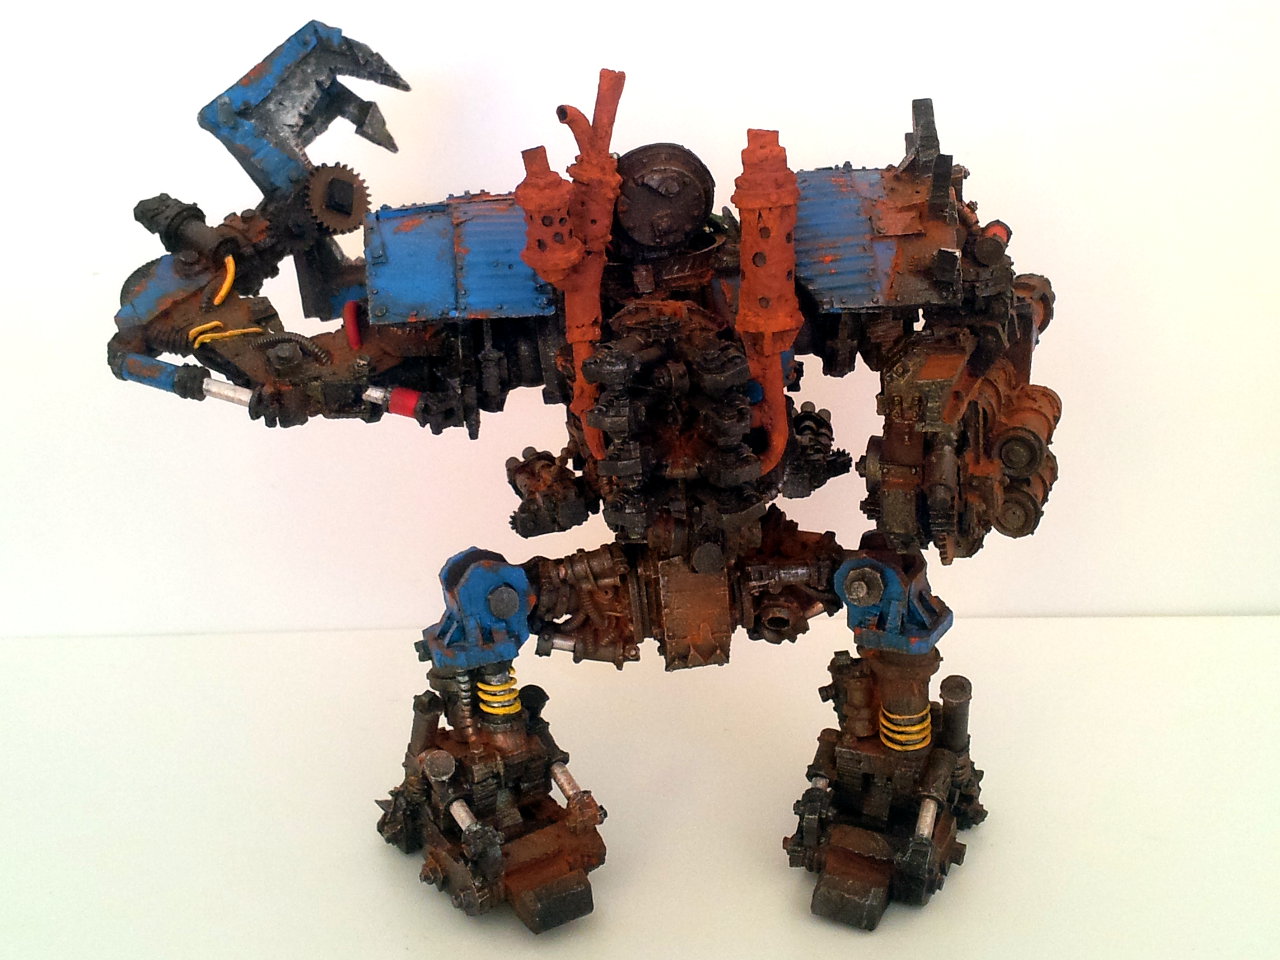
Since I have a soft spot for mecha models when I first saw the FW Ork Mega Dread I instantly fell in love – the ramshackle design is marvellous in its chaos. Unfortunately like all FW resin-crack it’s pretty expensive, so I could never justify purchasing one. But then earlier this year I managed to acquire one for cheap because it was missing a couple of bits. Through my contacts I was able to source a couple of replacements and thus began my journey into painting a rusty, ramshackle mecha.
Phil Stutcinskas has done a fantastic job of the model – the level of detail is just insane. I particularly loved all of the gears and the way that many of them mesh together. I applaud the variety of cables and hoses he has employed also.
Now I have to say up front that this was my first time using pretty much all of the techniques I used to paint this. In the past the bulk of my painting was of Tau models for tabletop use, which had very clean lines and no metallics. I decided that other than the primary metal colour of the model I wanted to have a highlight colour of blue. I have a blue car, a blue hobby desk and I’m wearing a blue shirt as I type this. Maybe I’m a Bowerbird? In Ork mythology blue is supposed to be lucky and I can’t say I do too badly!
Here’s a rundown of the technique I used (in ideal order – I did things is a screwed up order):
- Prime (Tamiya Surface Primer which is grey)
- Airbrush all but the areas I wanted to be blue in Tamiya black
- Paint a few random bits in very dark brown (probably should have done it a little lighter)
- Airbrush on a light coat of Vallejo Game Colour Gunmetal
- Black and brown washes (GW and Secret Weapon)
- Paint blue panels
- Paint all of the pistons, hoses and springs (some in metallic, some red, some yellow)
- Dark blue wash the blue panels
- Sponge chip the blue panels with a black and gunmetal mix
- Stipple brown and then orange onto the blue panel chips for rust
- Drybrush metallic silver on all of the upper metal edges
- Paint the exhausts with a mix of brown paint and Secret Weapon Orange Rust pigments. I followed up with some stippled on Brown Rust pigment to give some variation.
- Dust the whole model with Orange Rust pigment.
I procrastinated a bit on that last step before I did it, but I’m so glad I did. The rust powder took the model from looking OK to looking great and really pulled everything together to give a uniform neglected appearance. The blue panels and orange rust really work well together.
Now I realise that in the scheme of things this is far from award winning painting – like I said this was my first time trying out a lot of these techniques so there was a lot of trial and error involved. I did a few steps in the wrong order. From a technical point of view my rusty paint chips are all the wrong way around. But IMO the net result looks quite nice and I’m very pleased with the result.
I’m still deciding whether to make a display base for it or not. I do feel that bases complete the model so I would prefer it. I’m envisioning the edge of some highway asphalt with the Mega Dread standing there at idle.
Thanks for looking!
Posted by
Mangozac on July 24, 2012
Sorry for the neglect of the blog lately but to tell the truth I’ve actually been doing hardly anything hobby related for quite a few weeks now. It’s just been one of those periods of constant real life distractions. Not least of which has been moving house.
Since this has been my first chance to actually have all of my own furniture and stuff I’ve taken the opportunity to actually go with some kind of decor/theme. I like the aged vintage beach and French industrial styles so I’ve been buying furniture to fit in with that. Some stuff though it’s easier/cheaper to do yourself – the hobby desk being one such item. I have to admit though that primary inspiration for this came from my mate Seb – he recently picked up a cool looking vintage hobby desk and emailed me a photo to brag share his excitement 😉
Since my hobby desk will again be in my bedroom (it’s a single bedroom duplex bachelor pad) I decided that my existing hobby desk was just too “office furniture” looking. I didn’t want to spend big money on a new desk though, so after looking around I came across an old used timber desk for $50. It’s a lot smaller than my old desk but since it has 5 drawers I figure I’ll be able to make more efficient use of the desktop space.
I got some paint mixed up and painted it “Calypso Blue”. Then distressed it (which entails attacking the edges randomly with sandpaper). Then wiped on a dark grey-brown glaze to give the paint an aged appearance. The end result is great.
The top that the desk came with was just crappy laminate so I decided it had to go. I bought a sheet of laminated pine from the hardware with the intention of staining it an aged colour. But I found that I quite liked the juxtaposition of the aged blue and the new pine so I simply lacquered it as it was. Admittedly I made the top a bit wide for the base – I might yet cut a little bit off each end so it looks more appropriate.
Here’s a pic:
The next trick is to sort out some drawer handles and then it will be properly finished, but in the meantime I couldn’t help but get the desk set up. I was right about the usefulness of the drawer space! The wide single drawer on the right is fantastic for storing all of the various stock materials (styrene strip and tube, etc.). The other drawers are organised into:
- Large hand tools (the Chopper II, saw, calipers, dial gauge)
- Mould making (Lego, clay, MDF boards)
- Other consumables (terrain making supplies, sandpaper)
- Misc figures and kits
I’m sure it will get organised differently once I start actively using it again. My next trick is to get my compressor and casting gear setup so that I can continue painting my SAW!
Next week on Homemaker Addict we’ll be discussing crochet for the modern housewife….. :p
Posted by
Mangozac on December 29, 2011
I trust everybody had a Merry Christmas! Accompanying the festive break for me is a fortnight of holidays, which has given me some time to get stuck in and finish some projects! The first task is to knock over my pending BFG projects so that I can get back to some 28mm modelling (which I’m really starting to miss).
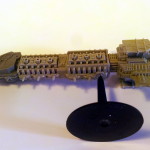
This is a project I’ve had on the workbench for far too long. It’s something that Vaaish approached me with early this year. The premise was that he wasn’t a big fan of the GW Space Marine Strike Cruiser design. He much preferred the FW Grey Knights Strike Cruiser, not to mention that oddly enough the FW model is half the price of the GW one! The problem with the GK SC is that it has the GK style curved prow and side fins, preventing it from fitting in to the rest of the Space Marine naval aesthetic.
So the plan was to make a new prow and side fins that could be used with either the FW or the GW Strike Cruiser models. Easy huh?
Much of the build process was chronicled in the Resin Addict Forum and yesterday I finally moulded up and cast the finished pieces. It has turned out quite nicely and in an amusing twist it turns out that Vaaish prefers the look of the conversion kit on the GW model rather than the FW one like he had originally planned to outfit his fleet with. Fortunately for him he stumbled across a glut of GW strike cruiser models for a very keen price somewhere online!
As always feedback is welcome. Enjoy!
Posted by
Mangozac on October 1, 2011
Well it’s all done! The master model was completed and moulded this morning, and I’m already pumping out the bunch of copies required for the commission. For best results casting (and to prevent having any gates damaging details) I decided to break the model into two pieces, with the prow and hull separate. Add the two turrets and that makes it a four piece model. I went with the usual single part split mould for this one, with all of the parts together on one tiny sprue. There’s actually more resin used up in the sprue block than there is in the model itself!
Overall the project has turned out fantastically, and certainly gives me the motivation I’ll need to do a Frigate sized variant for the same client later…

Posted by
Mangozac on August 16, 2011
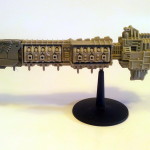
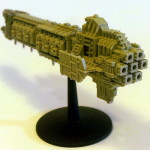
Well it’s all done – the Spear Prows are complete and I started fitting the casts to some cruisers:
They turned out quite nicely and I feel give a bit more of a regal feel to the Admech cruiser design. As you can see the Admech cruiser has been primed grey so the next step is to do some painting – I’ll likely go for a grey and red scheme along similar lines as the official GW pics…
With this project out of the way it’s time to move on to the next one; and of course it’s another BFG related project!


 You read it correctly: not a Light Cruiser but a full blown, cruiser size, Zeus pattern ship design!