SAW Buildup: Fixing to the Base

Posted by Mangozac on March 29, 2012

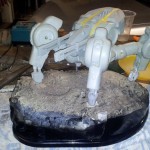
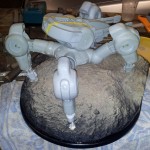
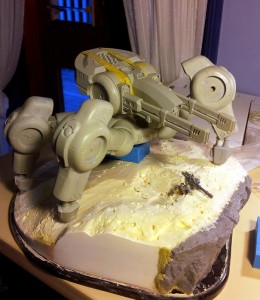
Well things are coming together! The legs have been epoxied and pinned to the pelvis. The sides of the base have been painted gloss black. M5 threaded rods have been screwed into the base and the feet drilled and tapped to accept the rods. So finally the walker is connected to the base!

It’s not sitting as tightly against the ground as it should in the following pics – that’s because I need to cut a tiny bit of length off the threaded rods. Also, because I glued and pinned the hip joints before fixing it to the base, I screwed up and one of the rear legs is sitting about 15mm off the ground. So I’m going to have to build up that area with some foam before I do the final basing layer. Oh and one of the mounting rods for the front legs ended up miles off course, so I’ll just stick with three mounting points rather than try drilling and tapping another one.

The dirt, plaster and PVA mix for the groundwork actually seems to have worked really well. If I hadn’t already bought the gel medium I’d try another layer of just that mix to get the ground appropriately even. Hopefully this will happen over the weekend.

Anyway here’s some pics for now. Note that the front cliff is partially covered in masking tape.

SAW Buildup: Groundwork

Posted by Mangozac on March 18, 2012

I made a lot of progress on the SAW yesterday. The legs are all pinned (which took ages to do!) and are now ready for painting. I’m tossing up whether to glue the legs to the pelvis prior to painting or not. Each “hip” ball joint has two pins inserted from the outside so if I paint first it means I will then need to putty up the holes and patch up the paint in those spots once I do assemble them…

I didn’t get a shot of the final pose (which has the front legs facing forward more) but here’s one of the test poses:

Anyway I also got the foot to base mounting points sorted, which meant that I could finally do the initial sand/gravel layer:

As is the sand coating is a bit ordinary. It’s a mix of sand, small rocks, plaster, PVA glue and water. I tried “patting” down the mixture after application but it still left a far too uneven effect (I know a degree of unevenness is good, but this is a bit false looking). Then I remembered I had this groundwork article saved, which recommends the use of acrylic gel medium. So I’m going to do a second, thinner coat over the top of the current groundwork, which should even things out a bit. I’m thinking I might pick up a tube of this texture gel rather than muck around with the plaster/PVA recipe again. I didn’t tint the first coat although the dirt I’ve used is probably pretty close to the kind of colour I want anyway!

Superheavy Assault Walker Build Up

Posted by Mangozac on March 11, 2012

It was two years ago that I completed my Superheavy Assault Walker design. Following this and subsequently casting half a dozen copies for some people I got a bit sick of the project and had lost the urge to have one of my own. A year back (and a year on from completing the original design) though I suddenly felt the urge to have a SAW of my own built up!

I’ve now seen a handful of these built up and painted around the internet, but I don’t feel that any of them have captured the kind pose I had intended for the model. So this is my chance to set the record straight as to how it was supposed to be assembled 😉

Since my moulds were partially worn out and I didn’t have the time or motivation to cast it up myself, I decided to order a kit from Chapterhouse (exercising my designer’s discount and purchasing it at cost). It still worked out pretty expensive by the time I paid for post, but I’m not complaining. I got most of the parts cleaned up and ready to go and then got sidetracked with non-hobby stuff (girlfriend, work, commissions) so it got shelved. Actually the larger reason for shelving the project was because I was struggling with the base that I was going to mount it onto. I did periodic work on the base building it up with foam but was still pretty uninspired with it.

Recently I caught up with my mate Jas and decided to show him the progress I had made and ask for his advice on where to take it. I explained that I wanted to represent the edge of a cliff in an arid Afghan style landscape. He gave me the perfect answer: Woodland Scenics Rock Moulds. So I had a browse and ordered a C1243 Base Rock mould. Postage was stupidly slow for some reason (probably because it was so cheap) but then this week, after a month in transit, it finally arrived. I hit the mould with some release spray and mixed up a 4PU resin (tinted grey) and talc (as a filler so not to waste resin) combination, which was then sloshed around in the mould until it gelled. The idea being to cast the rocks “hollow” (even though they are single sided).
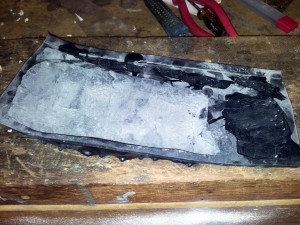
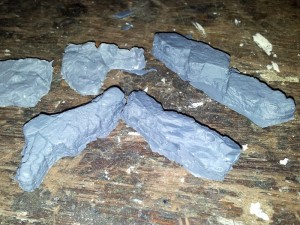
I had built up the base with another layer of foam since the pics above, and these were the perfect height for the large rock mould parts. So I hacked off part of the foam and hot glued the rocks in place. The edges of the base that represent where the base had been “cut from the earth” I wanted to be flat and painted black so I glued in some styrene sheets and used a heat gun to curve them around.

With all this done the last step was to attack the base with expanding foam to fill all of the gaps and level things out. Man the expanding foam really expands! That brings us to the current state as of 11:30 this morning:
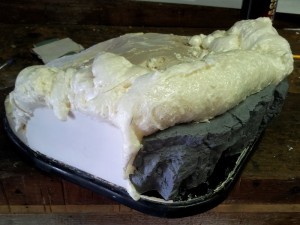
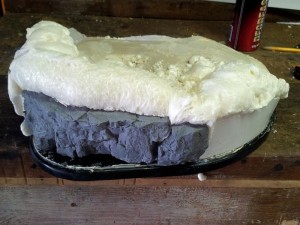
Next step will be to trim the foam back and then I can start looking at the ground cover mix. The bush out the back of my work has provided a perfect sand/gravel mixture that I have washed and dried in preparation for the base. The legs and pelvis are all ready to go, so soon I will be ready to drill the holes into the base for the bolts that will screw into the feet to hold it in place.

Don’t expect frequent updates on this one, since this little flurry of activity has happened while waiting for another mate Wereweevil to sculpt me up a pilot blank for my Centurion Mecha project (which he also completed this week).

Review: Statuesque Miniatures’ Sci-fi Chicks

Posted by Mangozac on March 3, 2012

OK so I have to admit I have a bit of a soft spot for well sculpted female figures. I’m sure if I had a psychologist there would be some kind of connection to something in my upbringing. So when I saw the line of Statuesque Miniatures Sci-fi chicks I felt the uncontrollable urge to buy a few of them. I find myself more and more being an unintentional miniatures collector these days (see my recent review of the Dreamforge Sturmtruppen).

Andrew C. Rae, owner of and sculptor for Statuesque Miniatures has that rare sculpting talent that produces simply stunning miniatures. Sure, it helps that this line is 32mm rather than 28mm (it’s amazing how much difference that 4mm in extra size makes), but to me the proportions are absolutely perfect. I’ve never been a massive fan of the “heroic” scale of GW miniatures (although I do quite like the Forge World figure proportions). Andrew’s proportions on these girls are just perfect and if I were running a miniatures business I would certainly be trying to commission female sculpts from him!

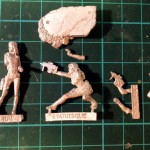
So as I said, I couldn’t help but pick up some of the Statuesque Miniatures figures:

The prices are very good for boutique figures like these, plus postage was very reasonable. Andrew was very quick to pack and post the figures, and they arrived quite quickly.

As many know (and you might have guessed from the name of the site!) I prefer my figures in resin, simply because it is far superior in reproducing detail in the figure. Also as a material I much prefer working with it. I was disappointed to discover that although these figures were available in resin, the resin versions were a very limited edition (which apparently sold out within hours of their release) so my only choice was metal. Prior to purchase I spoke to Andrew about my preference for resin and he assured me that his metal caster was producing very high quality that I would be happy with. In short he wasn’t wrong!

The following is a shot of the three figures on my cutting mat (10mm grid). The figures were broken into parts very smartly (and no more than needed too) and supplied with a 30mm bevelled lip base.

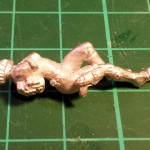
Well Andrew wasn’t talking crap when he said that his caster was top notch! The casts are very nice! The mould lines were very slight and there was no mould slip to speak of. For the most part the mould lines were well placed (except for the Bella figure which has a mould line up the right side of her face). Here’s a shot showing a line on the Tilly figure (down the side of her torso):

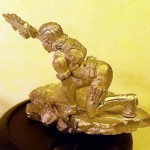
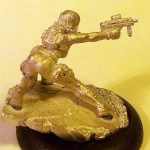
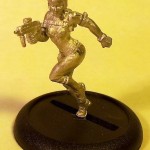
I’ll leave you with some parting close up shots of the assembled bare metal figures. Yeah I know it’s hard to really appreciate them like that but I didn’t want to prime them from a rattle can. Next time I’m priming some scratchbuilt parts with Mr Surfacer from an airbrush I’ll do these figures too 😉

Oh and for some nice painted pics check out the Statuesque gallery.

So to conclude: do yourself a favour and pick up some of these figures: beautiful sculpts, excellent casting and a great price!