Posted by
Mangozac on May 31, 2013
Resin Addict member and hobby friend Shane Barnbrook (Barn) suffered a lot of misfortune last year with regards to his health. Something as seemingly inane as accidentally swallowing a chicken bone resulted ultimately in a coma and paralysis! While doctors expect him to make a full recovery, it will be a very long journey. In order to take the first steps Barn needs to get out of rehab and back to his home so that he can be with his lovely wife and children. This however requires extensive and expensive improvements and mobility assistance equipment.
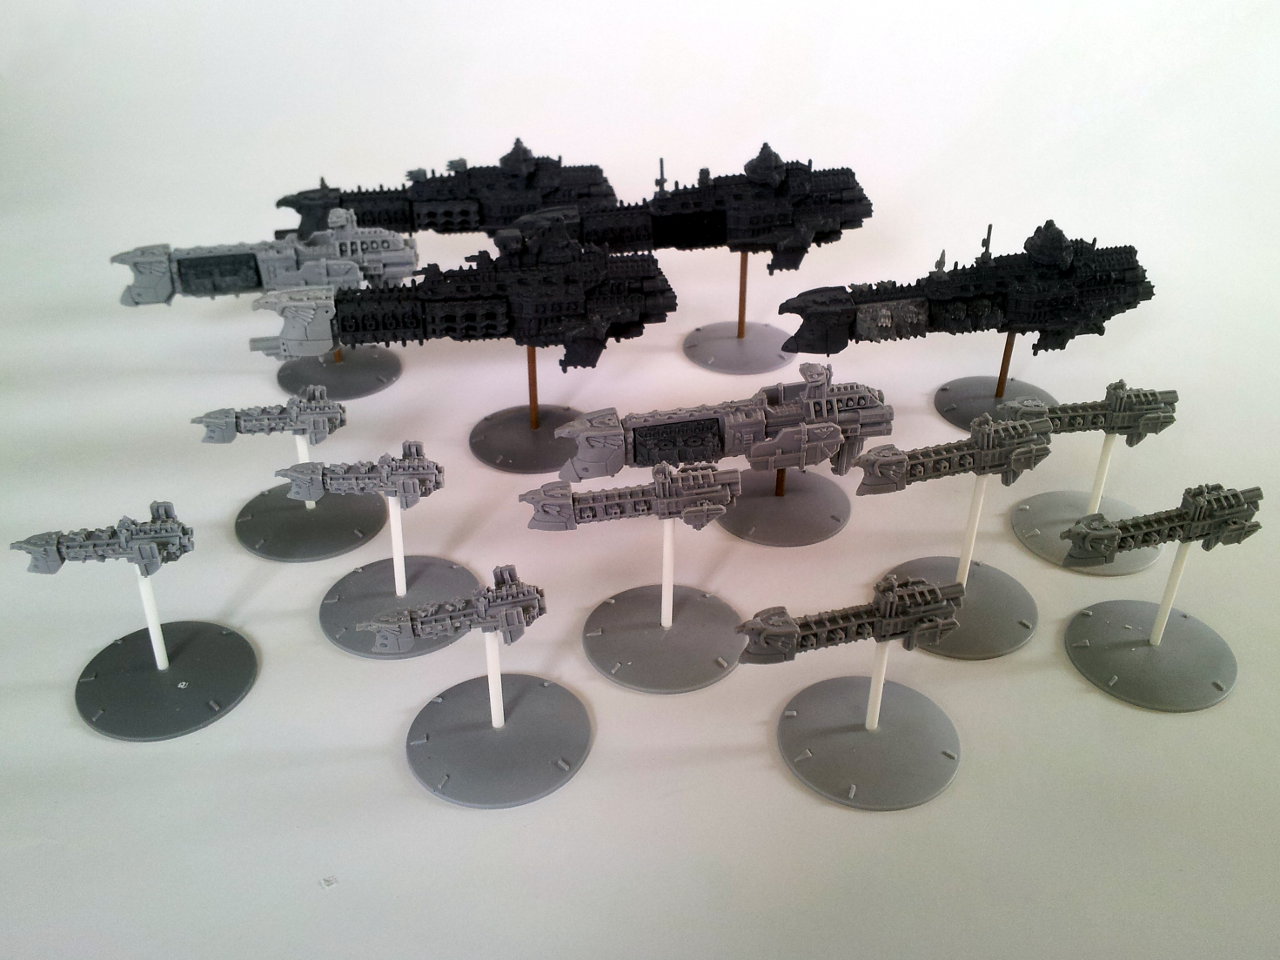
In order to help raise funds for Barn and his family I am auctioning off a one-of-a-kind custom Battlefleet Gothic fleet on ebay: http://cgi.ebay.com.au/ws/eBayISAPI.dll?ViewItem&item=190848743706.

Every cent from the auction will be donated to the Barnbrooks (the models, listing fees and postage are all coming out of my own pocket). Even if you’re not into BFG yourself, please spread the word so that we can get lots of bidding!
Posted under
Uncategorized
Posted by
Mangozac on May 29, 2013
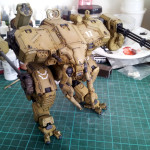
Today’s brief update is showing my progress on the diorama base. As you can see I’m going for a dirt street and section of sidewalk. The base is made from a piece of timer chopped to size and then edged with a styrene skirt. On top of this does a dirt mix and then the cement. I added too much black to the hydrostone “cement” mix so it’s a little bit dark, but that’s ok it will paint up to the right colour just fine.
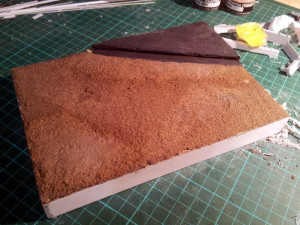
Ignore the strange effect on the dirt – I had just applied some more (a dirt and PVA mixture) on top of the base dirt coat (which is dirt, hydrostone and a glob of PVA).
Here’s the Fiddler sitting on top to show the scale. The next step is to scallop out slightly the spots where the feet will go, fill them with a sand and gel medium mix and then press the Fiddler into it to make it look “settled” into the ground (rather than hovering slightly above it). This thing would weigh a few tonnes so it would certainly put some pressure on the ground!
Once that’s all done I’ll paint the edging in gloss black, mask it off and then paint the dirt and cement.
Posted by
Mangozac on May 26, 2013
Since getting back into a lot more painting in this last year work desk space has been at a premium due to the number of paint and consumables bottles sitting on my desk. I recently realised how much of a waste of space this was and devised a shelving system to rectify it. I finally got a chance to build it this weekend and am pretty pleased with the result.
It’s pretty simple construction made from 40mm x 8mm pine strip. The size was determined by what I could make from two 1200mm lengths, however in hindsight I should have been less stingy and sprung for another length. That way I could have made it a bit wider (as constructed it’s 450mm wide), as I will be running out of space very quickly. I’d recommend 600mm wide.
The back is just a sheet of 3mm MDF.
The pieces of timber were cut to size on a drop saw. I used nails and PVA glue to fasten the pieces together, but due to how thin the pine strips are I pre-drilled all nail locations to ensure no splitting occurred.
I was quite surprised how stable the finished shelving unit is. I was expecting to have to add a base with a larger area, but in practice this is completely unnecessary.
So here’s the finished product in all its populated glory (please excuse the crappy picture – there was something weird going on with light levels):
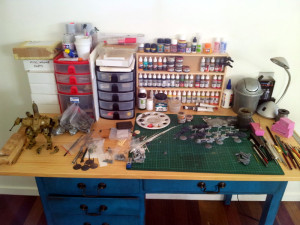
Those with really keen eyes will see some new project on their way 😉
Posted by
Mangozac on May 23, 2013
Let me start with a disclaimer: THIS PROJECT IS NOT MY OWN WORK
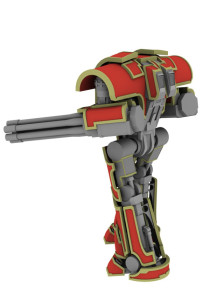
OK I don’t do this too often but every now and then I see a hobbyist with whom I can’t help but feel some affinity. It’s not necessarily solely a display of amazing hobby skills, but a combination including the design itself and the topic. In this case it’s an amazing Mars style Warlord Titan being built by Dakka member Fiorhellheart (Rory). The guy is still in his teens but his work is as professional as a seasoned veteran. I am very jealous of his clean styrene work!
A Warlord Titan is an ambitious project for anybody to undertake – hell even I’m not crazy enough to attempt one (yet)! But Rory has a very promising start by first creating his design in 3D CAD. I’m ripping off a couple of pictures from his Dakka thread to post here:


Rory has devised a beautiful design for the lower leg and foot – I love this rear view and in the particular what he’s done for the rear toe:
Like any truly devoted hobbyist, Rory is hinting at moulding and casting the model when he completes it (with the amount of work going into building those beautiful forms it would be criminal not to!). Unfortunately though the project has had to take a back seat to Rory’s studies (he’s studying physics but I think he may have missed his calling in engineering!) so we just have to stay subscribed to the thread and wait patiently for updates (is patience one of your virtues – it’s certainly not one of mine!).
Check out the Dakka thread and salivate over the scratchbuilding goodness: http://www.dakkadakka.com/dakkaforum/posts/list/0/458325.page.
Posted under
Uncategorized
Posted by
Mangozac on May 21, 2013
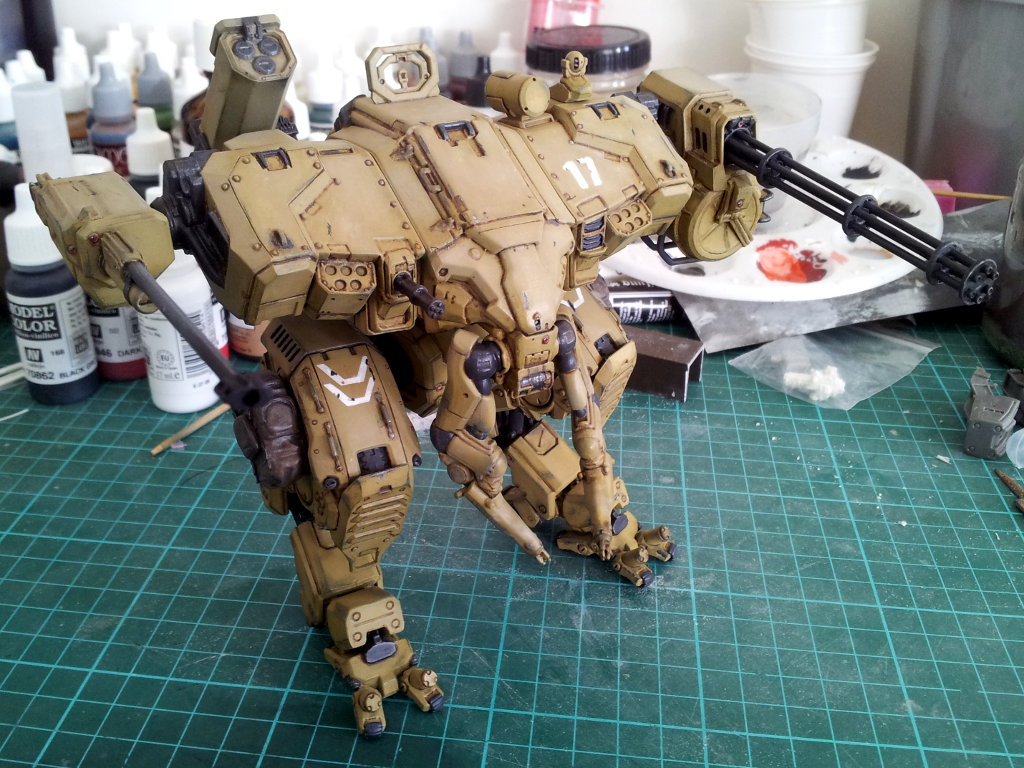
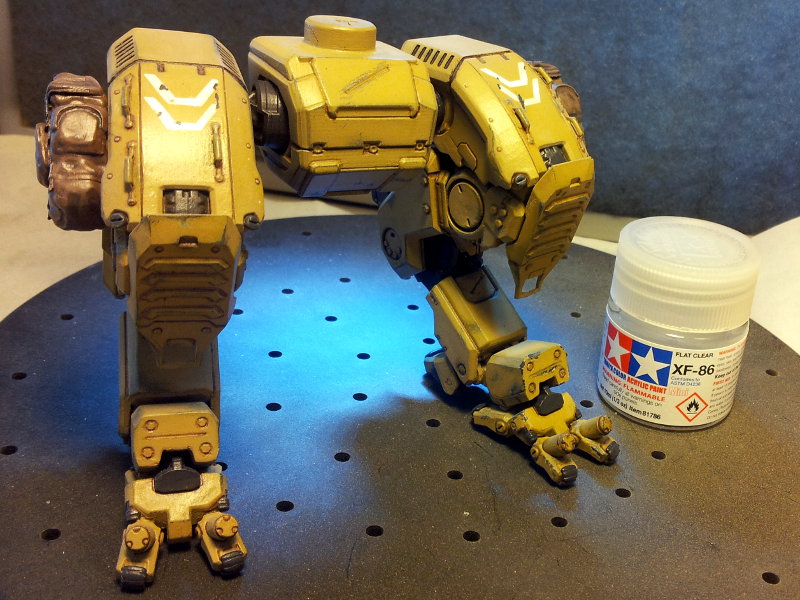
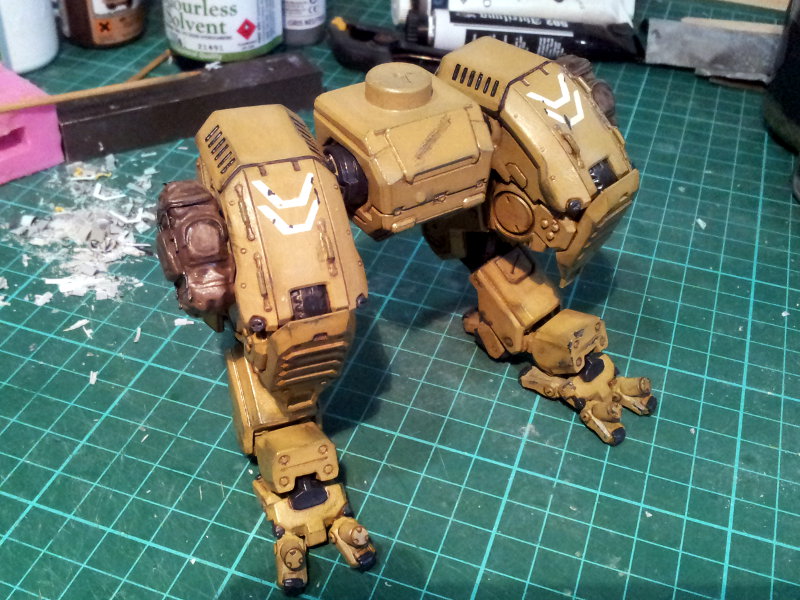
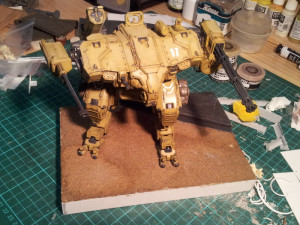
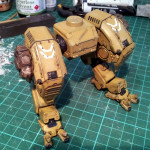
It’s very exciting to have finally assembled the painted parts. It looks great and is really coming together now!
After soliciting some advice from some mates who use similar techniques over on WargamerAU, I was introduced to Tamiya XF-86 Flat Clear. I specifically wanted a clear that I could spray through my airbrush, as the Tamiya TS-80 rattle cans are lacquer based and too thick of an application can cause damage to the underlying paint. I went down to Toyworld and grabbed from XF-86 and I have to say it’s very impressive. You just thin it like any other Tamiya acrylic and it provides a nice matte surface.
So all the parts got a coat and I then painted up the various optic sensors, followed a coat of gloss on the optics only. I then used super glue and 5 minute 2-part epoxy to assemble everything (epoxy is preferred as there is no danger of white hazing created from the super glue fumes).
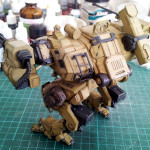

One thing I have come to notice is that I really was a little too heavy with the brown wash application. At the time it felt like I wanted a really strong contrast, but in hindsight a little more subtle would be been better. In any case it’s too late now – everything is sealed with the matte clear coat!
Next up: dust effects!
Posted by
Mangozac on May 16, 2013
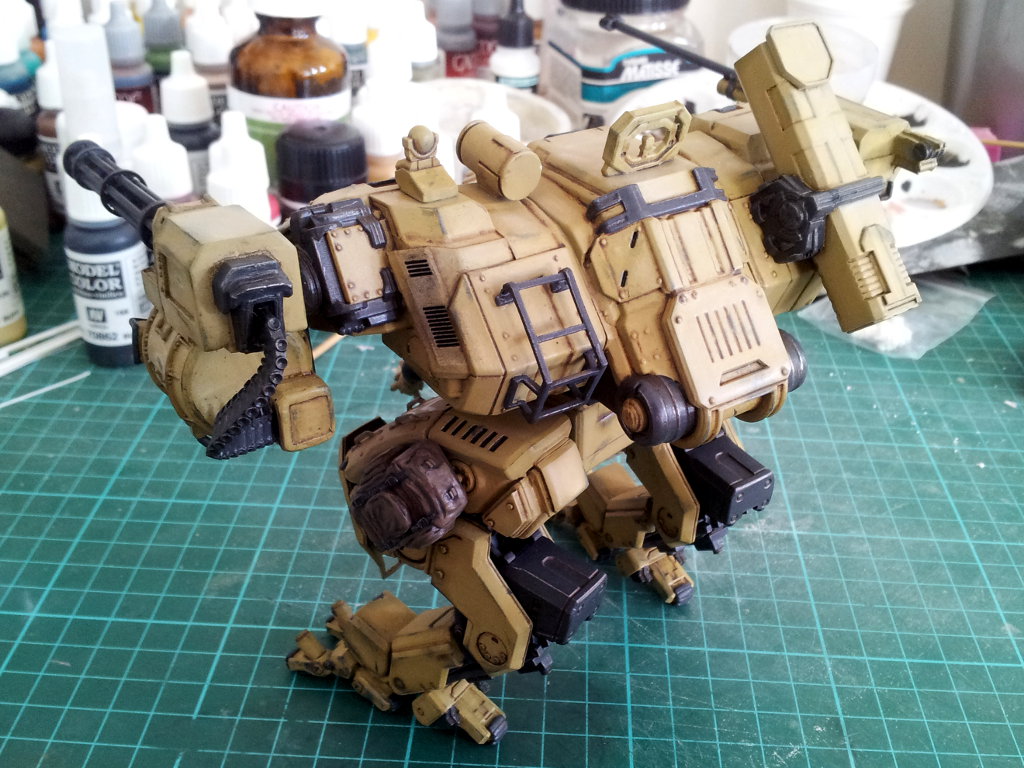
Well last night I finished applying the oils. It took way longer than expected and I’m still getting used to working with the oils (slow drying time = be careful where you put your fingers!). The best thing about the oil paints is how they can be used in very thin, transparent layers to tint the colour underneath.
As mentioned in the last post, I’m using AK Interactive AK-121 OIF & OEF wash for the bulk of the shading/grime and applying thinned black oil paint for vents and metal areas.
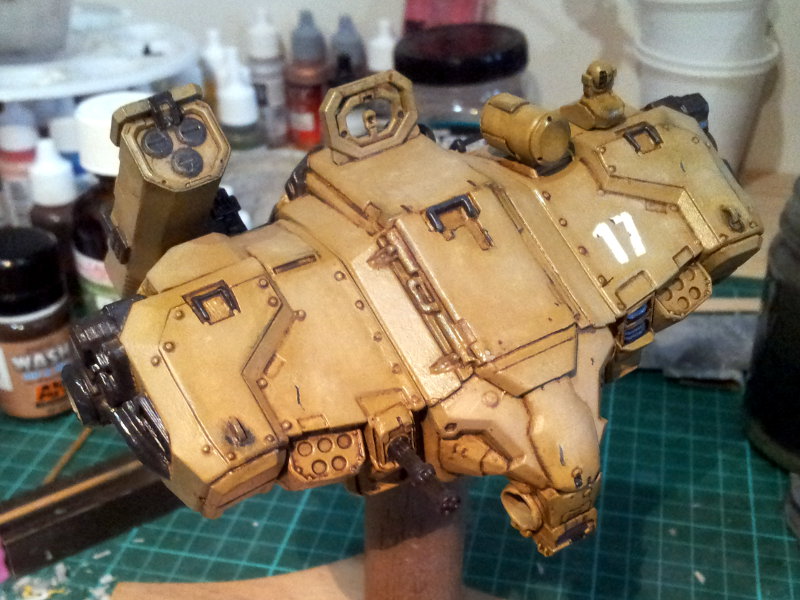
In order to add some interest I decided to fade the upper panel surfaces with white oil paint and give that tired desert operation look. I just dotted on a few spots of white oil paint and then used a large brush to spread them out and blend evenly. The white paint has also given those panels a very matte appearance, making the contrast between them and the glossy un-faded panels very start. Once the model is given a coat of flat clear it should all look much more uniform.
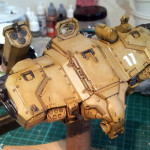
As you can see I started some assembly. I’ll complete the assembly after I’ve done the flat clear coat, so that I can weather it all in a uniform manner. I’ll wait a couple of days before the clear coat – you need to ensure that the oils have cured sufficiently first.
So the processes left are:
– Flat clear coat
– Paint optics
– Grease and oil stains (have to be done after the clear coat so that they’re glossy)
– Dust weathering (pigments, etc.)
I secretly sat the torso on top of the assembled legs and it looks really exciting! Can’t wait to see it come together! I do need to start work on a base for it though – I have a simple dirt and concrete base in mind.
Posted by
Mangozac on May 12, 2013
I have been making progress on this but have struggled to find time to post about it! This update was completed during the week, but I’m only now posting these images.
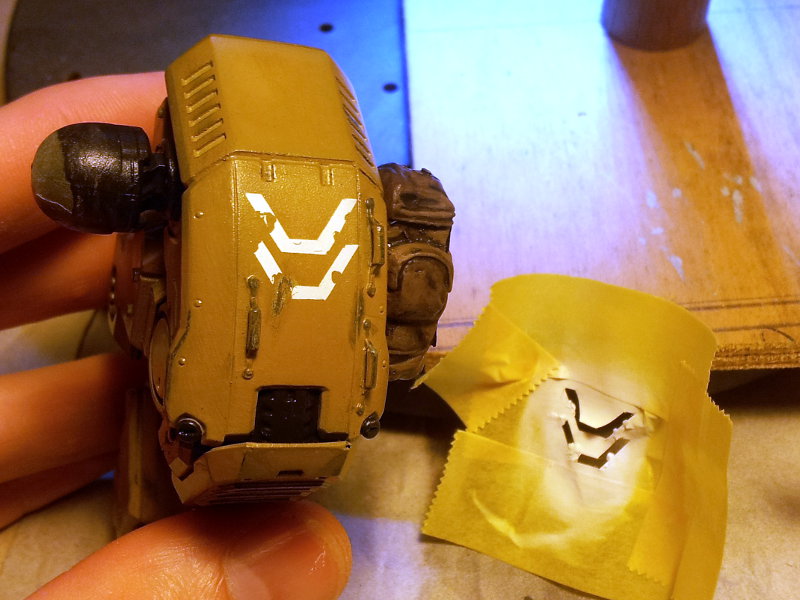
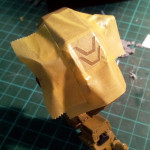
I’ve sprayed a few markings onto the Fiddler, inspired by those shown on Don’s latest render. To do this I took some measurements, drew up the markings in Inkscape and then printed them out. I then placed the printout atop some 18mm width Tamiya tape temporarily stuck to my cutting mat and used a knife to cut through both the paper and the tape. The tape was carefully lifted and fixed to the Fiddler.
This was done on both thighs and I also did a unit number marking on the top left of the torso.
One other thing I did try was to stipple on a small amount of liquid mask after I had applied the templates to the model (to simulate where the markings had been chipped or worn off). After spraying Tamiya white I removed the tape and the liquid mask, but the the result was less than impressive. Perhaps I just aren’t yet skilled enough in applying liquid mask but it simply didn’t give me the effect I wanted. So I brushed some Vallejo white over the top of the sprayed markings to make the chips less severe and much finer.
The masked thigh:
After removing the mask:
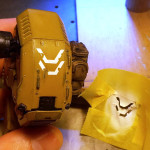
Unit marking:

Pretty pleased with the overall result. I’ve since given it all a coat of gloss clear and have begun applying weathering oils and washes. For vents and deep panel lines I’m using thinned artists’ oil paint. For everything else I’m using AK-Interactive AK-121 OIF & OEF wash (which is just a clay brown colour). The first time I tried the oil based weathering techniques (on my Superheavy Assault Walker) I had a lot of trouble because I hadn’t laid down a suitably consistent gloss clear coat. I’ve not made that mistake here however and applying the oils works like a dream!
I’ve found that the wash needs to be shaken up pretty regularly during use (like every 5 minutes) in order to keep the pigment nice and suspended – maybe you’re supposed to decant some of it into a palette rather than apply straight from the bottle. I’m about halfway through this stage and will have a photo update when it’s done.
Once oils are done I think we’ll be ready for final assembly (exciting!).