Posted by
Mangozac on January 29, 2014
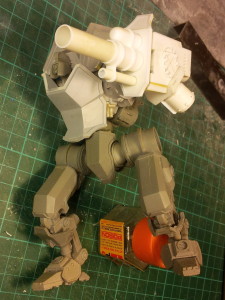
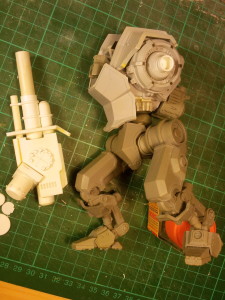
Quick update before I go to work to show you all the progress on the cannon design. It’s coming along very nicely! As I’ve said before I’m much happier with the larger cannon size. Obviously there’s still a lot more detailing to do (the muzzle is yet to be built too), which I’ll hopefully get completed in the next week or so.
Enjoy!
Posted by
Mangozac on January 21, 2014
I received some queries asking what exactly I did with my CNC router for making model parts, so having just finished cutting out the upsized cannon parts I thought I’d share:
The first thing I do is draw the parts in a vector graphics program called Inkscape (the open source alternative to Adobe Illustrator). It’s a great program! I then choose to make a copy of the artwork and convert everything to toolpaths. I’m using a 1mm diameter cutter for this so the toolpath will be 0.5mm (the cutter radius) outside of the line I want to cut. While there are automated tools for converting vector artwork into toolpaths, I’ve found that doing it manually doesn’t take that much longer and is less error prone. More importantly it allows me to precisely control the locations of the tabs which hold the part to the sheet. Kind of like sprue gates on injection moulded parts (although a different purpose).
Once I have the toolpaths drawn up I export them as a dxf file. This can be loaded directly into my machine control software.
I have an abundant supply of 1mm and 1.5mm styrene sheet, so I cut them up into approximately A5 sizes to fit on my router table. The styrene sheet is clamped down and I run the program. It generally takes anywhere between 5 and 15 minutes for most stuff I do. Note that I’m cutting out solely in 2.5D: cutting out 2D shapes.
This is what I end up with:
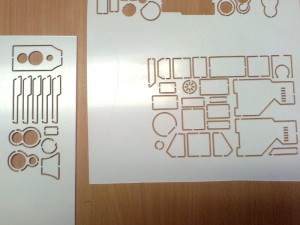
I then cut the tabs and start assembling. Easy! While it’s not a 5 second process, it’s still WAY faster than having to cut out all of that detail by hand (especially if there are duplicate parts) and provides such precise curves and geometry I shudder at the thought of doing many of my parts any other way!
So tonight I’ll start assembling the new cannon. I’m really pleased with the design tweaks I’ve made too.
Posted by
Mangozac on January 17, 2014
I just wanted to drop off this quick update today and whet everyone’s appetites 😉
My CNC router was temporarily back up and running (it was assembled to the bare minimum necessary to cut out the cannon parts but has since been disassembled again so I can tidy it all up and reassemble properly) so I got my cannon parts cut out!
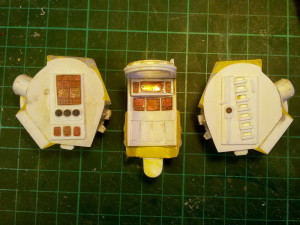
I give you the beginnings of the cannon design:

The basic design concept was drawn up by my friend Xeones, and it was then up to me to translate it into a physical design. There is one big problem: it’s not big enough! You see I scaled it around the sizes of styrene tube I had in stock but neglected to print out a 2D paper copy first to ensure it looks correct. It’s a smidge too small 
Actually, at this point I should interject that realistically it’s probably quite an appropriate size as is, but the style I’m going for is that over-the-top sci-fi style we all know and love, where guns are far oversized.
So I’m now tossing up between just making modifications to this design or starting again and making it bigger (I’ll have to buy some larger sizes of styrene tube). The beauty of using the router is that I can just scale up the parts by ~20% and re-cut it out. Also, I’ve got a couple of tweaks that would make it even better so it’s very likely that’s what I’ll do.
I’ll have to hurry up and reassemble the router 😛
Posted by
Mangozac on January 8, 2014
Happy new year everyone!
I’m fortunate that my day job takes a 3 week vacation over the Christmas holidays. The first week was spend doing Christmassy stuff. The second week I spent on a yacht on the Gold Coast. Now here I am with my third week half way through and progress on the Centurion is starting to gather momentum!
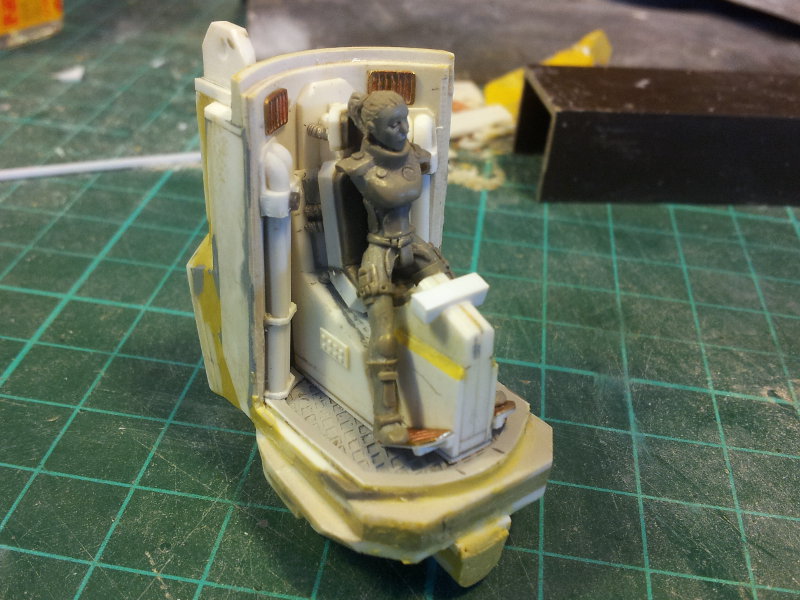
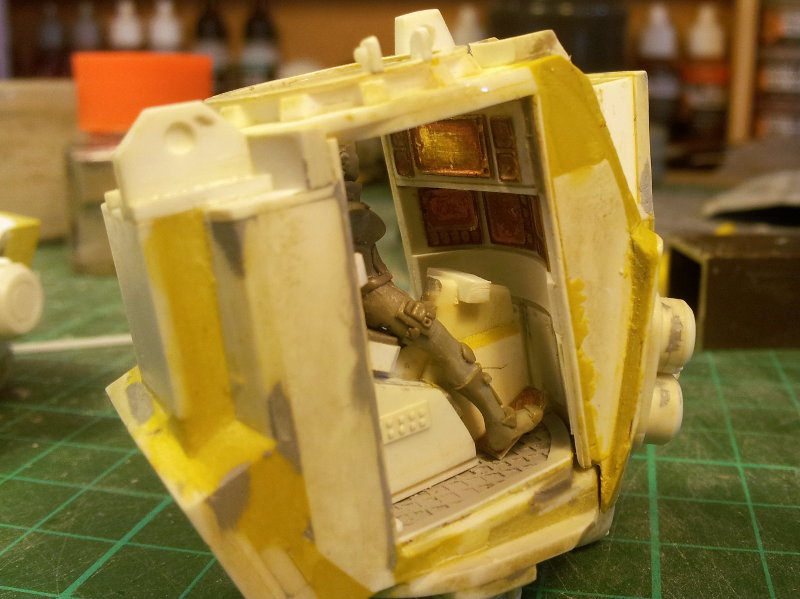
I’m been focussing primarily on the cockpit detailing, which is a slow and fiddly task. I’m actually a little bit disappointed at how it looks in pictures (tiny model parts always look less impressive in photos) but with another layer of details (like structural details) it will be good to go!
I’m sure you’ll be excited to see the first WIP shots of the pilot, as is being sculpted by my mate Marcus. The body is pretty much done, just the arms are left (which require me to complete the hand controls first, still WIP in the following shots). I’m really pleased with how it’s turning out!

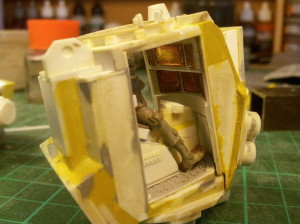
After I took the above photos I gave everything an airbrushed coat of Tamiya Liquid Surface Primer and am very pleased with the results. The parts look better than I’d imagined when all a uniform grey colour!
I’m hoping to test out the new control system I’ve built for my CNC router tomorrow afternoon, so I’d better pull my finger out and draw up some patterns for the weapons so that they can be cut out…