Category: Work in Progress

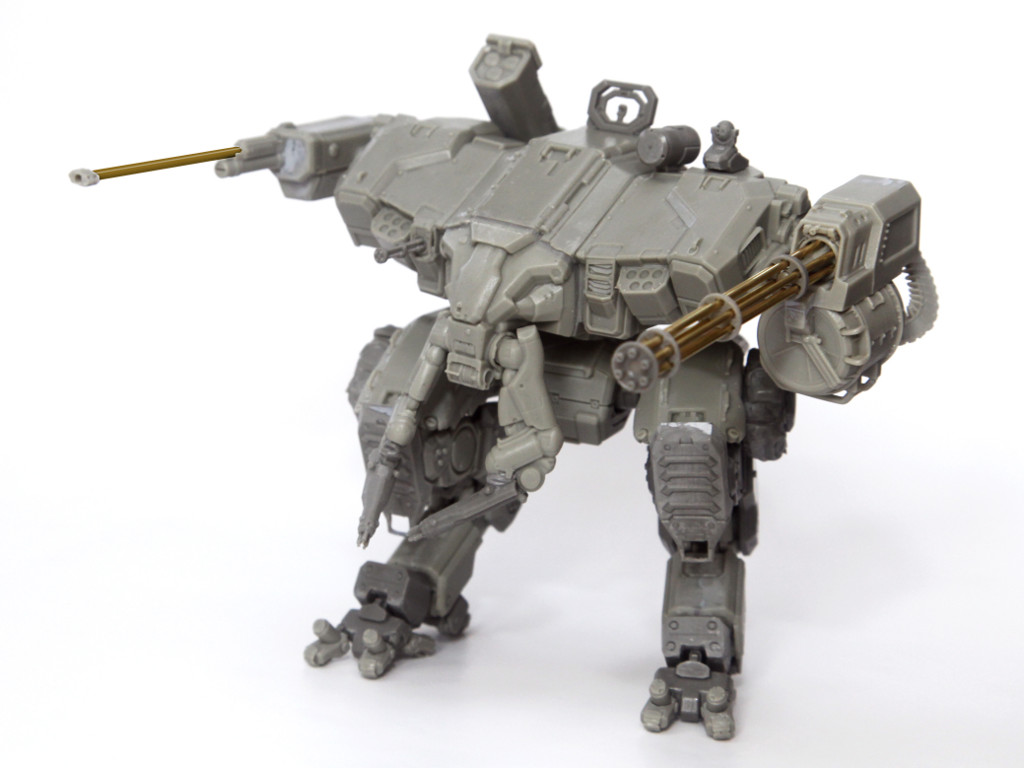
WIP: Warhound Titan 6
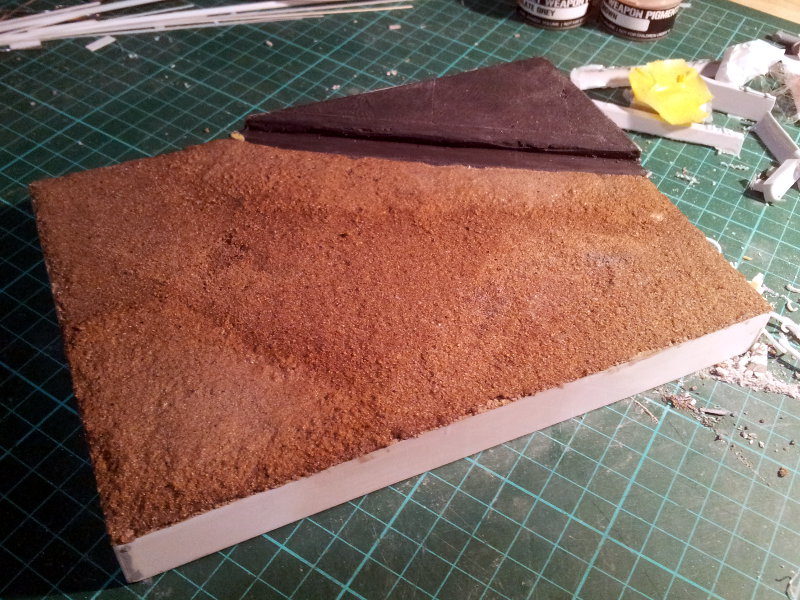
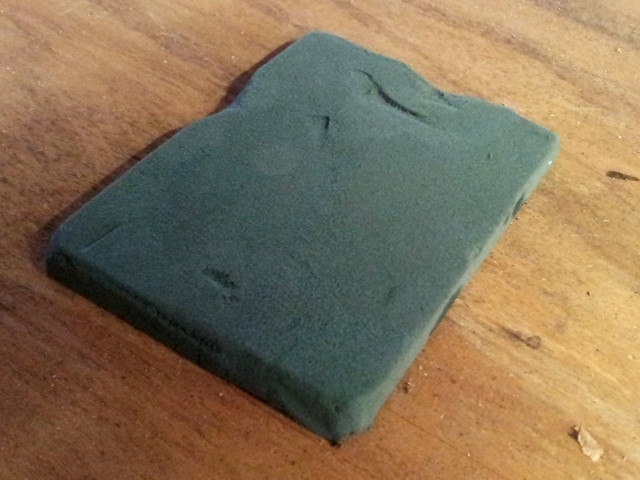
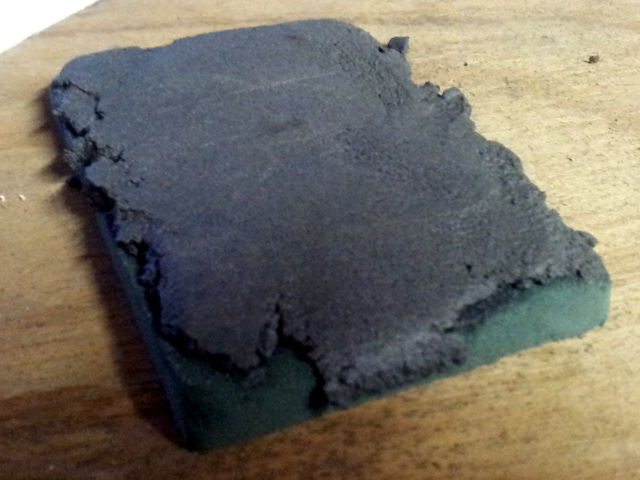
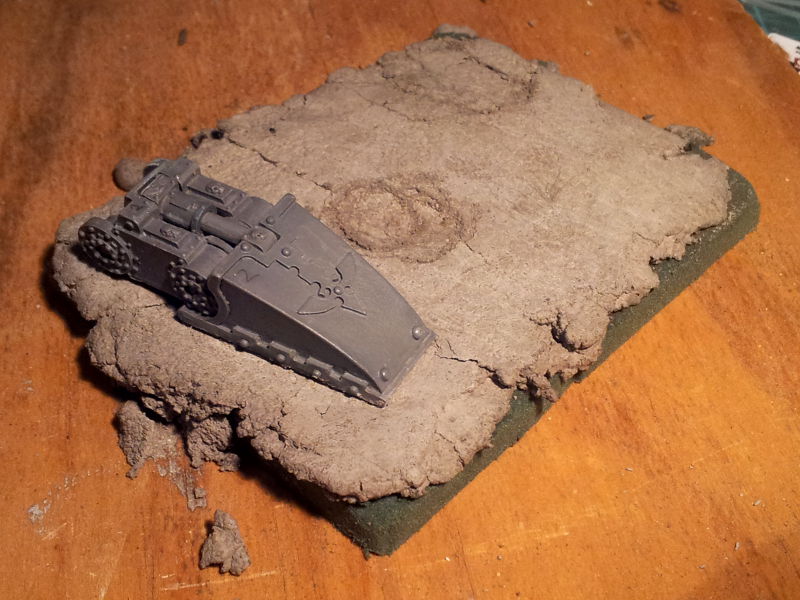
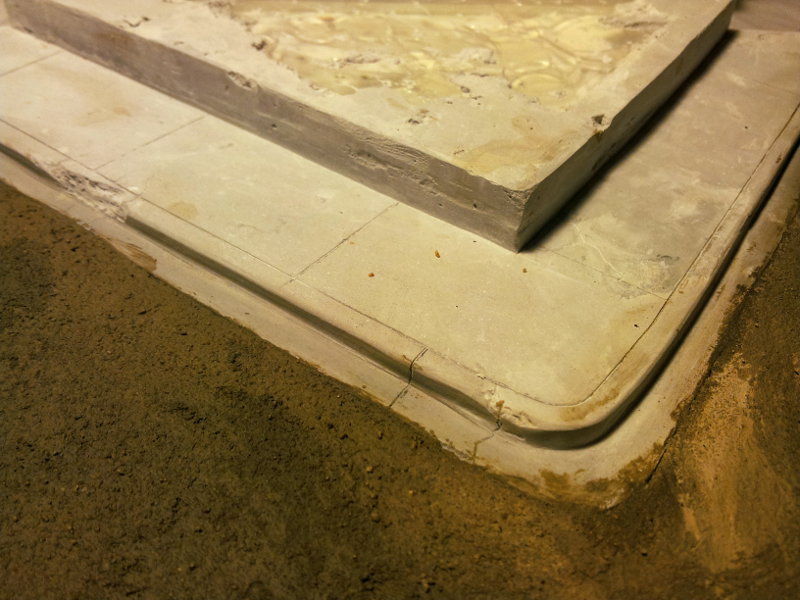
Posted by Mangozac on July 4, 2013

I’ve been doing some more work on the Warhound project of late. The last fortnight has seen some major work on the base. All of the plaster work is done (I’m using Hydrocal tinted with a little black paint) and has been cleaned up (scraping and sanding). I also scribed all of the details into the concrete and then laid the asphalt. The asphalt is a mix of plaster, fine sand, PVA and black acrylic (I just used cheap discount store acrylic and ran out of it near the end). It’s actually really difficult to smooth out properly and once it’s dried properly I’ll give it a bit of a smooth out ;)

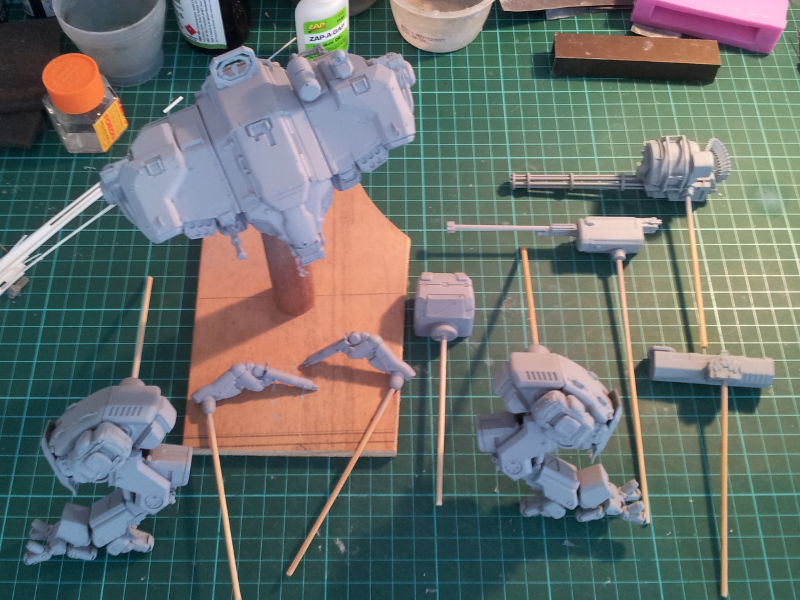
Here’s some progress shots:

Warhound_WIP_12 Wahounrd_WIP_13

Wahound_WIP_14 Warhound_WIP_16

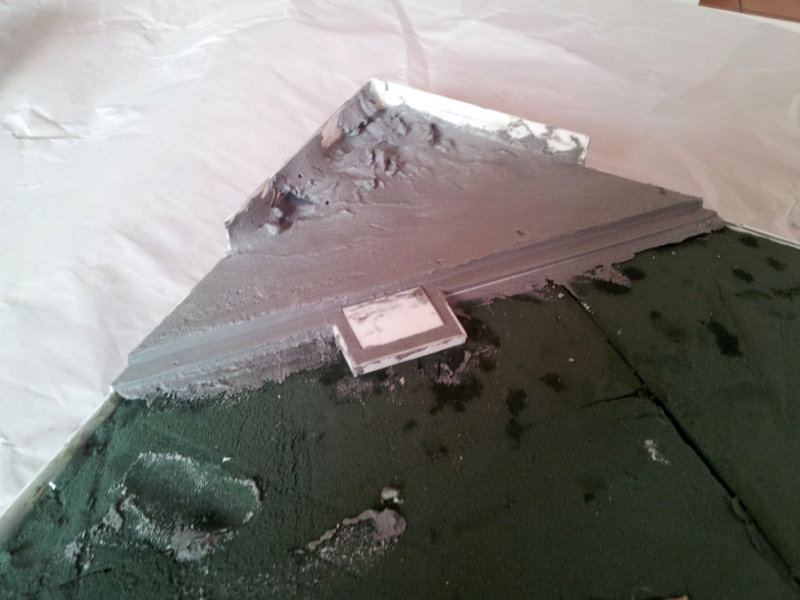
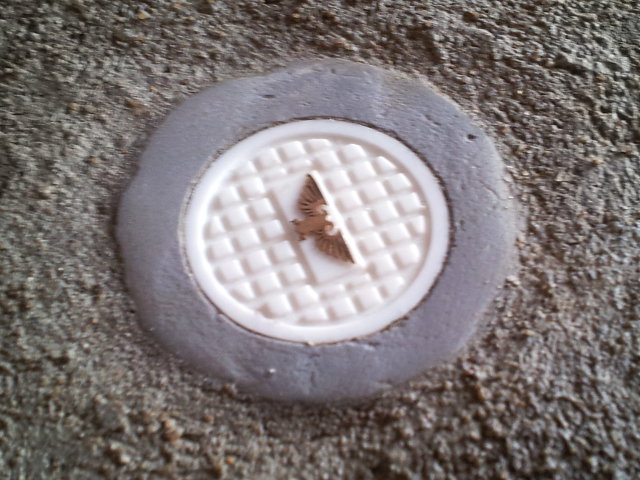
Two things I felt were necessary for the road and guttering were a stormwater drain and a sewer manhole cover. More Inkscape and CNC work have facilitated some pieces I’m really pleased with:

Wahound_WIP_15 Warhound_WIP_17

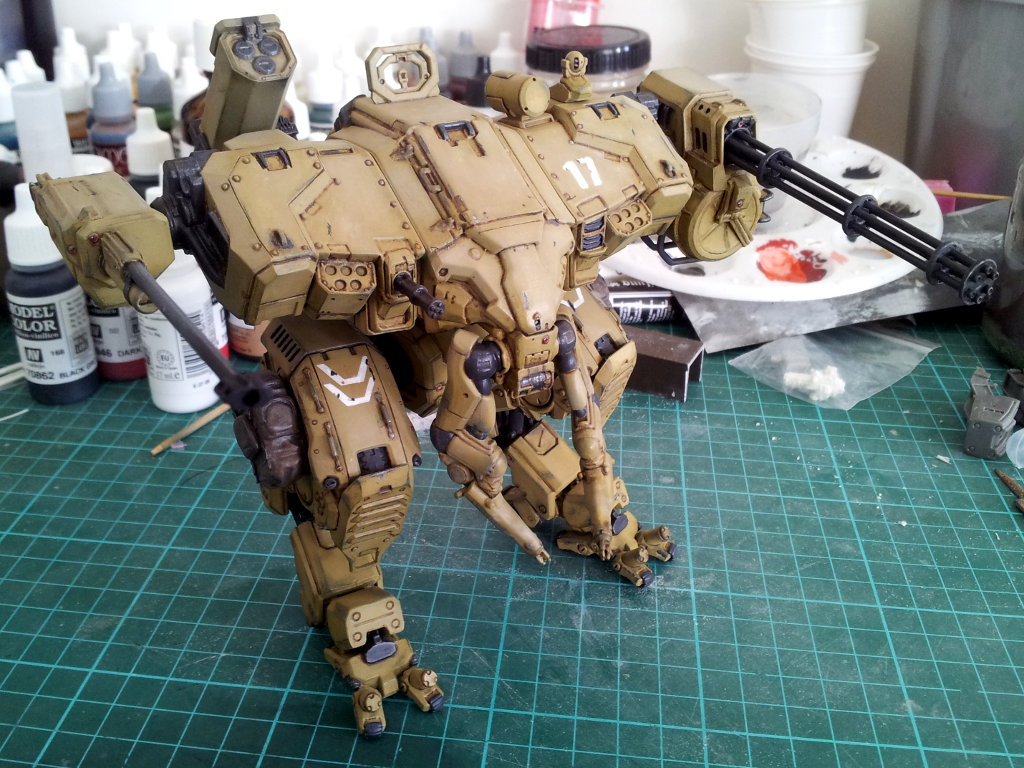
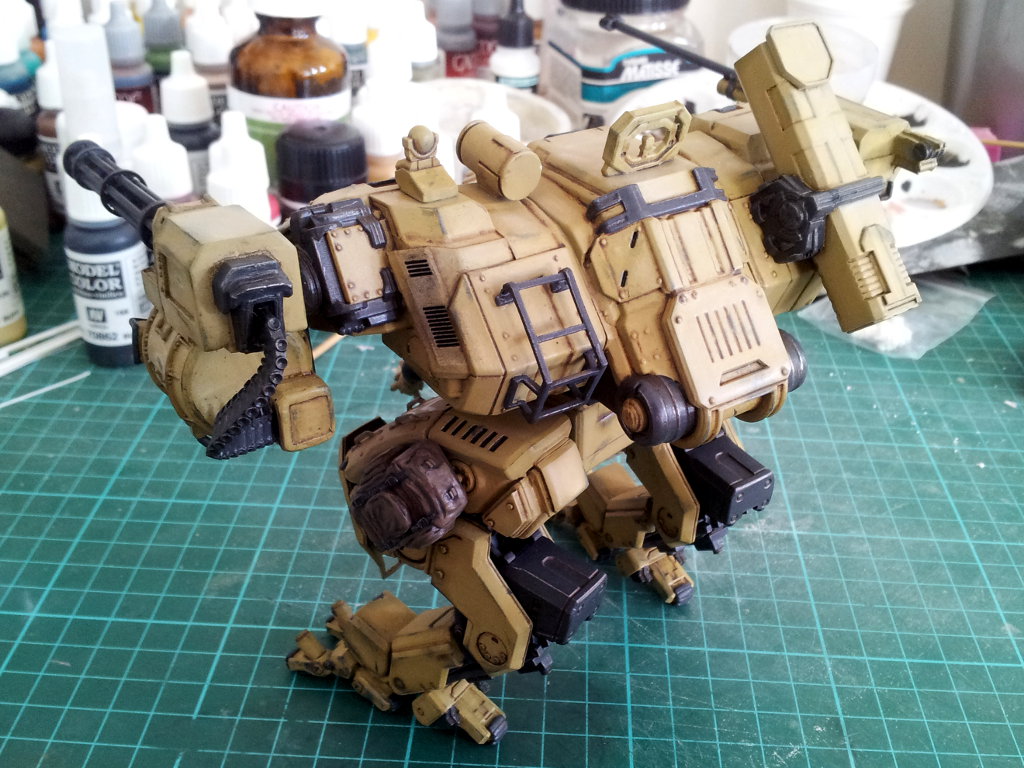
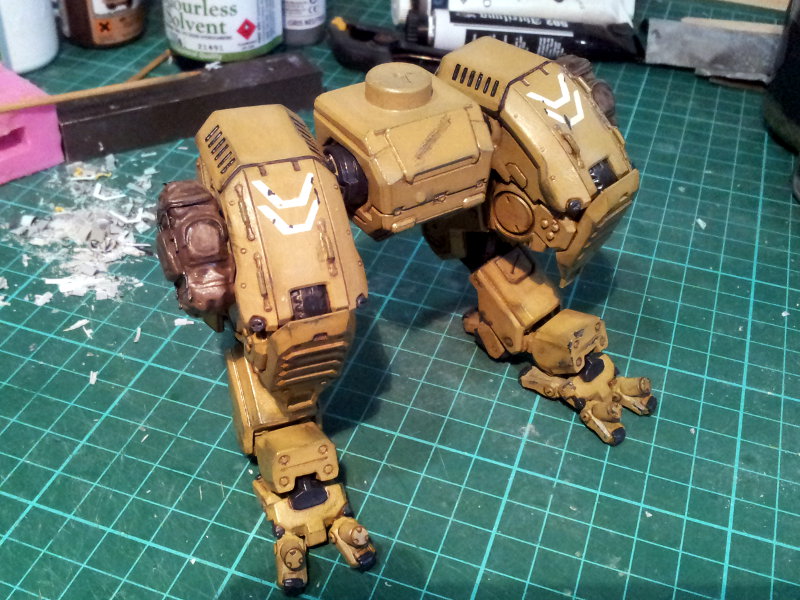
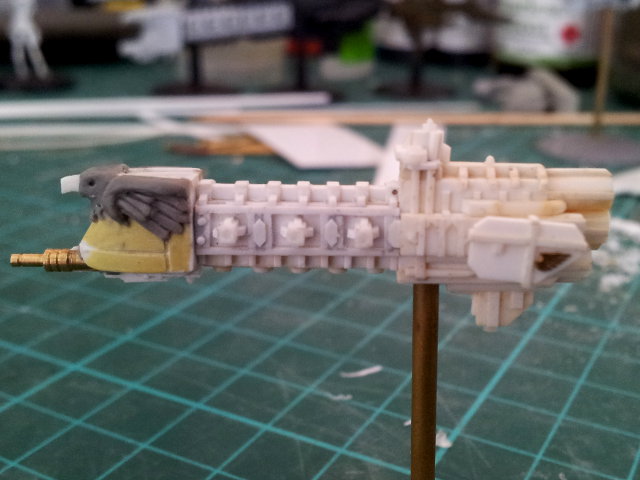
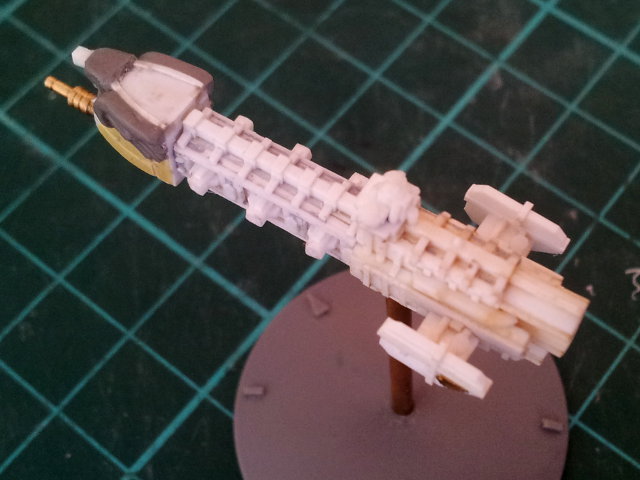
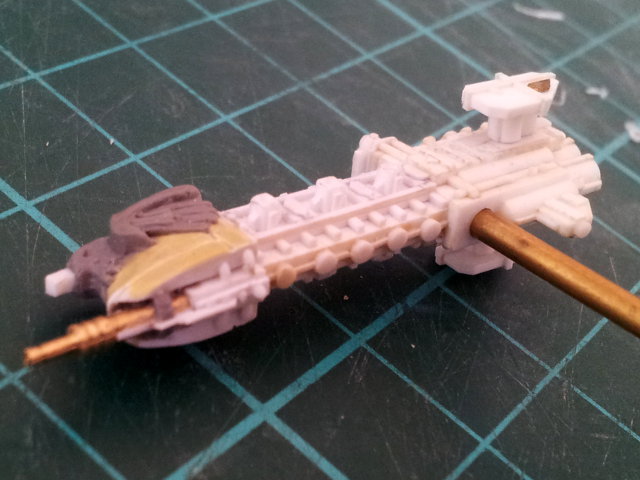
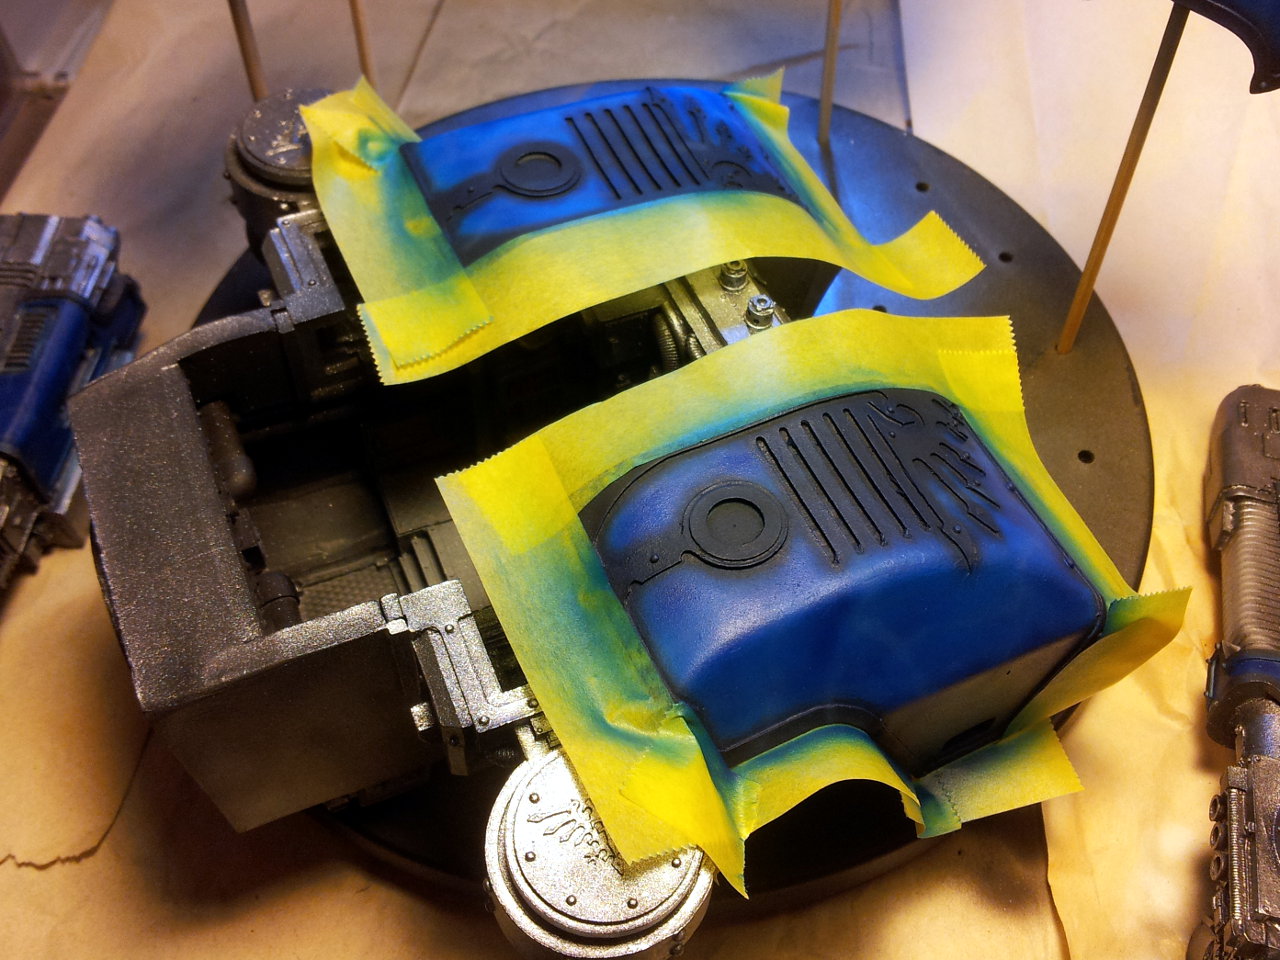
Painting the Warhound is coming along nicely. All of the blue is done (except the legs, which haven’t been primed yet because I’ve been playing around with them sorting out the base and don’t want to damage the paint in the process). I decided to have a go at doing a marbled effect on the blue armour plates by mixing a little white with the blue colour and spraying it on in wavy lines (with the airbrush set at a very low pressure), but it was a bit too light and contrasted too much. So I had to spray a thin coat of the base blue colour over the top to dull the marbling down a bit…

Warhound_WIP_18

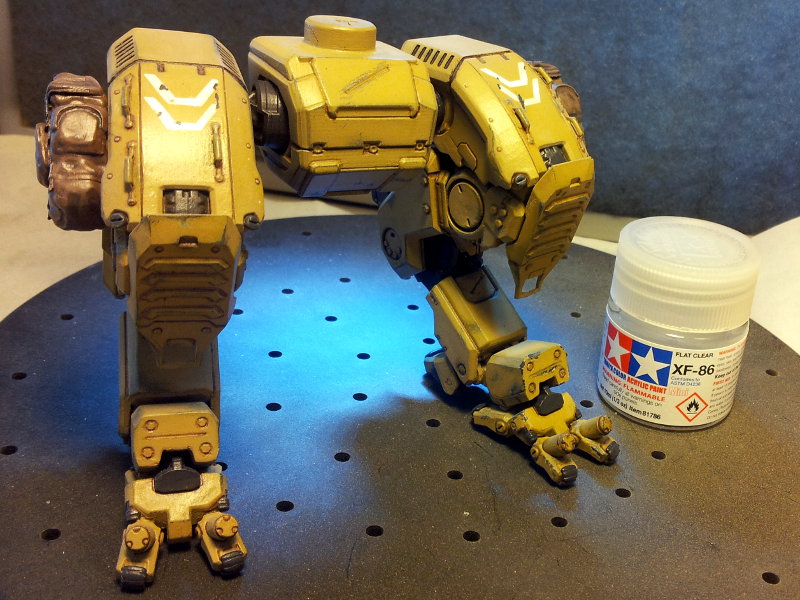
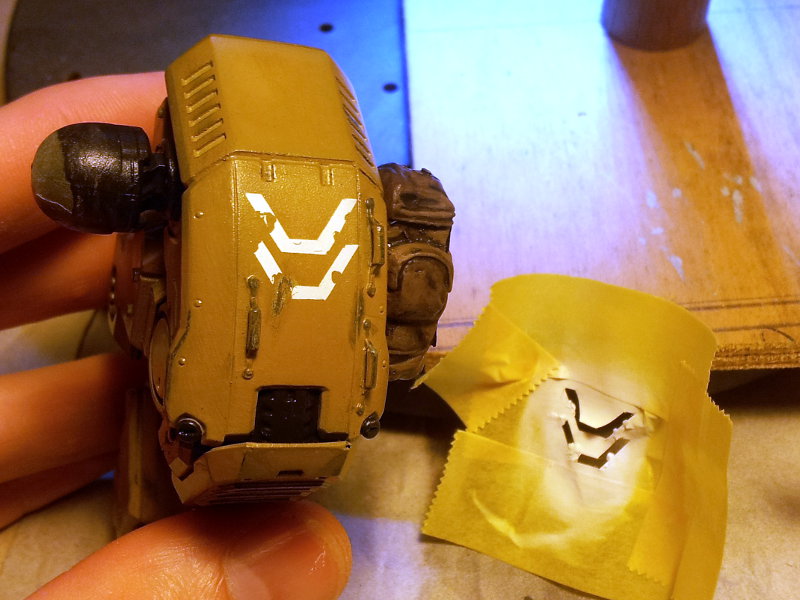
I masked off the metallics that had already been done so that they didn’t get tinted blue from overspray:

Warhound_WIP_20

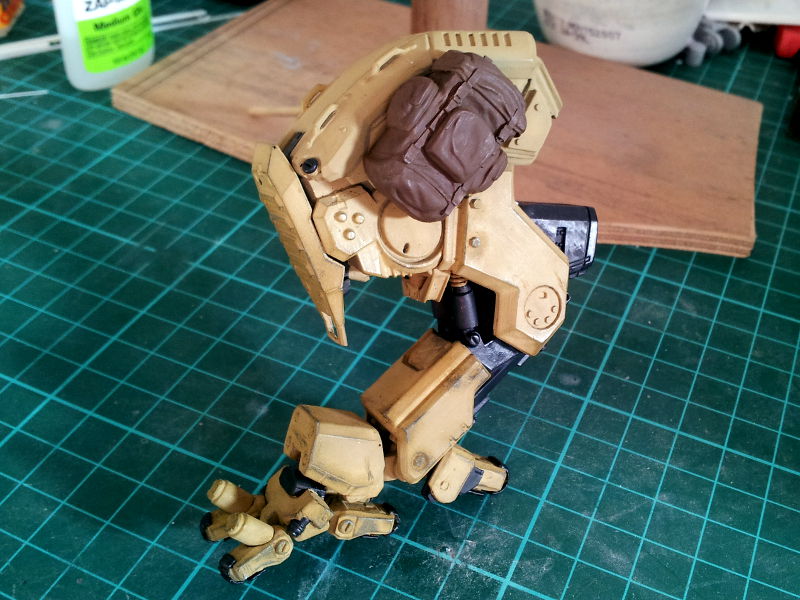
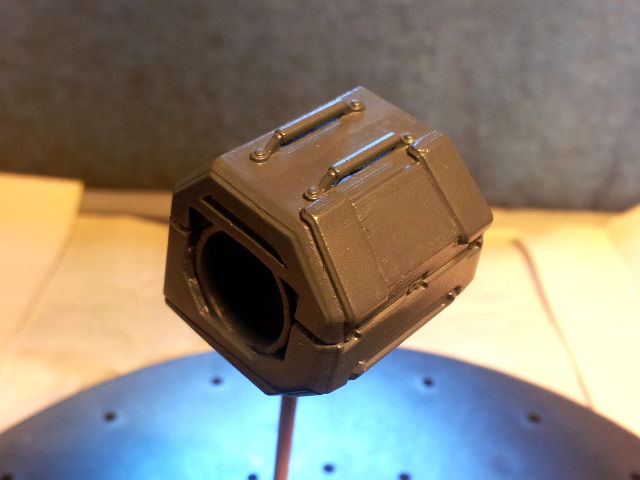
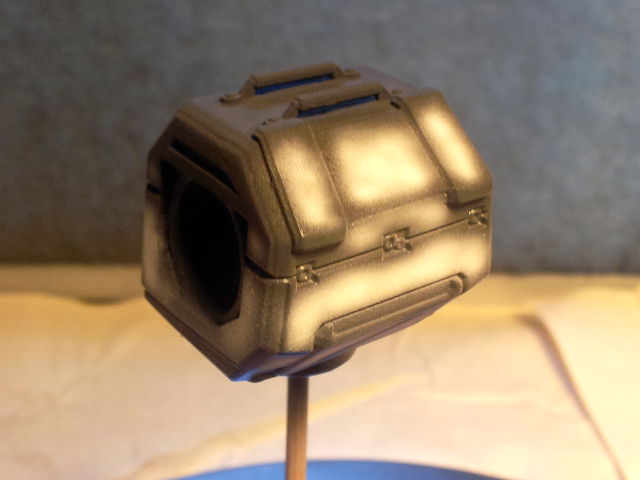
Here’s a shot showing the pre-shading on the head armour plating. It’s since been painted yellow, but I have’t grabbed a pic of it yet. The pre-shading works really well with light colour like yellow!

Warhound_WIP_19

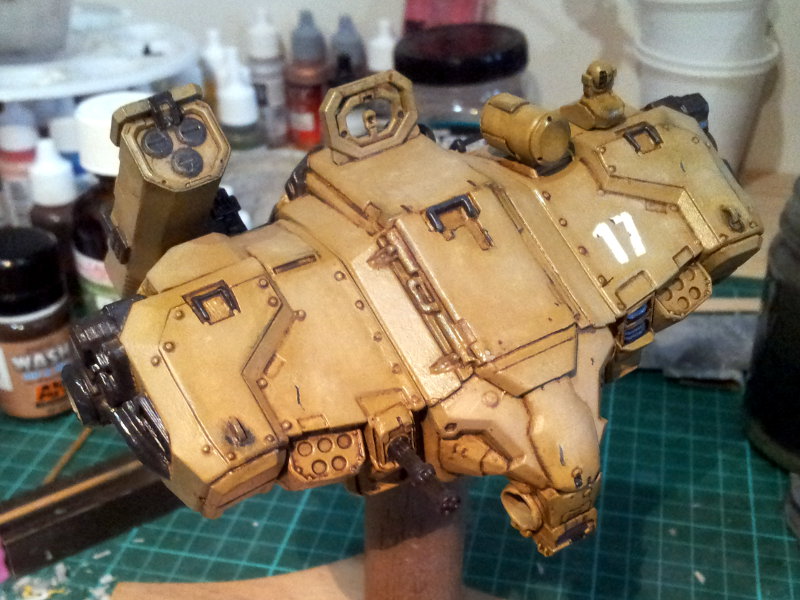
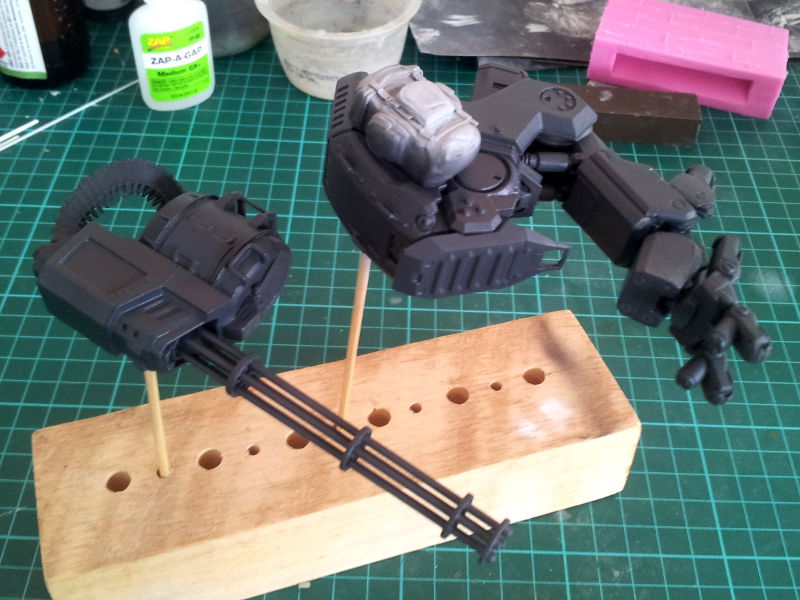
I’m currently working on the brass banding and it is officially the most boring part of this entire project! It takes forever and requires two coats to get a good coverage (you can see what just one coat looks like on the torso armour plate).

Warhound_WIP_21

WIP: The Fiddler Mech 6

Posted by Mangozac on May 29, 2013

Today’s brief update is showing my progress on the diorama base. As you can see I’m going for a dirt street and section of sidewalk. The base is made from a piece of timer chopped to size and then edged with a styrene skirt. On top of this does a dirt mix and then the cement. I added too much black to the hydrostone “cement” mix so it’s a little bit dark, but that’s ok it will paint up to the right colour just fine.

Fiddle_WIP_20

Ignore the strange effect on the dirt – I had just applied some more (a dirt and PVA mixture) on top of the base dirt coat (which is dirt, hydrostone and a glob of PVA).

Fiddler_WIP_21

Here’s the Fiddler sitting on top to show the scale. The next step is to scallop out slightly the spots where the feet will go, fill them with a sand and gel medium mix and then press the Fiddler into it to make it look “settled” into the ground (rather than hovering slightly above it). This thing would weigh a few tonnes so it would certainly put some pressure on the ground!

Once that’s all done I’ll paint the edging in gloss black, mask it off and then paint the dirt and cement.

WIP: The Fiddler Mech 5

Posted by Mangozac on May 21, 2013

It’s very exciting to have finally assembled the painted parts. It looks great and is really coming together now!

After soliciting some advice from some mates who use similar techniques over on WargamerAU, I was introduced to Tamiya XF-86 Flat Clear. I specifically wanted a clear that I could spray through my airbrush, as the Tamiya TS-80 rattle cans are lacquer based and too thick of an application can cause damage to the underlying paint. I went down to Toyworld and grabbed from XF-86 and I have to say it’s very impressive. You just thin it like any other Tamiya acrylic and it provides a nice matte surface.

So all the parts got a coat and I then painted up the various optic sensors, followed a coat of gloss on the optics only. I then used super glue and 5 minute 2-part epoxy to assemble everything (epoxy is preferred as there is no danger of white hazing created from the super glue fumes).

Fiddler_WIP_18 Fiddler_WIP_19

Fiddler_WIP_17

One thing I have come to notice is that I really was a little too heavy with the brown wash application. At the time it felt like I wanted a really strong contrast, but in hindsight a little more subtle would be been better. In any case it’s too late now – everything is sealed with the matte clear coat!

Next up: dust effects!

WIP: The Fiddler Mech 4

Posted by Mangozac on May 16, 2013

Well last night I finished applying the oils. It took way longer than expected and I’m still getting used to working with the oils (slow drying time = be careful where you put your fingers!). The best thing about the oil paints is how they can be used in very thin, transparent layers to tint the colour underneath.

As mentioned in the last post, I’m using AK Interactive AK-121 OIF & OEF wash for the bulk of the shading/grime and applying thinned black oil paint for vents and metal areas.

In order to add some interest I decided to fade the upper panel surfaces with white oil paint and give that tired desert operation look. I just dotted on a few spots of white oil paint and then used a large brush to spread them out and blend evenly. The white paint has also given those panels a very matte appearance, making the contrast between them and the glossy un-faded panels very start. Once the model is given a coat of flat clear it should all look much more uniform.

Fiddler_WIP_14

Fiddler_WIP_15

As you can see I started some assembly. I’ll complete the assembly after I’ve done the flat clear coat, so that I can weather it all in a uniform manner. I’ll wait a couple of days before the clear coat – you need to ensure that the oils have cured sufficiently first.

So the processes left are:
- Flat clear coat
- Paint optics
- Grease and oil stains (have to be done after the clear coat so that they’re glossy)
- Dust weathering (pigments, etc.)

I secretly sat the torso on top of the assembled legs and it looks really exciting! Can’t wait to see it come together! I do need to start work on a base for it though – I have a simple dirt and concrete base in mind.

WIP: The Fiddler Mech 3

Posted by Mangozac on May 12, 2013

I have been making progress on this but have struggled to find time to post about it! This update was completed during the week, but I’m only now posting these images.

I’ve sprayed a few markings onto the Fiddler, inspired by those shown on Don’s latest render. To do this I took some measurements, drew up the markings in Inkscape and then printed them out. I then placed the printout atop some 18mm width Tamiya tape temporarily stuck to my cutting mat and used a knife to cut through both the paper and the tape. The tape was carefully lifted and fixed to the Fiddler.

This was done on both thighs and I also did a unit number marking on the top left of the torso.

One other thing I did try was to stipple on a small amount of liquid mask after I had applied the templates to the model (to simulate where the markings had been chipped or worn off). After spraying Tamiya white I removed the tape and the liquid mask, but the the result was less than impressive. Perhaps I just aren’t yet skilled enough in applying liquid mask but it simply didn’t give me the effect I wanted. So I brushed some Vallejo white over the top of the sprayed markings to make the chips less severe and much finer.

The masked thigh:
Fiddler_WIP_11

After removing the mask:
Fiddler_WIP_12

Unit marking:
Fiddler_WIP_13

Pretty pleased with the overall result. I’ve since given it all a coat of gloss clear and have begun applying weathering oils and washes. For vents and deep panel lines I’m using thinned artists’ oil paint. For everything else I’m using AK-Interactive AK-121 OIF & OEF wash (which is just a clay brown colour). The first time I tried the oil based weathering techniques (on my Superheavy Assault Walker) I had a lot of trouble because I hadn’t laid down a suitably consistent gloss clear coat. I’ve not made that mistake here however and applying the oils works like a dream!

I’ve found that the wash needs to be shaken up pretty regularly during use (like every 5 minutes) in order to keep the pigment nice and suspended – maybe you’re supposed to decant some of it into a palette rather than apply straight from the bottle. I’m about halfway through this stage and will have a photo update when it’s done.

Once oils are done I think we’ll be ready for final assembly (exciting!).

WIP: The Fiddler Mech 2

Posted by Mangozac on April 26, 2013

Soldiering on!

As you can see, painting is progressing. I was having an issue with the chipping fluid but I sorted it out: the Mig Productions Absolute Chipping product required you to also use the fluid to chip the paint (rather than just warm water as is used with hairspray and other dedicated products). However after painting all of the rest of the parts in one big batch and then trying to chip them it still wasn’t working as it should. I believe where I went wrong this time was the use of a clear coat over the German Grey colour. The chipping fluid has relatively high surface tension and the gloss coat prevents it from giving an even coat over the top of the gloss. Apparently you shouldn’t need to use any kind of clear between your base colour and the chipping fluid, but I was really paranoid about removing paint back to the actual primer. Further research concluded that I should mix in some Tamiya X-21 Flat Base with the gloss to flatten it down a bit and allow the chipping fluid to cover evenly.

I won’t be using the Mig Productions product again though. I’ve purchased some AK-Interactive Worn Effects fluid and will try that next time. Having to use the chipping fluid for the removal too means you go through a lot of the Mig Productions stuff, so the AK-Interactive product should be more economical too.

Anyway, on to the pics. Nothing too exciting here: you can see the failed chipping on the leg. I’m just going to have to do the traditional “sponge and brush” chipping technique. I’ve given all parts except the torso their grey paint. Once that’s done I’ll do the chipping, hit it all with gloss clear and then pinwash all of the details. Then weathering (the exciting bit!).

Fiddler_WIP_9 Fiddler_WIP_10

I think these shots show just how naturally matte Tamiya paints are: they make the Vallejo paint (the dark grey parts) look super glossy!

Hopefully I’ll get another update done over the weekend ;)

WIP: The Fiddler Mech

Posted by Mangozac on April 16, 2013

I’ll start off with full disclosure: bringing this design to resin has been my pet project for the past year. The Fiddler is an awesome design created by the talented artist Alex Iglesias back in 2010 (original artwork). An equally talented 3D modeller named Don Bradford then created an insanely detailed 3D animation model. Last year I arranged a license agreement, had it prepped and then 3D printed and now my mate Alan from Black Dragon Castings/White Dragon Miniatures is casting and distributing them. I got my hands on a pre-production kit ahead of the product launch at Salute 2013 this weekend in the UK.

Darkmessiah got one of the other pre-production kits and painted it in a fantastic digicam: http://www.coolminiornot.com/329738. I decided however that I wanted to paint mine more in line with Don’s 3D render: more like a modern US tank in a sand colour and with lots of worn paint. I figured it would be a perfect opportunity to use the advanced “hairspray chipping” technique. In stead of hairspray though I’m using the Mig Productions “Absolute Chipping”.

First up, some assembly shots ;)

Unbagged:

fiddler_WIP_2

I skipped pics during cleanup and assembly because it was kind of boring. So straight to the temporarily assembled model (it gets broken back down into sub-assemblies for painting):

Fiddler 1

I prime with my favourite primer: Tamiya Surface Primer (grey).

fiddler_WIP_3

Next up all of the parts got a coat of Tamiya XF-63 German Grey, followed by two coats of Pascoes Floor Polish (a clear coat). Note that I use Tamiya thinner too, as I find it works really well.

fiddler_WIP_4

From here on I’m in uncharted territory (for me anyway) so I proceeded just with the pelvis piece to experiment. I sprayed on two coats of the Mig Absolute Chipping and let it dry:

fiddler_WIP_6

Next I did some pre-shading for the main coat. I sprayed XF-1 Flat Black onto the bottom surface of the pelvis to shade the underside. Then XF-2 Flat White was painted roughly into the centre of each of the panels (except for the bottom panels).

fiddler_WIP_7

Over this I sprayed a coat of XF-60 Dark Yellow. At this stage it’s hard to see the effect of the pre-shading but in the past I’ve found that once the paint receives a clear coat it become much more defined. That’s just how flat the Tamiya colours are!

Immediately after cleaning the airbrush I set upon the part with some water, old, stiff brushes, a toothpick and a toothbrush. The idea is that the water causes the chipping fluid layer to dissolve in a controlled manner, causing the outer layers of paint to chip off. Unfortunately it didn’t work fantastically – I think either the chipping fluid needed more coats or the coats needed to be thicker. In the demo video for Absolute Chipping they brush it on so I might try that on the next part tomorrow night…

Still after a bit of perseverance I got some decent chipping effects. Unfortunately it did wear through to the actual primer (rather than the dark grey “fake primer”) in a couple of spots, but that will be easy enough to fix with a brush. I’m determined to perfect this technique, since all of the armour modellers make it look so simple!

fiddler_WIP_8

Stay tuned for more progress – I’m hoping to knock this project over pretty quickly!

WIP: Zeus Frigate 6

Posted by Mangozac on March 9, 2013

Sometimes projects go to a schedule, but most times they don’t. I had planned to get this finished a few weeks ago, but then the screwing around changing the broadside cannon designs, etc. dragged things out a bit. Oh well after some sculpting last night it’s now 99% done! All that’s left is the details atop the lance prow.

As you can see, the following pictures show the lance prow variant progress. I used my Sherline lathe to turn up the lance barrel and then decorated it with styrene and putty. Whilst sculpting the eagle I was cursing myself for not simply taking a cast of the first prow and hacking it up, but I guess practice make perfect! That said, I still loathe sculpting and don’t feel that my skills at sculpting eagle prows are improving much. I still love working with the Procreate putty for this kind of thing – leaves Greenstuff for dead!

Frigate_WIP_12

Frigate_WIP_14

Frigate_WIP_13

I’ve got a few Saturday morning errands to run, but I’m planning to finish things off and hopefully even get it into silicone this afternoon! So the next post should be pics of the resin casts…

WIP: Zeus Frigate 5

Posted by Mangozac on February 21, 2013

I haven’t been feeling happy with the weapons battery design so last night I threw some styrene together to try out the more common square cannon design. The hull area around the cannons still needs a lot of work and detailing, but I do much prefer the square cannons themselves. They really make this ship look like a scaled down version of the Zeus Light Cruiser. I know some of my followers prefer the domed cannon designs but I think this has sold me…

Frigate_WIP_11

WIP: Warhound Titan 5

Posted by Mangozac on February 19, 2013

Well over the weekend I decided to do a test of the asphalt planed for the diorama road. The other guys on the RA forum concurred with my reasoning that the Warhound would make a mess of standard road asphalt it walked on. I figure large main avenues of an Imperial city may be reinforced to support the weight of such heavy vehicles as superheavy tanks, but a smaller street would have just standard pavement, which is relatively thin and weak.

So I wanted to model heavily damaged asphalt, damaged not only by the Warhound’s steps but also potholes and other general traffic which causes potholes. To achieve this I wanted to try out a technique I read about on a military modelling site some time last year. Unfortunately I don’t have a link, nor can I find any references to it now. The idea is to use florists’ foam underneath a standard asphalt recipe (dirt, plaster, glue and black paint) so that once the asphalt dries it can be deformed by applying pressure, creating very natural looking cracks and damage.

So we start off with a slice of florists’ foam:

Warhound_WIP_8

Then mix up some asphalt. I used dirt (I was in a hurry so just grabbed it from the backyard but usually you would want to sieve any impurities out), plaster of paris, a little PVA, black acrylic paint and some water. You really need to make sure you don’t skimp on the paint: in the end it turned out far too light (although remember in real life asphalt fades as it ages, so unless you’re modelling pristine new pavement you don’t want it to be totally black).

Warhound_WIP_9

Apply the asphalt mix to the foam. Note that the mix won’t actually stick to the foam so it can be a little tricky. To smooth it out I ended up placing a piece of cling film on top and then using a glass bottle as a rolling pin. The only disadvantage of doing this is that it can leave the top surface a bit too smooth, so you may need to rough it up again afterwards. I’ve read that you can use some sandpaper on the cured asphalt mix, but I’d be weary of sanding marks.

Note that you don’t want the asphalt to be too thick. In real life the actual asphalt layer is only about an inch thick (generally atop a bed of crushed rock) so try to get your model asphalt down to about 2mm thickness (which is still far too thick according to our scale, but for practicality will work well).

Warhound_WIP_10

The weather here has been pretty wet so it took the asphalt about 48 hours to cure properly. I tried doing some impressions earlier and later and found that the most realistic results came from doing it later. It’s hard to tell but the Titan toe has been used to compress the asphalt is it sitting on and in person it gives a really authentic subsided/crushed effect. It would look even better with a thinner layer of asphalt (I applied it too thick). The pothole looks great though! You can see that once it dried the colour was nowhere near dark enough.

Warhound_WIP_11

So the next step is to start roughing out the diorama! I did do some priming of the Warhound last weekend so I might even begin putting down some basecoats soon enough. Although I’ve got a pretty hectic couple of weeks ahead of me so it might be a little while before the next update…

As always, happy hobbying!