Posted by
Mangozac on October 28, 2013
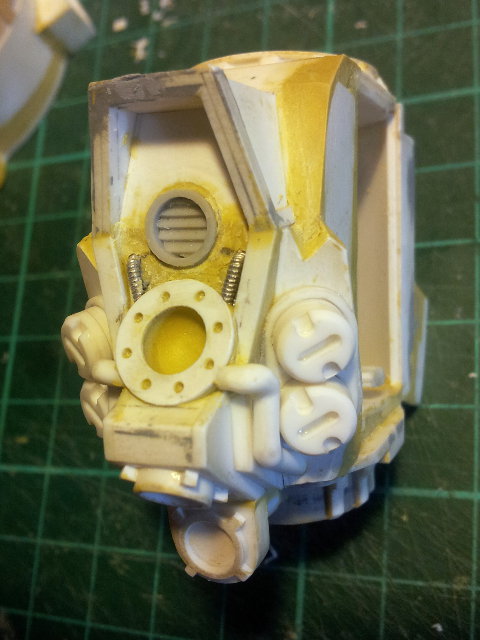
Just a quick interim update today. Detailing work is progressing slowly (and was hindered by me having to help my girlfriend with her web design assignments the last couple of weekends). You can see I’ve been working on the front of the torso. As my mate Seb pointed out when I showed him the other week, it’s a shame that much of it will be hidden behind the chest armour. I probably should have just left it bare, but those who know me know I’m too anal for that! 
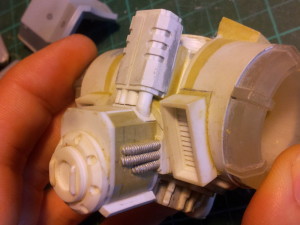
Detailing the rear reactor and exhaust system is also progressing nicely. The reactor itself still needs a lot of detailing though.

I’ve been hoping to use some brass etch for a lot of my detailing, but my latest experiments (trying to do it photo-resist style using Electrolube PRP) have been failures. The photo-resist is just way too temperamental! I should go back to using the laser transfer film (but I need to find someone with a non-Brother laser printer because Brother toner doesn’t work with the transfer film sheets).
Posted by
Mangozac on October 7, 2013
As most of my readers would know, we use combinations of pressure and vacuum to remove bubbles from resin during the casting process. This is facilitated through the use of a pressure pot (this is a really old picture of mine):
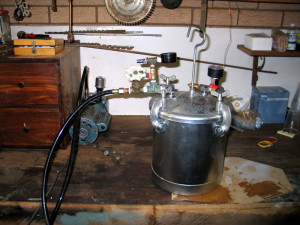
Generally people use spray painting pressure pots converted to suit resin fasting duties, and in the US the cheapest options is usually the Harbor Freight item.
Over the past couple of years there have been a couple of instances of people having their pot fail. While the Harbor Freight pots are rated to 80PSI, we recommend running them at about 60PSI (this gives an adequate level of bubble removal), which should be well within any tolerances in the design. One RA member actually went through 3 of the Harbor Freight pots before he had an non-faulty one.
We have just had another RA member’s pot explode while he was standing over it (“explode” may sound a little more dramatic than it actually was) and while he was fortunately unharmed, I must stress that this can be potentially VERY dangerous. Many people don’t realise just how violent compressed air can be.
Because of this, we advise that people in the US do NOT purchase the Harbor Freight pressure pots to use for casting (or anything else for that matter). While it’s a lot more expensive, we highly recommend the C.A. Technologies 51-201C Resin (Mold) Casting Pot (http://www.finishsystems.com/resincastingpressurepots.html), which is a high quality unit and requires zero modification for casting.
Here in Australia we still recommend the 10L pressure pots sold by Super Cheap Auto (regularly on sale for $100), as per the picture of mine above. As yet I have not heard of any dangerous problems with these (I did have the thread on one of my clamping bolts strip so replaced them all with high tensile steel).
Remember that working with pressure and vacuum can be dangerous, so please everyone be safe! Never exceed the maximum pressure rating of the pot you are using.
If you have any concerns or questions please don’t hesitate to ask in the Resin Addict forum.
Posted by
Mangozac on October 5, 2013
It’s been a month since my last update, but fear not the Centurion is still progressing! I’ve been refining lots of little things and find it hard to find motivation to document the progress when doing that kind of work.
First up, here’s the front of the torso. As you can see, the front armour has been completed and received a coat of primer. It still requires some final detailing but the base shape and banding is done. Shoulder pads now mount properly onto the top of the shoulders using locating lugs. You can also see the current progress on the head.

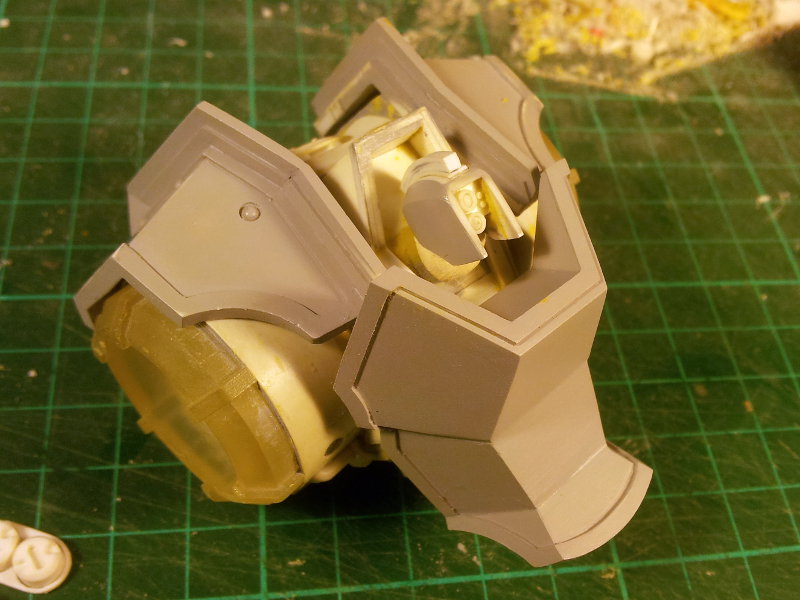
This next shot I threw in just because. It looks a bit empty down between the front armour and the torso, but I have some detail pieces that will be mounting in there to fill it out a little.

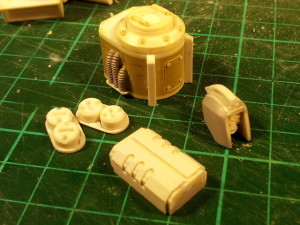
Here’s a shot of a few of the detail pieces currently under construction. We have the rear reactor, the head, the torso front detail pieces and the exhaust. All pretty self explanatory. The exhaust was originally supposed to be made on my CNC router, but it’s out of action at the moment (a dead motor driver has motivated me to build an entire new control system for it) so I did it all by hand and it actually turned out really well. I must be getting pretty good at working styrene? 
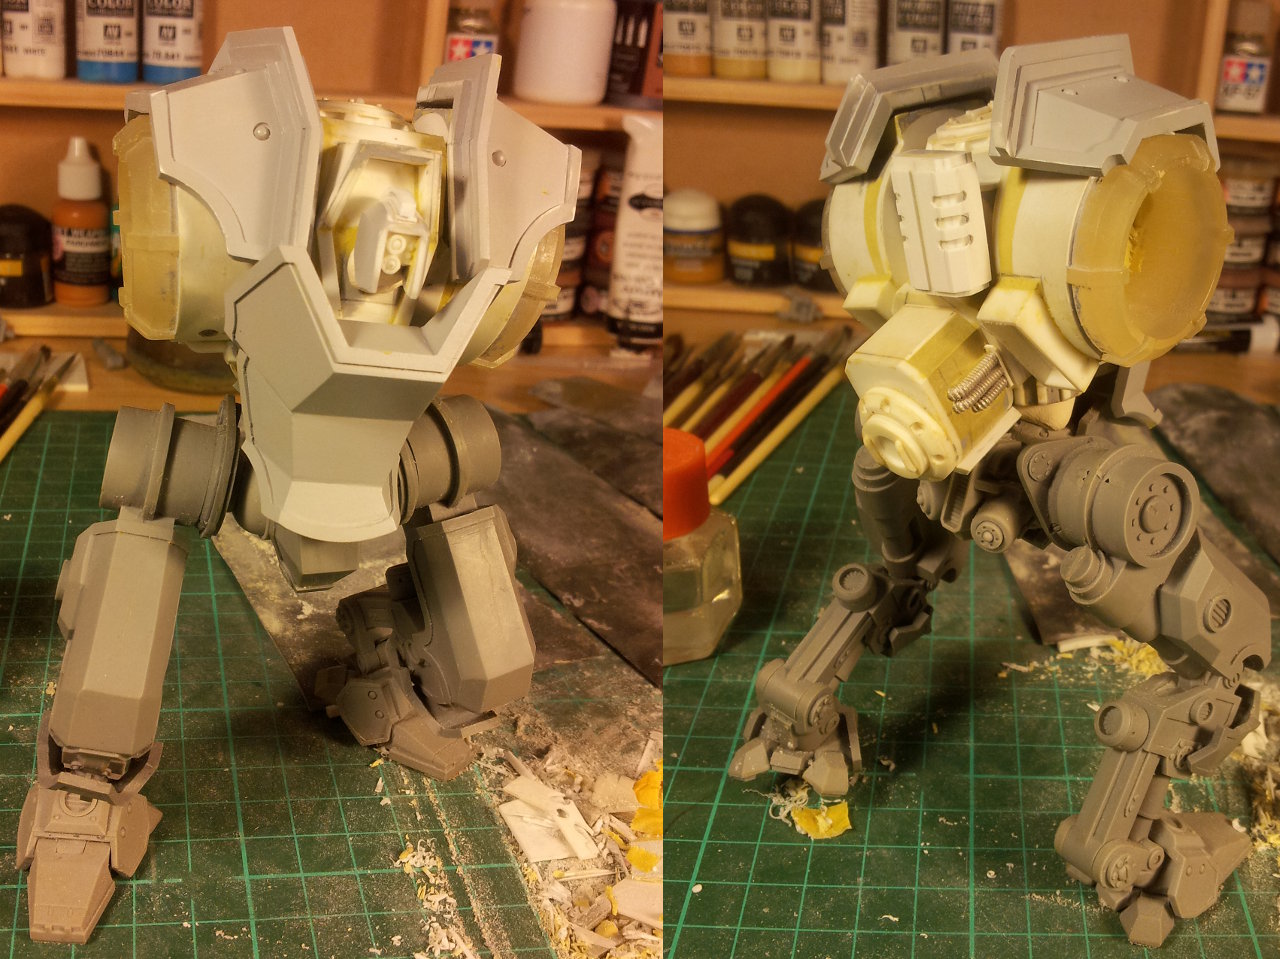
Finally I’ve also grabbed a couple of blue-tacked together shots of the entire model. The waist piece was replaced with a glob of blue-tack so the torso is sitting a bit lower than it should, but you get the idea. There’s still a lot of fill-in and detailing work to go, but it is progressing nicely!

No big plans for the next step other than to keep progressing on all of these little details. I’m currently working on the neck and detailing that area. I’ll try to post some more frequent updates…
As always, thanks for reading!