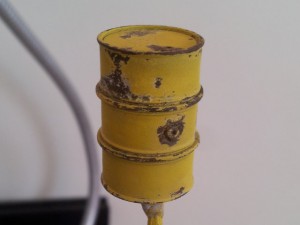
Comparison of Chipping Effects
Posted by Mangozac on November 15, 2012When I posted the results of my hairspray paint chipping test on the RA forum Munkey Joe suggested an alternative technique he had used where masking fluid is sponged on to create the chipping effects. I had also seen mention of a technique involving salt elsewhere on the internet and decided that a comparison of the techniques was in order!
I primed another three fuel drums and painted them with the blotchy brown rusty colour as used last time. Drum #1 was given a coat of some dirt cheap “Home Brand” hairspray I bought specifically for this purpose. On drum #2 I used a bit of blister pack foam to sponge on some Abteilung Liquid Mask in random rust patterns. God that stuff smells nasty!
For drum #3 I wet it under a tap and then rolled it around in some freshly ground Himalayan crystal salt. My salt grinder has a feature where you can adjust the grain size so I made sure that I had a nice variety. The water isn’t the best fixative and a lot of the salt falls off, but I was surprised by how much remained.
A few days later I sprayed the colour coats: first white and then the yellow/green. Immediately afterword I began the chipping process.
This time the hairspray technique did not work very well at all. Perhaps I didn’t spray a thick enough coat because the paint just did not want to chip off. I was finding that if I was too rough I was chipping all the way through to plastic, which completely ruins it. Fail.
Sorry MJ but the liquid mask technique was also a bust. I used a pair of tweezers to pick the masking off and found that it just exposed massive areas of the rust underneath in a very fake, forced looking style. I didn’t like it at all. I did try to improve both this and the hairspray drum by stippling some orange onto the rust areas, but I think this actually made things worse.
By and large the best result was from the salt technique. The salt grains rubbed off easily using my fingers, leaving a very random, believable looking rust effect. The only downside is that the salt technique didn’t expose enough rust due to not enough salt sticking in the first place. In light of this I think the very best technique would have to be a combination of hairspray and salt, as I’ve seen mentioned elsewhere. You would first spray the part with hairspray and then quickly apply the salt – the hairspray providing a better fixative than just water.
Here’s the results, left to right:
Hairspray, liquid mask, salt

I’m also much happier with the green colour for the drum than yellow. The problem is that that green was a random mix at the time of a standard green darkened with some grey! Oh well the next step is to drop the yellow drums into some stripper and start them again.


