Posted by
Mangozac on February 29, 2012
OK I’ve got a quick update for tonight. The problem with regards to updating at the moment is that I’ve been doing little bits of work on lots of different pieces, working out how the torso is going to go together. My sculptor is going to have the naked figure done in a weeks time, at which point it will be moulded and duplicated. He will continue sculpting over the top of a resin cast and I will use a cast for proportioning the cockpit. Since the cockpit design will largely affect the torso layout I’ve got to wait until that is done before the torso can really come together.
Anyway I’ve been doing some more work on the waist, as you can see in the first pic. I’m really happy with how it’s coming along and am actually considering not covering it up with the amount of armour panels I had originally planned!

This next pic is a heavily WIP shot of some of the other torso parts. In the background is the very basic form of the reactor, which will hang diagonally downwards from the rear of the waist. I’m not happy with that slotted disc in the middle so will be doing a lot more refinement there. The area between the two styrene panels will be filled with putty to bulk it up. Lots of hoses and technical looking bits will also be added.

In the foreground are the beginnings of the two cylinders that will make the shoulder arm/weapons mounts. Obviously still pretty bland at this stage – again lots of detailing to do 
That’s it for now. I guess I’ll continue work on the reactor, and make a start on the vents which will mount on the front of the torso (as per the sketch Xeones did)…
Posted by
Mangozac on February 27, 2012
When Mark Mondragon (isn’t that just a cool name?) of Dreamforge Games posted some 3D model WIP shots for some figures for his Iron Core setting we all knew he was on to something cool. He decided to jump on the kickstarter bandwagon and with such promising designs I decided I’d back him on it. I
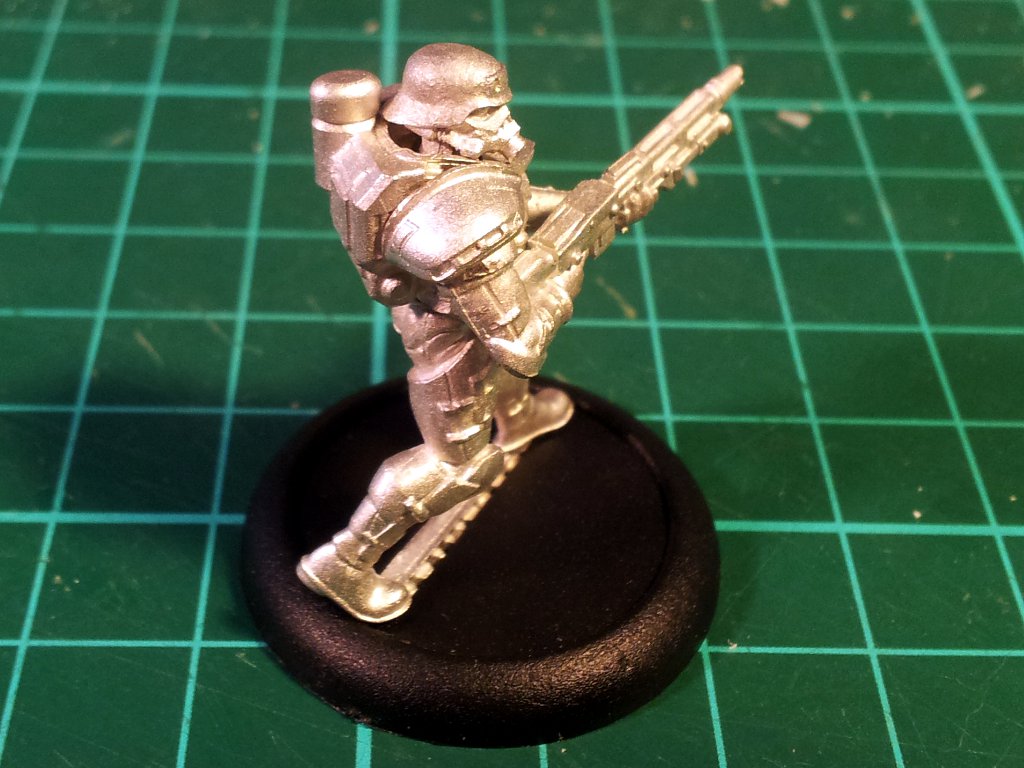
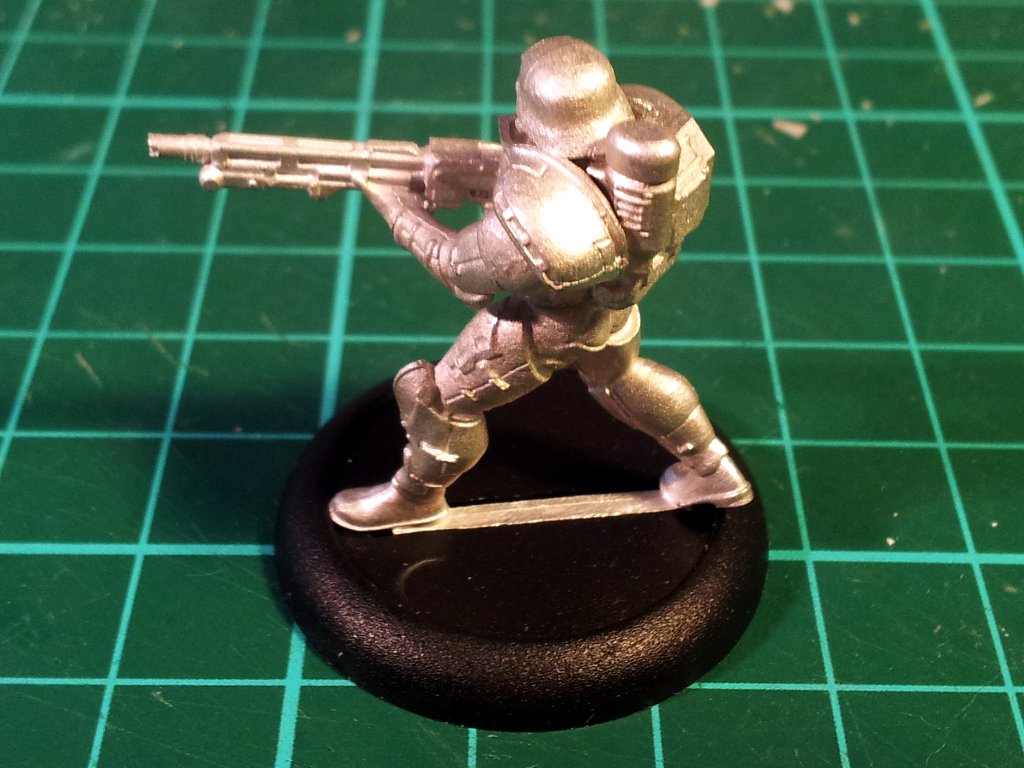
Mark was working on two troop types: Kriegsmarine and Sturmtruppen, being the standard and elite troops respectively. It was the Sturmtruppen that grabbed my interest so I decided to pick up a pack of 5 of them in the kickstarter campaign. It took a while for Mark to finalise the designs (he went through a couple of 3D print revisions) and get them cast but I finally had a package arrive the week before last.
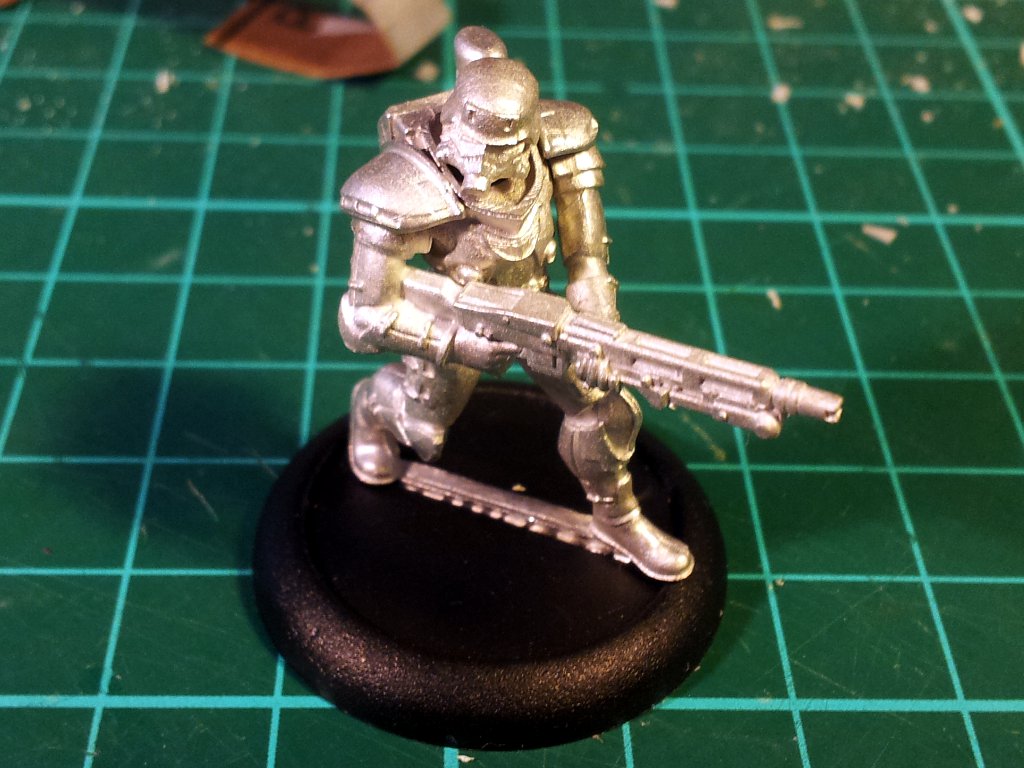
I’ll be honest and say that when I discovered that the figures would be metal cast I was a little disappointed. I’m sure it will come as no surprise to hear that I just have a strong preference for resin – this is mainly due to the superior level of detail that a resin cast can reproduce. Mark knows his stuff and not only does he have a very good spincaster, but he has designed the figures with a perfect level of detail for metal reproduction. Not to mention breaking them up into parts perfectly.
The casting is perfect. Now I’ll be honest and admit that I haven’t bought all that many metal miniatures over the years, but those that I have bought were all Games Workshop. Let me say that the Dreamforge metal casting quality leaves the GW casts for dead. There really is no comparison. The slight mould lines that are discernible are well placed to make removal easy. There was no mould slip at all. I was impressed!
I only have one negative comment: print lines. Many miniatures manufacturers have turned to 3D modelling to design their kits. In order to translate the 3D model into a master pattern that can be moulded a 3D printer is used. Unfortunately all but the most insanely expensive 3D printers produce striation-like lines in the finished print where each layer slice meets the previous. The 3D print therefore needs to be have its surfaces cleaned up by hand to ensure a smooth finish devoid of these print marks. I was quite shocked recently to see some close up images of the new Secret Weapon 6×6 Rapid Assault Vehicle which showed really prominent print marks on some of the flat surfaces of the cast models. To be blunt this is unacceptable.
But I digress! The reason for the explanation of the print lines is that I did find some on my Sturmtruppen minis. The top of the collar still has these obvious marks visible, but at least they are very quick and easy to remove from there with a file. In fairness to Mark I know that he does spend a lot of time and effort cleaning up his prints prior to moulding so it’s quite possible that the top of the torsos just slipped through. And the rest of the models are flawless so I really can’t deduct any points for this
I’ve only assembled one of the Sturmtruppen as a test. I figure I’ll wait until I know what I’m going to do with them before I assemble the rest! I guess I’ll build up some kind of vignette/diorama to mount them on (I’ll just add that to the list of projects!). Certainly within the 5 figures I received the poses seem varied enough. There’s also a couple of different weapon types. Actually what I think is even more enticing is the “command squad” style figures that Mark has planned for future release.
So all in all I’m very pleased with the Dreamforge figures and couldn’t recommend them enough! It will certainly be exciting to watch the range grow as Mark expands and fleshes out his Iron Core universe.
Posted by
Mangozac on February 21, 2012
Well I thought it’s about time I posted an update
If I’m honest I kind of wore myself out a bit over the first few weeks stuck back into this project, so progress has slowed to a more subdued pace. This is probably mainly due to me having a heap of other stuff going on, such as spending the last weekend catching up with mates on the Gold Coast.
Anyway I’ve been working on what is best described as the waist/spine piece. The arrangement of the pelvis and groin armour means that the waist connection needs to be offset to the rear of the mecha. This allows the waist to rotate without fouling on the groin armour. I decided to incorporate a ball joint that will form the “spine” and allow the torso to bend and tilt. Similar to the hip ball joints the spine will have a pair of pistons on the front. Of course much of this will be covered with armour plates on the actual model!
This is the waist piece:

The area below the ball will have a heap of recessed hex bolt heads. There will also be some triangular braces added. I actually screwed it up and had the piece at too steep an angle so have just tonight hacked it off and reset to a shallower angle. I’ll fill all of the gaps with some Milliput after I post this
And just to show what’s going on here’s a pic of it mounted to the pelvis:

Plenty more cool ideas for the torso design are milling around in my head so I’m feeling confident about my “design as I build” approach!
Posted under
Uncategorized
Posted by
Mangozac on February 15, 2012
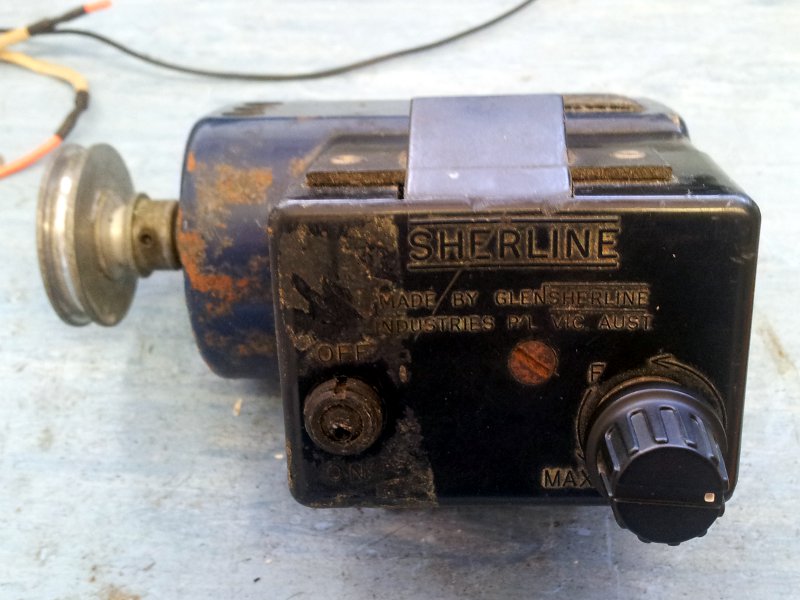
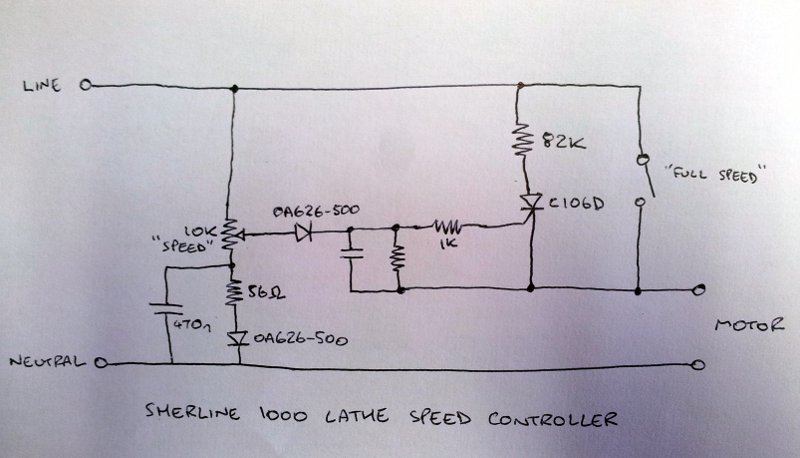
Huh? Isn’t this a hobby blog? What’s with this electronics stuff? Well over the last 18 months I’ve become quite reliant on my Sherline model 1000 lathe (and its attachments) for a large portion of my modelling work. It has an electronic speed controller built onto the motor and I had noticed that the maximum speed had been gradually getting slower. Not surprising since the machine is about 10 years older than I am!
Well a couple of nights ago the speed controller gave up and would only give two speeds: slow-crawl and insane-fast. So this morning I pulled it apart to have a look at the problem.
The setup is a basic DC motor running on half wave rectified 240VAC, with an SCR chopping the wave to control the speed. You can see a schematic I reverse engineered from the PCB below. It’s using pretty old-school components, including some carbon composition resistors. I at first suspected one of the semiconductors but some basic testing with a multimeter proved that the diodes and SCR were most likely fine. So I checked out the speed control pot, thinking maybe the wiper had gotten dirty. But that too seemed fine. Capacitors checked out OK so the last things left were the resistors.
I can’t recall ever having a faulty resistor, but I figured since these ones were so old I’d best stick the ohmmeter across them. Lo and behold, the 82k resistor in series with the SCR anode had crept up to approaching 1 meg! I pulled it off the PCB and checked again. The expensive Fluke meter never lies! I had no idea what the power rating of the failed resistor was, but I found a similar sized part with the same value in my box of odd resistors and stuck that in. I’ll check it again in a few weeks and make sure there’s no signs of overheating that would present is the power rating of the replacement resistor was too low.
So that’s the story! I decided to post it here in case anybody else has the same problem and is Googling it
Posted under
Uncategorized
Posted by
Mangozac on February 11, 2012
I had a play around with the brass etch today and thought I’d post a quick update. I ended up putting two of the smallest size icons on the sides of the bottom pelvis armour banding and think it’s turned out quite nicely. I also hit it with a final coating of Mr Surfacer to prep it for moulding (along with the pelvis). I guess I’ll make the moulds up tomorrow.

Just for kicks I also hit the brass etch sheet with a coat of Mr Surfacer to bring it all up to a uniform colour:

Looking at it like this the depth of etch seems just fine. The only reason deeper etch is necessary is to make it easier to cut the individual icons from the sheet. I really like the icon with the laurels around it – for reference the largest one is 20mm diameter. I’ll do one with an additional circular border around it to use as a main icon somewhere on the torso. Although 20mm diameter is far too big – the 14mm ones produce adequately sized details that will reproduce in resin nicely enough.
I’ve played around a little more with my clay torso mockup but I’m going to blame my inability to produce something really worthwhile on the fact that the hot weather makes the clay too soft to work with, rather then the fact that I just suck at sculpting like that :rolleyes:
My friend Xeones on the Resin Addict forum made some great suggestions and did a cool torso sketch based on my clay mockup. While it’s not exactly the style I’m planning, he has introduced some great visual ideas and so I believe I now have a solid enough plan of what I’m doing to start work on the actual torso model. Hopefully I’ll have some reportable progress (i.e. pics) during the week
Posted by
Mangozac on February 9, 2012
Brass etch update: we have some success!
Using Canon laser toner certainly helped, but I also after some further reading found that someone was recommending running the brass and press-n-peel sandwich through the laminator 25 to 50(!) times. I settled for around 10 (I didn’t actually count) with my modified high temp laminator and that seems to have given a good result. Out of interest though I will try again with the Brother toner and a higher number of passes.
Here’s the progress shots. This is the press-n-peel film with the artwork printed onto it, next to a nice clean piece of copper:

The press-n-peel is then placed on top of the brass sheet and the two run through the lamintor several times. It’s then quenched in water and the press-n-peel peeled off. This leaves you with the top half of the next picture:

You then cover the back of the brass with something to protect it (I used packing tape which seems to have worked well) and drop it into a bath of etchant (I use ferric chloride). The etchant was a bit old so it took ages (which also adds the danger of over etching parts) but in the end I ended up with the bottom half of the above pic.
That mottled effect of the brass really isn’t as pronounced in person and isn’t a problem. The etching depth wasn’t as deep as I’d have liked so I will test a new piece with fresh etchant to see if I can’t get better results. I will hit this piece with some Mr surfacer though (the brass etch is too fine to risk praying anything from a rattle can onto it) and see just how (in)appropriate this depth is.
The really stupid thing is that after all of this, it turns out that the smallest icon size I made is just slightly too big for where I was thinking of fitting it on the pelvis armour! D’oh! I might just stick one of the bigger icons in a different spot…
While I was waiting for the etching process I also built a stand for testing out torso sculpting but I forgot to take a pic. Will do that tonight