Posted by
Mangozac on January 27, 2015
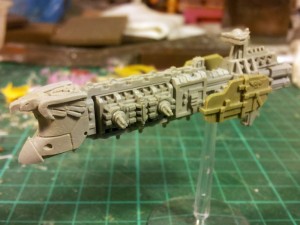
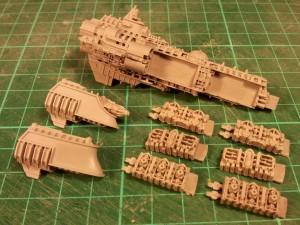
So for a while now I’ve been promising some people that I’ll complete the set of Zeus weapons modules. Truth be told I made a start on these before I went to Europe in mid-2014, but it’s only over the 2014 Christmas break that I got around to finishing them.
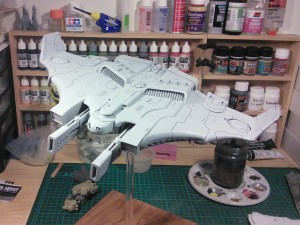
Overall I’m pleased – I think I’ve managed to fit the Zeus aesthetic appropriately. I went for something different with the ball turrets, although I think the barrels may be a little too long – I might shorten them for the production versions…

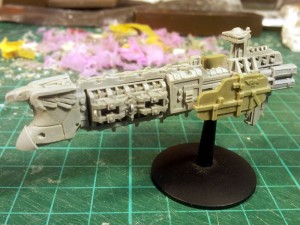
Here’s what they look like fitted to a Zeus Light Cruiser:
I’ll make some production moulds and cast up a heap of them soon. Keep an eye out on here for the announcement of when they’re available for purchase 😉
Posted by
Mangozac on December 1, 2014
Well after many months in the making we’re excited to announce that Battlegroup Helios is now live. Battlegroup Helios is our new range of fine scale, highly detailed, boutique quality models for use in starship-level space combat wargames. Our first cruiser sized models, the Dreadnought and Firedrake are now available for purchase and we’re working hard on expanding the range shortly with both smaller and larger ship designs (in addition to new fleet styles in the future). We’re only a small operation so initial stocks will be limited, but we are doing our best to produce more models for you guys.
Check out the site at http://www.battlegrouphelios.com
We’ll have pictures of the models Vaaish is painting very soon!
Posted by
Mangozac on November 3, 2014
Progress continues! I’ve been doing more detailing and completed much of the bottom of the ship. I’m ready to do the final pass of detailing but before that I had to hit it with some primer to check for smoothness in a few spots. It’s mostly good, I’ll just have to run around with some Milliput to clean up a few areas.
The next step is to do all of the deck detail inset into the “intake” areas. I’ve been putting that off because it’s going to be really fiddly and there’s a lot of it to do…
Oh well, no pain no gain!
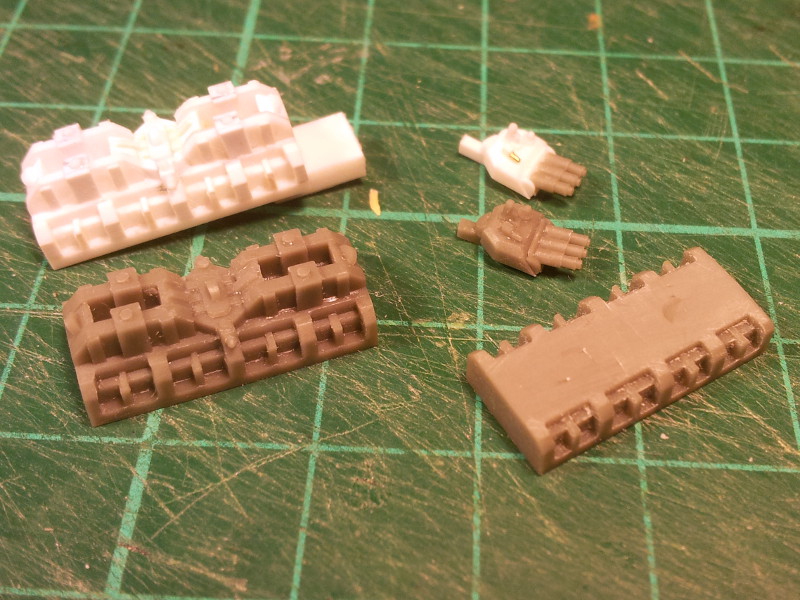
Oh and rather than make a second post I might as well share this here too (it is related):
This is the set of production master parts, taken from the first moulds of the 3D prints. I’ll use these to make multiple new sets of moulds which will in turn be used for mass production of the Dreadnought and Firedrake kits. Everything else is lined up ready to launch the new kits as soon as I’ve built up some stock. Soon, I promise!
Posted by
Mangozac on October 22, 2014
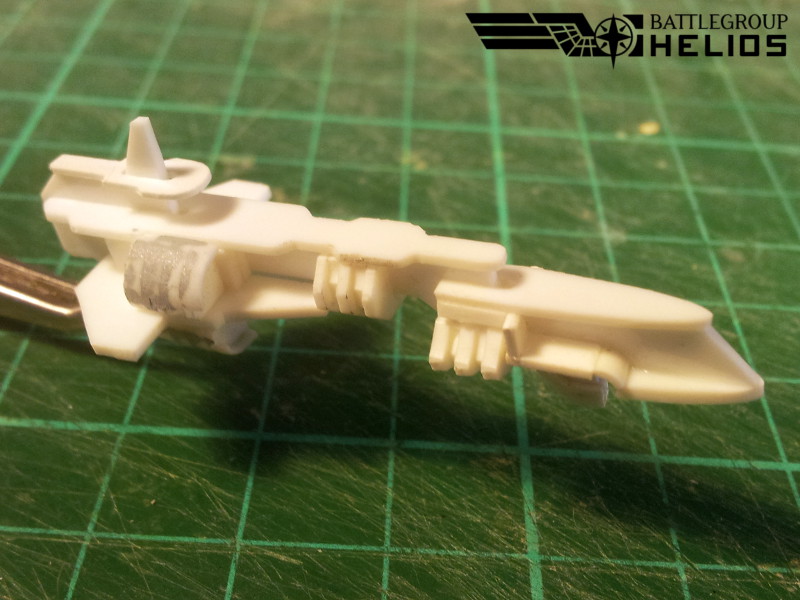
I’ve had a heap of real life stuff going on lately that has been diverting my attention from hobby stuff. I’ve lately managed to get some more progress done on the Helian Frigate though:

There’s not a real lot to talk about. The prow has been separated from the hull (to facilitate casting). Detailing is progressing slowly. The prow is mostly done and just needs a coat of primer before I can add the final small details. Next job is to start detailing the underside.
For those who aren’t aware the Battlegroup Helios site is up at http://www.battlegrouphelios.com/, but the actual site content won’t go live until we have our first products ready to go. Vaaish has done an amazing job on the site and you’re in for a real visual treat!
Posted by
Mangozac on September 29, 2014
Made some more progress over the weekend. The prow banding has been done (which was actually far easier than I was expecting) and more work has been done on the stern. The really fine detailing has begun too.
I’m now deciding whether to chop the prow off off or not. It will make casting easier if the prow is separate to the rest of the model, but it makes casting faster and cheaper if it’s all one piece. The downside to having it single piece is that there will be a gate attaching on the bottom of the prow, so removal will leave a flat, featureless area…
Anyway it’s progressing nicely 😉
Posted by
Mangozac on September 24, 2014
Just a quick update with a bit more progress to share. The prow and bridge areas have been puttied in and engines have been mounted. As you can see I’ve started detailing the engines, but there’s still a bit of work to do there. I need to hit the prow with some primer to check for smoothness and ensure there are no issues where the putty meets styrene. It’s hard to tell, as there was superglue involved in the construction and because of its relative translucency it will appear as a gap to the naked eye.
Posted by
Mangozac on September 19, 2014
Not much progress to show compared with my last post, but I did discover something interesting I wanted to share.
So many of the CNC cut parts are mirror images, which means to make them I just drew one side and then mirrored a duplicate in Inkscape. But I discovered that with all of the mirrored parts one side was slightly smaller than the other. On larger parts this wasn’t an issue, but on smaller parts it’s really obvious. It was quite perplexing!
After giving it some thought I realised what the problem is.
Styrene is not a great material for machining. It has a tendency to melt very easily so you have to have your cutter and feed speeds very correct for the depth you’re machining at. It turns out that feeding with the cutter rotation direction will take off more (or maybe less, I’m a bit confused now) material than feeding against the cutter rotation direction. When the parts are mirrored in Inkscape, it also inherently reverses the direction of the paths, so that the two mirrored parts will end up with slightly different sizes. Fortunately it’s easily fixed: simply use the reverse paths command on the mirrored paths.
The curved “intake” looking sections adjacent to the bridge area are where this problem was really evident. What’s more the multiple passes used to cut the shapes from the 6mm thick styrene (4x 1.5mm sheets laminated together) had left very prominent marks on the sides of the parts.
So I created new toolpaths with a new machining strategy: first the little undercut areas are milled out. Then 5 passes are made through the styrene to cut out the shape, with a 0.3mm offset (so that the part is 0.6mm bigger in each direction). The cutter can then be run around the actual part size shape at full depth, since only a 0.3mm shave is being taken off. This creates a perfect part with perfect, smooth edges!
Here’s what it looks like post machining:
Next up: engines!
Posted by
Mangozac on September 17, 2014
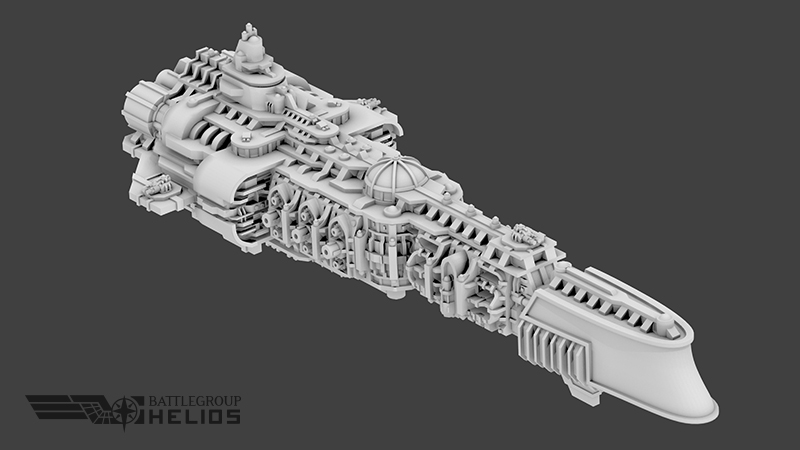
It will be pretty obvious to my followers that I’m a big fan of small scale, highly detailed space ship models. My good hobby friend and mega talented artist Aaron Dickey (known online as Vaaish) is also an aficionado of all things small scale (his Epic 40k models are arguably some of the best painted in existed). We were both bummed at the demise of the Battlefleet Gothic range over a year ago and set in motion plans to create our own line of highly detailed space ship models in the aesthetic that we love. Thus Battlegroup Helios was born.
Aaron has come up with a beautiful style for the first fleet (known as Helians) and created a stunning 3D model for the cruiser sized vessels (you can read about it here). Now that the 3D printing is under way (we had a couple of false starts) I have begun work on the Helian frigate design. I’m doing this as a traditional scratchbuild (although maybe I should call it a hybrid scratchbuild, considering the processes I’m using), since I prefer to work like that rather than 3D modelling.
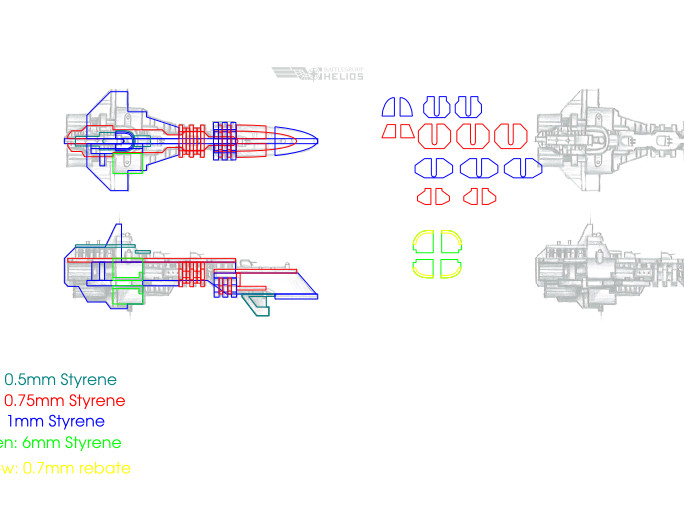
Fortunately Aaron flexed his creative muscles again and drew me some awesome sketches to work from:
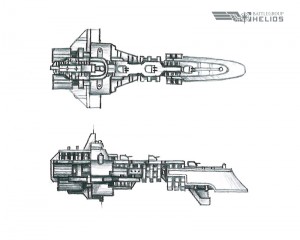
I then used Inkscape to draw vector artwork over the top of the sketches, working out all of the shapes required for the main forms of the design. Note how close Aaron’s freehand symmetry is!
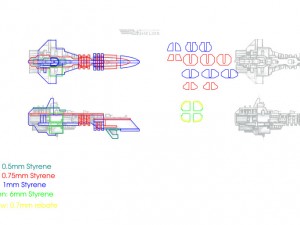
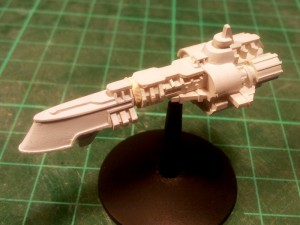
From there I used my CNC router and a 1mm diameter cutter to cut out the shapes from various thickness styrene sheets. I forgot to take a photo by the result looks very similar to CNC cut terrain as it is supplied. It’s then a matter of trying to work out how all of these tiny bits are supposed to go together. And I do mean tiny: the parts look much larger on screen, but the overall length is approximately 55mm.
The base shape is starting to take form. Things are very rough at the moment and not many details are actually glued on (they’ve just been sat in place for this photo), but it gives a pretty good feel for the design. It’s now just a matter of slowly filling in details. My next step is to fill in the prow area with Milliput.

I’m trying to get a little bit done each night, so hopefully it shouldn’t take too long to complete. Once I have some resin copies I’ll then be cutting them up to make other weapon fitout variants.
Thanks for looking!
Posted by
Mangozac on August 15, 2014
A while back (last year I think) I scored a secondhand Tau Tigershark AX-1-0 (the one with railguns) from someone. It was partially built (not that it has that many parts anyway) but in really poor shape. The casting quality was pretty ordinary and the builder hadn’t done any mould line removal (in this case mould slip scraping and filling).
Since it was far back in the project queue, the Tigershark sat in its box until last weekend when I felt a sudden surge of inspiration. This came in the form of watching some videos of Adam Savage’s (of Mythbusters fame) workshop and all of the cabinets full of cool stuff he has! I looked over at my cabinet and other than the SAW, Fiddler and Mega Dread it’s only housing the mass of partially painted Warhound parts and some books (glass cabinets are a great way to store things dust free!). I wanted my cabinet to be adorned with more beautiful miniatures, so I grabbed the one that I figured would be the quickest and easiest to assemble, plus is the biggest unbuilt model I have: the Tigershark!
Cleanup wasn’t as painful as I’d expected. A bit of cutting and everything fit nicely. Some Milliput to patch up any gaps and we’re good to go. As this is a very static display model, I glued the cockpit (which also functions as an escape pod) shut and to the hull. Same deal with the landing gear doors.
To mount it I went with the simple option of a 12mm diameter clear acrylic rod mounted to a nice block of wood with a routed edge. I’ll give it a coat of varnish later. I drilled the 12mm hole in the hull at an angle so the Tigershark mounts in a “banking” position.
Once I was happy with everything I gave it a coat of primer. For this I tried airbrushing on some newly acquired Alclad II Grey Primer. I have to say this is seriously nice primer, easily comparable to our good old favourite Tamiya Grey Surface Primer! While the health warnings on the bottle are pretty unpleasant, I’m pretty sure the Tamiya cans say the same thing, except since it’s in Japanese I can’t read it. Applying the primer through the airbrush is far more economical than the expensive Tamiya cans (especially now that my local hobby store only stocks the small cans of primer for a ludicrous price). I’m really pleased with the Alclad II primer and will certainly continue to use it in the future.
For now the Tigershark will be placed in the cabinet in all it’s primed grey glory. That’s good enough for now – I’ll worry about adding colour later on 😉
Posted by
Mangozac on August 6, 2014
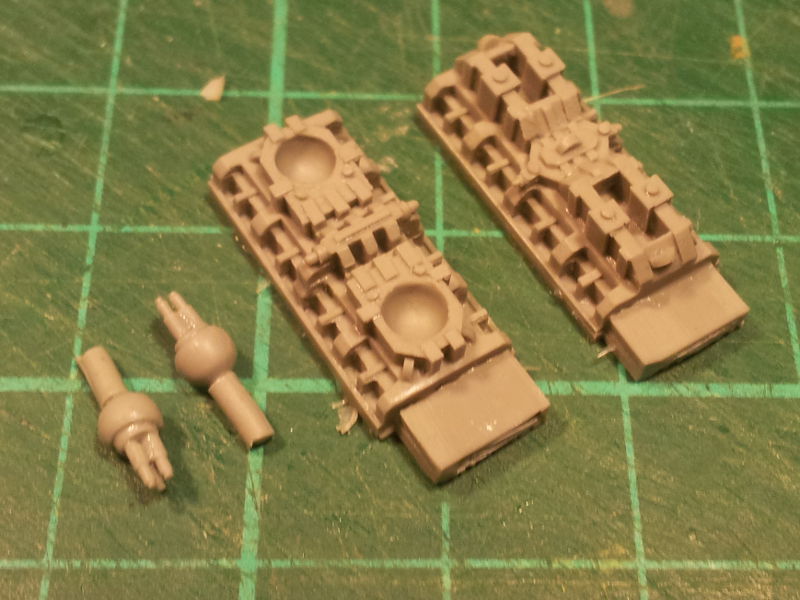
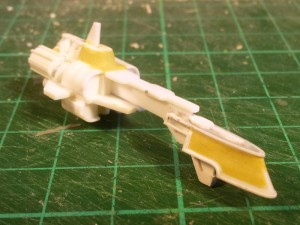
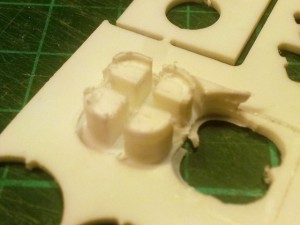
So here’s a little something else I’ve been working on recently: some alternative weapons modules for the Zeus Cruiser/Light Cruiser.
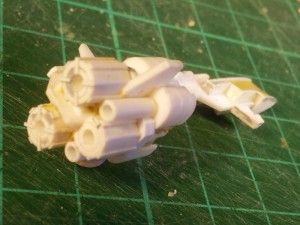
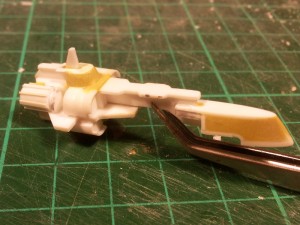
I originally set out to make a beam turret deck but somewhere along the line made some design decisions that I didn’t like so it got converted into a hanger bay. I also built up a triple-barrel beam turret (using the barrels I made for the Strike Cruiser Conversion Kit) but it turned out a little too big to use on the weapons modules.
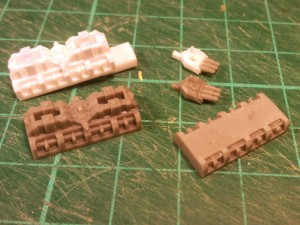
But all is not lost! I’ve moulded up the hanger bay and have sanded much of the structure off a resin copy. I’ll use this as a base for a new beam turret deck 😉