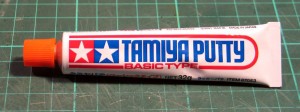
A few months ago I discovered that my local hobby shop was stocking a larger range of Tamiya products than it had in the past. One of these new products was the Tamiya Basic Type Modelling Putty:
This kind of putty serves a very specific purpose in the world of modelling and scratchbuilding: gap filling with a very fast curing time. You see traditionally many modellers with a wargaming background would just use Greenstuff, Milliput (my preference) or many of the other similar products available when a gap or seem needs to be filled. The problem with using such two-part putties is that they require quite a long curing time (at least 12+ hours) to get to the point where they can be further sanded or worked with. When filling very small gaps this curing time can really destroy productivity.
Enter the single part putty.
Single part putties are essentially really thick primer (think the consistency of toothpaste) that comes in a tube. They are generally lacquer based and from the moment you squeeze a portion out of the tube it begins to set quite rapidly as the lacquer evaporates. So fast, in fact, that the work time is likely to be as little as 15 seconds – enough to quickly and roughly apply the putty to the model with a sculpting tool. 15 minutes to 1 hour later (depending on the thickness applied) the putty will be fully cured and you can then continue on with the model.
Because of the relative messiness of the putty application it’s best used in applications such as filling small gaps such as along seams on larger kits (i.e. vehicles), or between joined styrene sheets when scratchbuilding. Once it’s cured you generally need to sand the seam smooth to clean it up. Unless you can apply with superhuman speed and dexterity so that there’s nothing to clean up!
Remember too that being lacquer based it can eat into the styrene a little. This generally isn’t a problem as it will fill the etched surface once it sets.
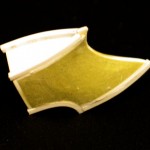
These two pictures show how the putty has been used to fill the gaps between the base prow shape and the added styrene edges:
Before using the Tamiya Putty I had been using some automotive spot putty (i.e. Bondo, but mine was a generic brand) for the same purpose and honestly it’s about the same in terms of performance. Both seem to have about the same curing time. I know it’s an ignorant way to think but I feel a preference for the Tamiya putty purely because it’s intended for modelling. The tube of Tamiya is cheaper than the spot putty, but it’s also a much smaller tube so economy wise the spot putty is better. Both types have a pretty strong smell though – if you have smelled lacquer thinner you’ll know what I’m talking about!
When you get adventurous you can also do advanced techniques with the spot putty, like creating a cast iron texture!
That’s all for now! Enjoy!
One Response to “Materials: Tamiya Putty (Basic Type)”
Leave a Reply
You must be logged in to post a comment.


June 19th, 2011 at 10:55 pm
[…] Read more from the original source: Tamiya Blog on: Materials: Tamiya Putty (Basic Type) […]