Category: Battlefleet Gothic

BFG Admech Spear Prow

Posted by Mangozac on June 15, 2011

To say that I’m not a fan of the stock Adeptus Mechanicus prow design would be an understatement. My mate Zelnik feels the same way and he somehow managed to talk me into doing up a new prow design that we could use on our Admech cruisers. I figured I’d do it to suit the plastic Imperial cruiser also so I could further spice up my fleet.

I also decided that this would be a good opportunity to document the process for use in an upcoming Warp Rift article. I’ll share a couple of pictures here but the rest (and a worded description of the process) will have to wait until the next Warp Rift issue.

I’m about two thirds of the way through the project at the moment. The prow weapons will be mounting asymmetrically into a big hole scalloped out of one side of the prow. Since I wanted to do a couple of variants and not risk damage to the original part, I decided the best idea was to cast the blank prow and then do the mods to the casts. I’ve just done a couple of casts so the next step is to start doing the mods. All will feature a lot of antennae and sensor masts pointing forward (again only on one side to maintain asymmetry).

Warp Rift Magazine Issue 32

Posted by Mangozac on June 10, 2011

Well once again Vaaish asked me to write up an article for the Warp Rift BFG magazine, this time detailing the construction of the Blackship commission I did late last year. You can check it out here.

I’ve got more BFG projects in the works, and I plan on documenting some of them properly for the next article!

Ramilies Star Fort Part II

Posted by Mangozac on May 29, 2011

Since becoming more familiar with the Ramilies kit I’ve reached the conclusion that I won’t ever be buying from Forge World again. Seriously I would be embarrassed to sell a model that arrived this generally terrible. I love the look of the Ramilies model and was so excited for it to arrive, but what I have been supplied with is absolute crap. Although I already phoned to arrange replacements for the parts most badly damaged in transit, I find the rest of the model less than acceptable. The problem is that I’m convinced it’s a mould issue, so don’t feel like a replacement could be any better.

Like I said, it seems like the moulds are just plain incorrect, perhaps to do with the pour sprues. See the picture:

This is the back of one of the four quadrants connected to a pier (pier on the left). This will butt up to an identically assembled pier-quadrant pair, and the same another two times to make up the bulk of the model.

See on the left side of the pier the step along the bottom of the side? See how the quadrant has a similar mating groove where it meets the left side of the pier? Well the side of the quadrant facing the camera doesn’t really have such a groove. It has a slight indentation, but nothing even close to what is required. I can get the pieces to align, but that means twisting things so that all four assemblies then won’t fit together. All four quadrants have the exact same problem.

I’m getting angry talking about it so I’ll stop now. Bottom line: don’t buy anything from Forge World. Seriously with the amount of cleaning up and repair required it would be quicker for me to scratchbuild and cast my own! I guess I’ll wait until the replacement centre towers come in before I have another go at assembly.

Ramilies Star Fort Part I

Posted by Mangozac on May 26, 2011

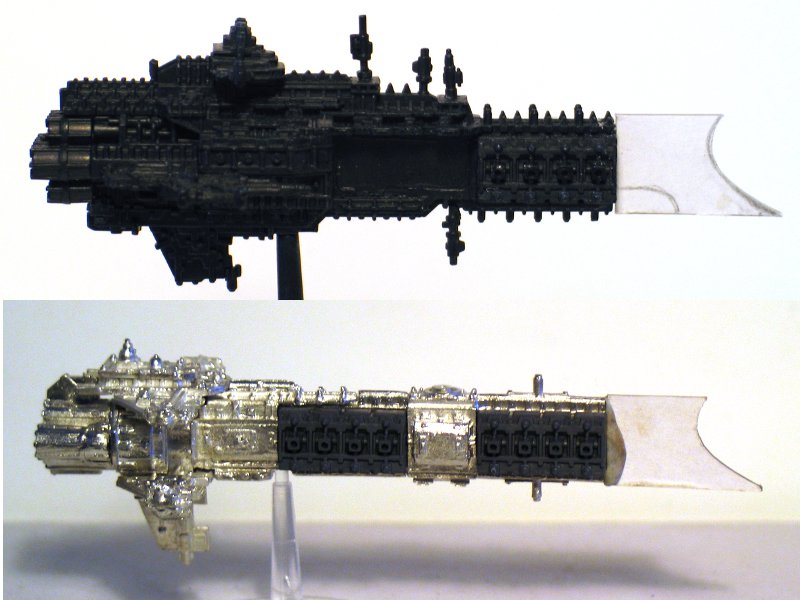
I’m sure many people will be surprised to hear that I have only just now made my first ever Forge World purchase! I picked up a Grey Knights Strike Cruiser (for a project I’m doing with Vaaish) plus a Ramilies Star Fort (I’ve always loved the model). Yesterday I was very excited to have a package arrive with my new purchases:

One of the things I noticed is that there are no decent pictures of the Ramilies online (that I ever found anyway), so that is one thing I want to rectify, by providing not only plenty of pictures of the assembled model, but also pictures of parts “on sprue”. Today I’ll be doing the latter.

All up the model consists of 14 parts. I’ve taken photos of all of the parts still attached to the sprues and casting gates to give the best idea of how it arrives. It’s also good for learning spruing techniques for ones own casting. In addition, I have drawn green lines to show the border between the part and the sprue.

PARTS PICTURES

I’ll start with the pier. There are four of these pieces which make up the four corners of the Ramilies.

Next up we have the launch bays/quadrant module. Again there is one for each side; four in total:

And now the upper and lower spires. That’s not what the piece of paper that comes with the kit calls them, but I don’t have it handy right now and can’t remember the proper name! I forgot to do the sprue borderline on this shot, but I think it’s pretty obvious that the giant block on the rear are sprues. Note the peg poking out of the lower spire – this is the stand which inserts into a flying base.

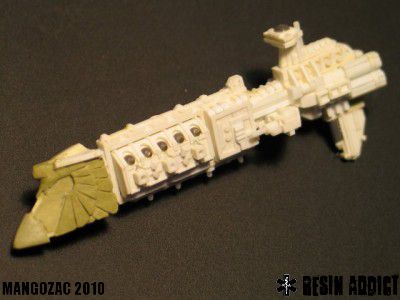
Finally we have the galleries. These sit above the innermost sections of the piers and butt up against the top spire, thus there are four of them:

PROBLEMS
C’mon, this is a FW kit. It would seem that it takes a large amount of luck to acquire a kit in perfect condition even from the factory. Although at this stage all of the parts seem nice and square (all parts are pretty thick and solid so it would be surprising if they weren’t), there is a bit of a problem: many of the little spindly bits have broken off.

In my opinion one of the drawcards of the Imperial BFG models is their highly detailed nature and having such a unique design. “Cathedrals in Space”. Part of this design aesthetic is lots of little spindly bits atop arches and buttresses and along battlements. The Ramilies is no exception and in addition has many lance turrets dotted around it which are actually cast onto the launch bay quadrants (rather than separate pose-able pieces). Despite the box that it came in being filled with a lot of bubble wrap, the parts themselves (some relatively heavy) were all just thrown into a bag and able to knock against each other. And knock they did – by the time the package arrived there were quite a few tiny parts that had broken off and gone missing.

Here’s some shots (missing parts circled in green):

Now I did find a few of the missing bits floating around in the bag, and generally would be happy enough to just glue them back on (so some spots of the model would still be missing bits. Only those really closely inspecting would notice). However for the money I paid for this kit having detail parts missing on the main spire is unacceptable, so I will be calling Forge World today to arrange replacements. I would like them to replace 3 of the 4 galleries too, but we’ll see what they say.

So despite the broken parts I can start assembly of the main body and will begin removing the sprues soon. Very much looking forward to it going together! Stay tuned for more progress.

Learning the hard way

Posted by Mangozac on May 16, 2011

Wow I can’t believe it’s been 5 months since my last blog post! So much for my resolution to be posting more!

Honestly a large part of the lack of updates is probably related to the fact that I haven’t actually been doing much hobby work this year. I’ve been so busy with work, interstate (for work) and overseas (for play) trips, and suffered some mild hobby burnout from working hard on a couple of commission projects earlier in the year.

I’ve decided that part of the hobby burnout has come from taking on another massive project: a 28mm scale mecha. I’ve got the legs about 60% done, but know just how much work will be required the finish the project and honestly I just don’t have the drive to do it. So as a solution I’m going back to BFG projects! They’re a perfect size in that I feel like I’m making good progress when I do them.

But before I get back into some modelling I had the sudden urge to paint up one of my Zeus Light Cruisers (oh my God it’s nearly a year since I finished the model!). So I cast one up, washed off the release spray residue and cleaned it up – I was pleasantly surprised at how little cleanup work was required . Here’s the part where I stuffed up:

Before painting the model it needs to be undercoated. I’m following Vaaish’s guide to ship painting (but with different colours) so I figured I’d also do a black undercoat. The only black spray I could find in my supplies was some Super Cheap Auto Export brand Matte Black enamel which I was sure I’d used on models in the past, so after mostly assembling the Zeus model I stuck the three sub assemblies (hull, left fin, right fin) on wires and gave them a spray. Easy. It went on nicely without leaving any texture so I figured I’d done well.

24 hours later I went to start painting and immediately realised the problem with the Export paint undercoat: it rubs of easily. Very easily. Just handling the parts was making it come off over my hands. It seemed like it wasn’t dry enough, even though I figured I’ve given it plenty of time. Anyway I tried to start giving it a “filler coat” of watered down black acrylic but found that the acrylic was drying with a “clumpiness” and texture I didn’t like. So I decided to cut my losses and strip the model.

At this point I remembered I had an unused can of quality Tamiya surface primer sitting on my bench! It’s grey but I’m doing a light colour scheme anyway so it won’t matter…

So I dropped the Zeus into a jar of methylated spirits this morning before I went to work. I’ve has great success with metho as a paint stripper on models in the past, however I was aware of the risk of a bad reaction with the resin Zeus model. I can always cast another one so it’s worth the risk. I arrived home tonight and fished the model out, finding that although a lot of the paint had stripped off (I reckon another 12 hours would have finished it off), the feared reaction had taken place and the resin had gone all soft. It’s possible that the resin will harden back up, but in it’s soft cheesy state I accidentally broke a few bits while scrubbing the paint off with a toothbrush so won’t waste any more time on it.

In closing, two lessons were learned: use decent, known good primer, and don’t strip Resin Addict kits using methylated spirits (they use the same resin as I use for my Zeus model).

Well I’m off to demould the replacement Zeus model. Here’s some pics to show the damaged model:

Commission: BFG Inquisitorial Black Ship

Posted by Mangozac on January 9, 2011

Well I’ve been busy this past month working on a commission job: a pair of Inquisitorial Black Ships. The Inquisitorial Black Ship is a fast, heavily armed cruiser used by Inquisitorial forces as a base of operations and transport for applying Imperial justice throughout the galaxy.

The client approached me wanting two identical models made so I made the decision to base it off the standard plastic Imperial Cruiser kit and add resin conversion parts. The resin parts were originally scratchbuilt in styrene and then cast to make enough parts for the two ships.

I’ll no doubt end up doing more Battlefleet Gothic stuff again in the near future – the same client already has ideas for more stuff he’d like commissioned!

Warp Rift Magazine Issue 30

Posted by Mangozac on December 12, 2010

Well RA patient Vaaish has been passed the torch that is editor of Warp Rift; the fan created Battlefleet Gothic web magazine, and asked if I would write an article for his first issue. So I’ve supplied an article about the process of scratchbuilding my Zeus Light Cruiser model and you can read about it in Warp Rift Issue 30. Vaaish has done a superb job on the refined layout and I’m sure he’ll continue to do so! I’m sure I’ll end up doing a few more articles for him too ;)

Zeus Light Cruiser Update: Painted Pics

Posted by Mangozac on July 31, 2010

Just a quick update to share pictures of the Zeus Light Cruiser as painted by good Resin Addict friend Vaaish. His beautiful paint work has for me personally provided a fantastic end to the project which overall has turned out quite well. Now I need to pull my finger out and paint some of my own (perhaps after I finish my little side project)!

By the way, Vaaish has a great little tutorial on how he paints his BFG ships over on the Two Lands Creative blog.

Project: Zeus Light Cruiser

Posted by Mangozac on July 11, 2010

Well after four months of work I have finally completed my latest project: the Zeus Light Cruiser for use in Battlefleet Gothic. This project was inspired by the lack of a model to represent the Voss light cruiser variants (Endeavour, Endurance and Defiant) and following some encouragement from some BFG fans I decided to take it on. The resulting design is a multi-part resin kit that can be used to represent any Imperial light cruiser pattern.

A massive thanks goes out to Vaaish who, in addition to giving a lot of persuasion for me to start the project in the first place, provided some amazing concept art and constant top quality feedback. He’ll be painting up a couple of casts and I’ll be sure to share pictures of them here when he’s done!

So here are some pictures of the process, including concept art, work in progress shots and final pictures of the resulting resin casts configured as two options. Resin Addict forum members can see the entire project log here.

Whilst I’m very happy with how the project turned out, I’m also glad to see the end of it! I’m now looking forward to getting back to some 28mm modelling and my Tau mecha project.

If you have any questions drop me a line on mangozac at resin addict dot com

Update: Zeus Prows assembled and painted

Posted by Mangozac on March 4, 2010

Check out the amazing job Vaaish has done painting up a pair of Zeus Prows for his Armageddon class Battlecruisers. Fantastic work!

Armageddon class Battlecruiser painted by Vaaish

You can see more pictures in the Resin Addict Forum