Posted by
Mangozac on July 13, 2013
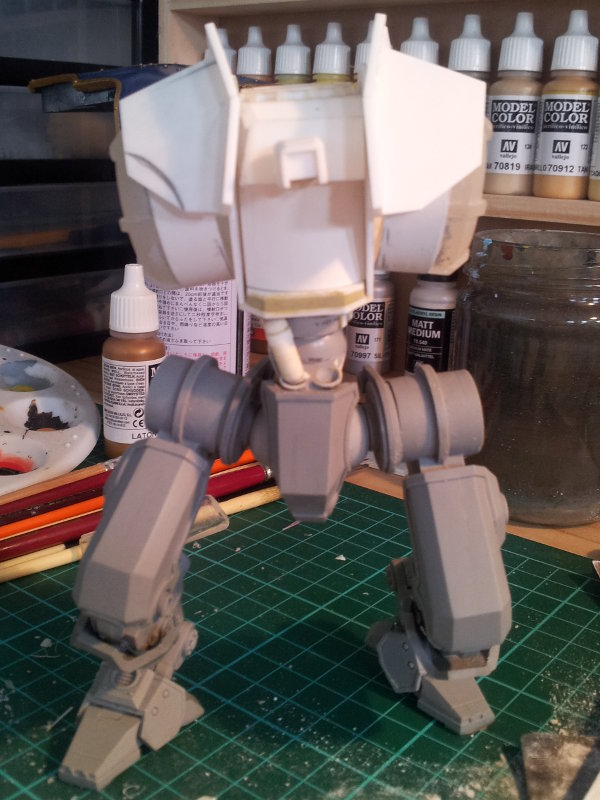
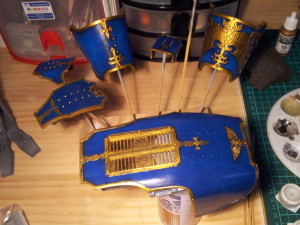
My hobby time of late is split between painting the brass banding on the Warhound (a loathsome task) and working on the Centurion torso. The beauty of having a painting and scratchbuilding project going at the same time is that working on one is a nice break from the other (rather than spending all of my available time just paint or just scratchbuilding, which is an easy way to burn one’s self out).
I finished the basic form of the shoulder pads as per the following pictures, but I’m contemplating whether a concave curve like I’ve pencilled in on the left side of the photos might look better. I just don’t want it to look like it’s been copied from the Forge World Chaos Decimator. Once I device on that I can then start cutting out and applying the banding to the shoulder pads.
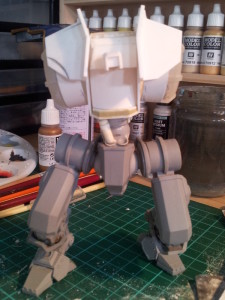

I’m yet to decide what’s going to happen with the chest area. Previous WIP posts have shown some armour plates there but I wasn’t completely sold on it. I think it might need something protruding a bit, as is common in many Japanese mecha designs. Either way there will be a floating armour plate protecting the abdominal mechanics. Spikes still aren’t off the table either…
Oh you can also see the progress I’ve made on the head so far. Yes it’s tiny – it’s supposed to be. Once it has a plume it will look a bit bigger 
Posted by
Mangozac on July 5, 2013
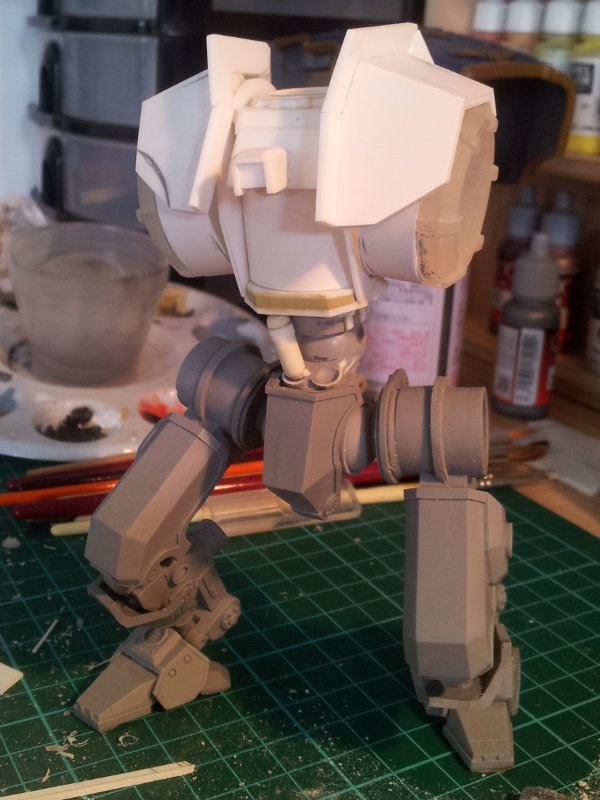
Just a quickie for today. I was playing around with torso layouts last night and feel like the following is going in the right direction:

Obviously it’s all still very rough (especially the armour plating – I’m not quite sold on the plating on the front). The two clay blobs on the left are actually spikes – I thought that some stumpy spikes on each side of the torso would look suitably Romanesque.
I’ll do some more playing over the weekend…
Posted by
Mangozac on July 4, 2013
I’ve been doing some more work on the Warhound project of late. The last fortnight has seen some major work on the base. All of the plaster work is done (I’m using Hydrocal tinted with a little black paint) and has been cleaned up (scraping and sanding). I also scribed all of the details into the concrete and then laid the asphalt. The asphalt is a mix of plaster, fine sand, PVA and black acrylic (I just used cheap discount store acrylic and ran out of it near the end). It’s actually really difficult to smooth out properly and once it’s dried properly I’ll give it a bit of a smooth out
Here’s some progress shots:

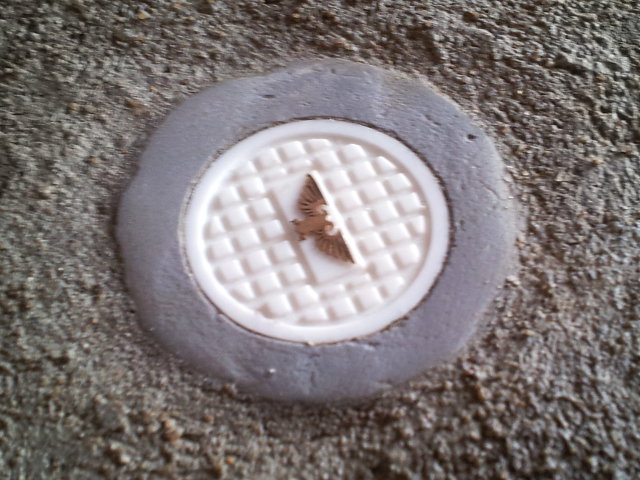
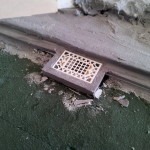
Two things I felt were necessary for the road and guttering were a stormwater drain and a sewer manhole cover. More Inkscape and CNC work have facilitated some pieces I’m really pleased with:

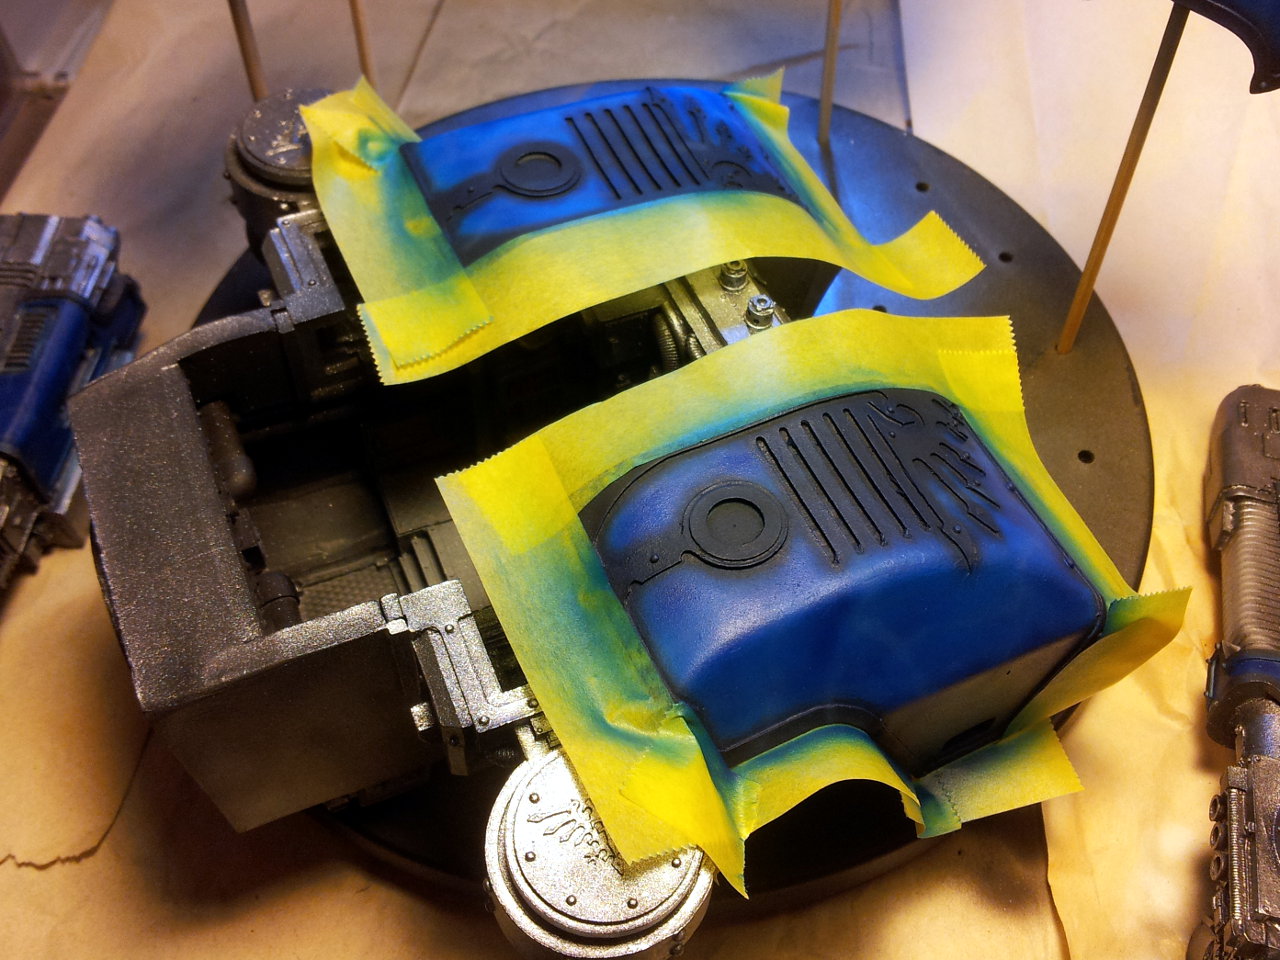
Painting the Warhound is coming along nicely. All of the blue is done (except the legs, which haven’t been primed yet because I’ve been playing around with them sorting out the base and don’t want to damage the paint in the process). I decided to have a go at doing a marbled effect on the blue armour plates by mixing a little white with the blue colour and spraying it on in wavy lines (with the airbrush set at a very low pressure), but it was a bit too light and contrasted too much. So I had to spray a thin coat of the base blue colour over the top to dull the marbling down a bit…
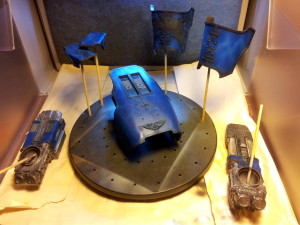
I masked off the metallics that had already been done so that they didn’t get tinted blue from overspray:

Here’s a shot showing the pre-shading on the head armour plating. It’s since been painted yellow, but I have’t grabbed a pic of it yet. The pre-shading works really well with light colour like yellow!
I’m currently working on the brass banding and it is officially the most boring part of this entire project! It takes forever and requires two coats to get a good coverage (you can see what just one coat looks like on the torso armour plate).
Posted by
Mangozac on July 3, 2013
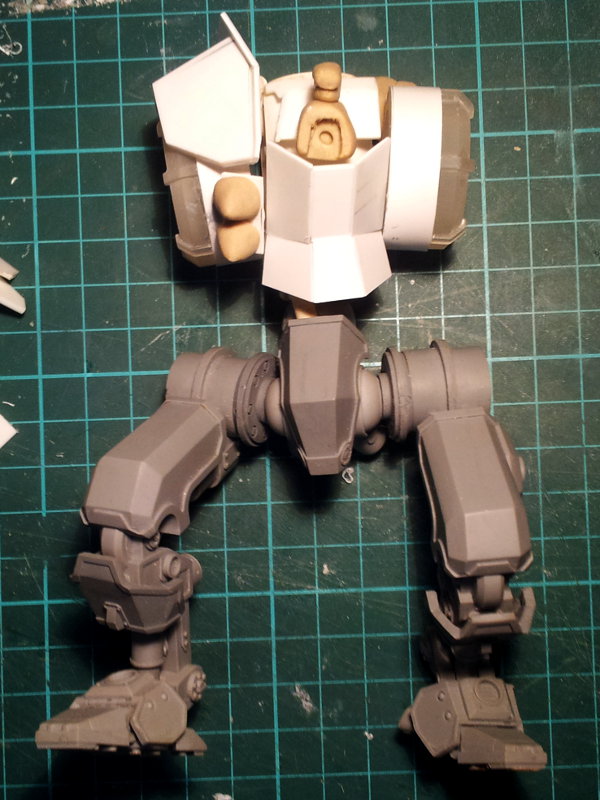
ERMAGERD! It’s a Centurion update! 
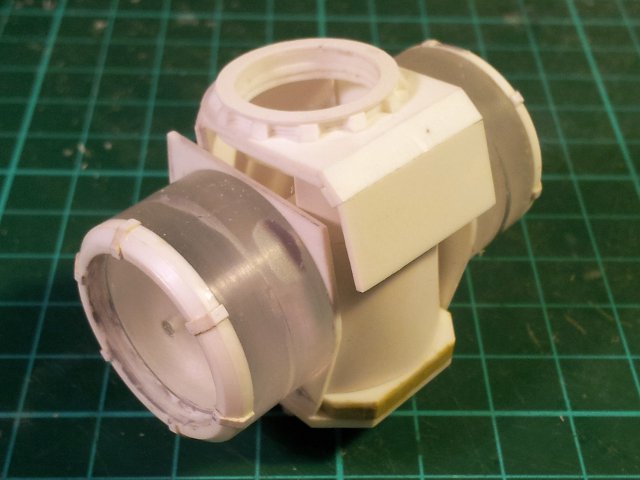
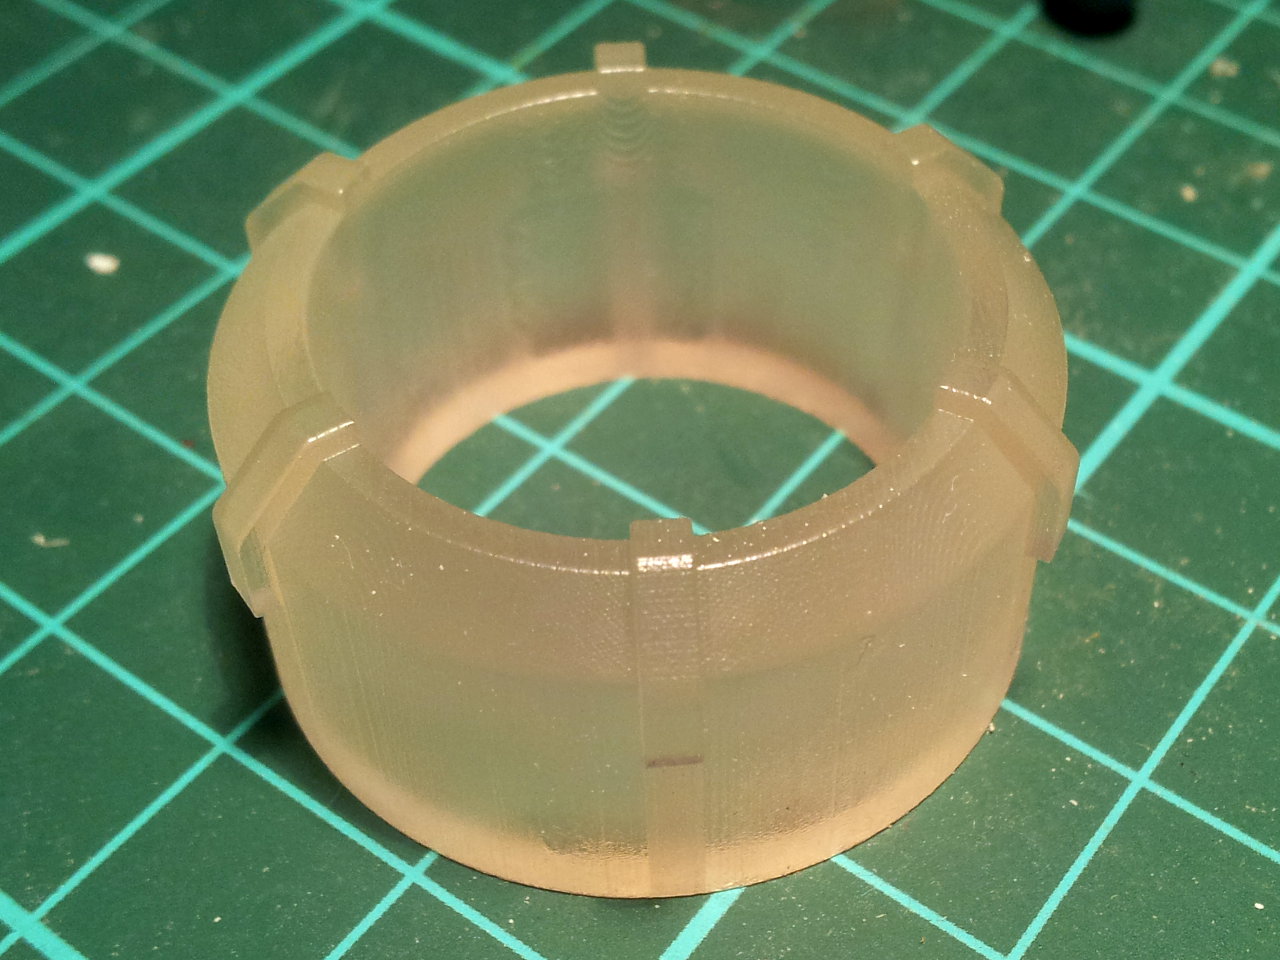
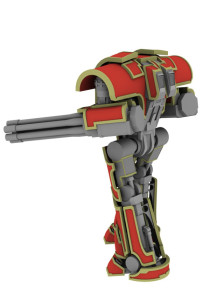
Well following some recent 3D discussion over on WargamerAU (and subsequent goading by AwesomeShotDude), I decided that I would kick this project back into gear by 3D printing the parts which have been putting off re-making: the shoulder cylinders. Here’s the existing parts on the torso:
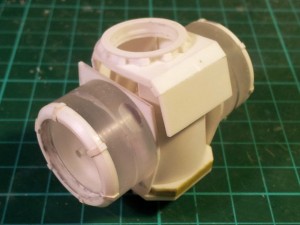
I was unhappy with the size of the existing cylinders that I had created and decided they needed to be about 25% larger diameter. While they’re not especially hard to make by hand, it takes a lot of time screwing around with the CNC router, lathe and then gluing on all of the individual little detail bits. In contrast it took all of about 15 minutes to draw up in 3D CAD!
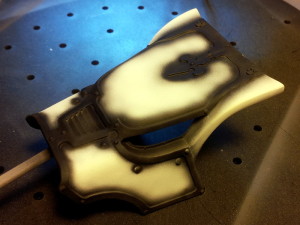
This was my first time trying Frosted Ultra Detail (called FUD for short, which I always mentally read as F!@#&d Up Detail) from Shapeways and if I’m honest I was pretty dubious as to what the surface finish was going to be like. I got two of the part printed, which cost US$25.00 each. Including shipping I paid US$70.00 all up. Not cheap, but definitely cheaper than spending 3 or 4 hours making them by hand.
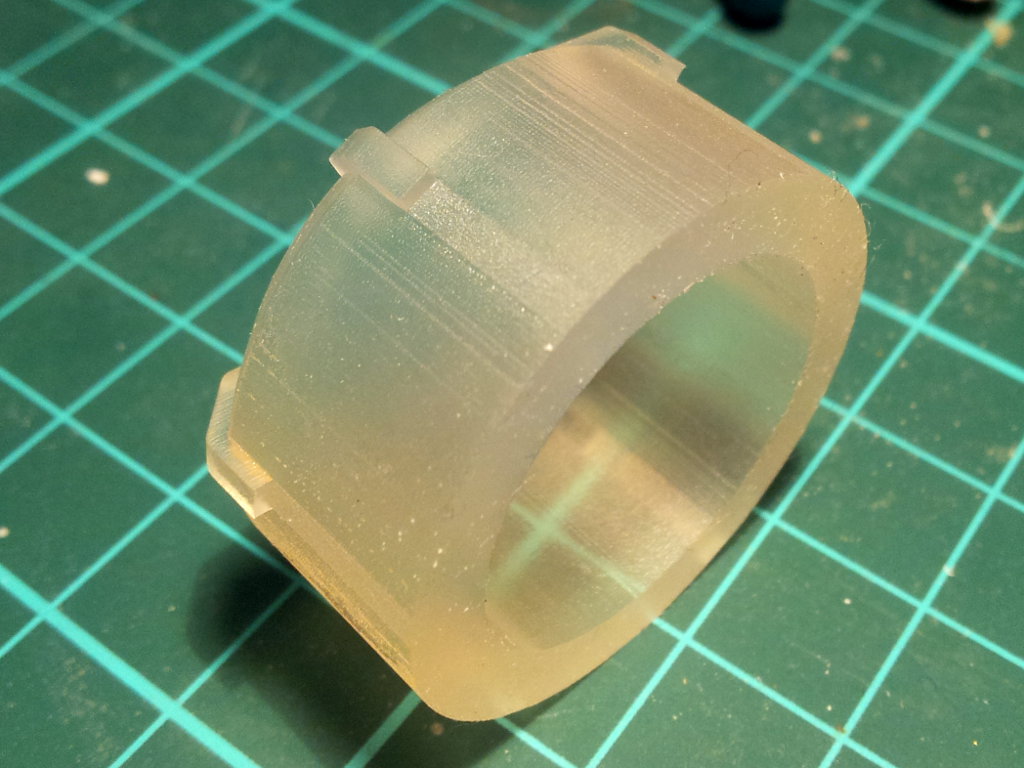
Well the parts arrived yesterday and I immediately unboxed them to see what they were like. I have to say, I was impressed. While there is still noticeable striation surface texture, it’s only very shallow. Last night I tried sanding it and can report that even without a coat of primer it actually sands very nicely with 400 grit paper. Remember though that I deliberately kept the detail on this part to a minimum in anticipation for the sanding and cleanup, which makes it easier.
Pics (the unsanded part – click for high res):


So would I use Shapeways again? For printing basic parts of a master model, almost certainly. Figures or highly detailed parts I personally don’t think I’d be happy with, but I’m sure it would do for others who are less anal about it than I.
With the new parts in hand I did some laying out of the Centurion torso last night (between the painfully boring job of painting the brass banding on the armour plates of my Warhound). I’ve got some ideas and will begin doing some proper design tonight. Hopefully I’ll have an update later in the week
Posted by
Mangozac on July 2, 2013
You may have noticed parts of the RA site being unavailable lately. I’ve been having issues with the server for some time and last week I decided to try out a new server. The transfer went fairly smoothly other than a small mistake I made, which delayed things a bit 
Anyway I’m sorry for the site’s down time and hope that the new server gives us much better performance!
Mangozac
Posted under
Uncategorized
Posted by
Mangozac on June 10, 2013
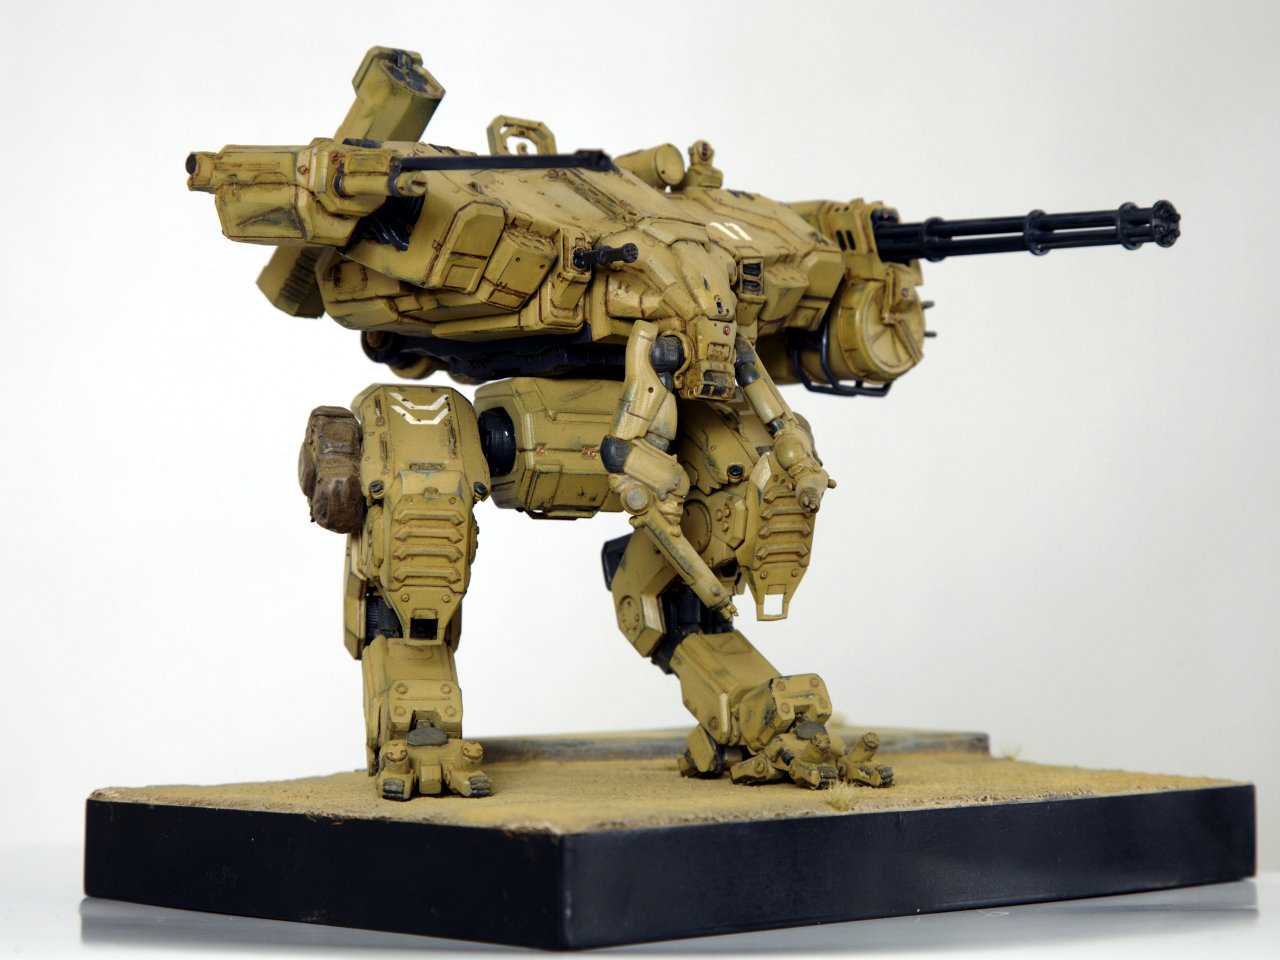
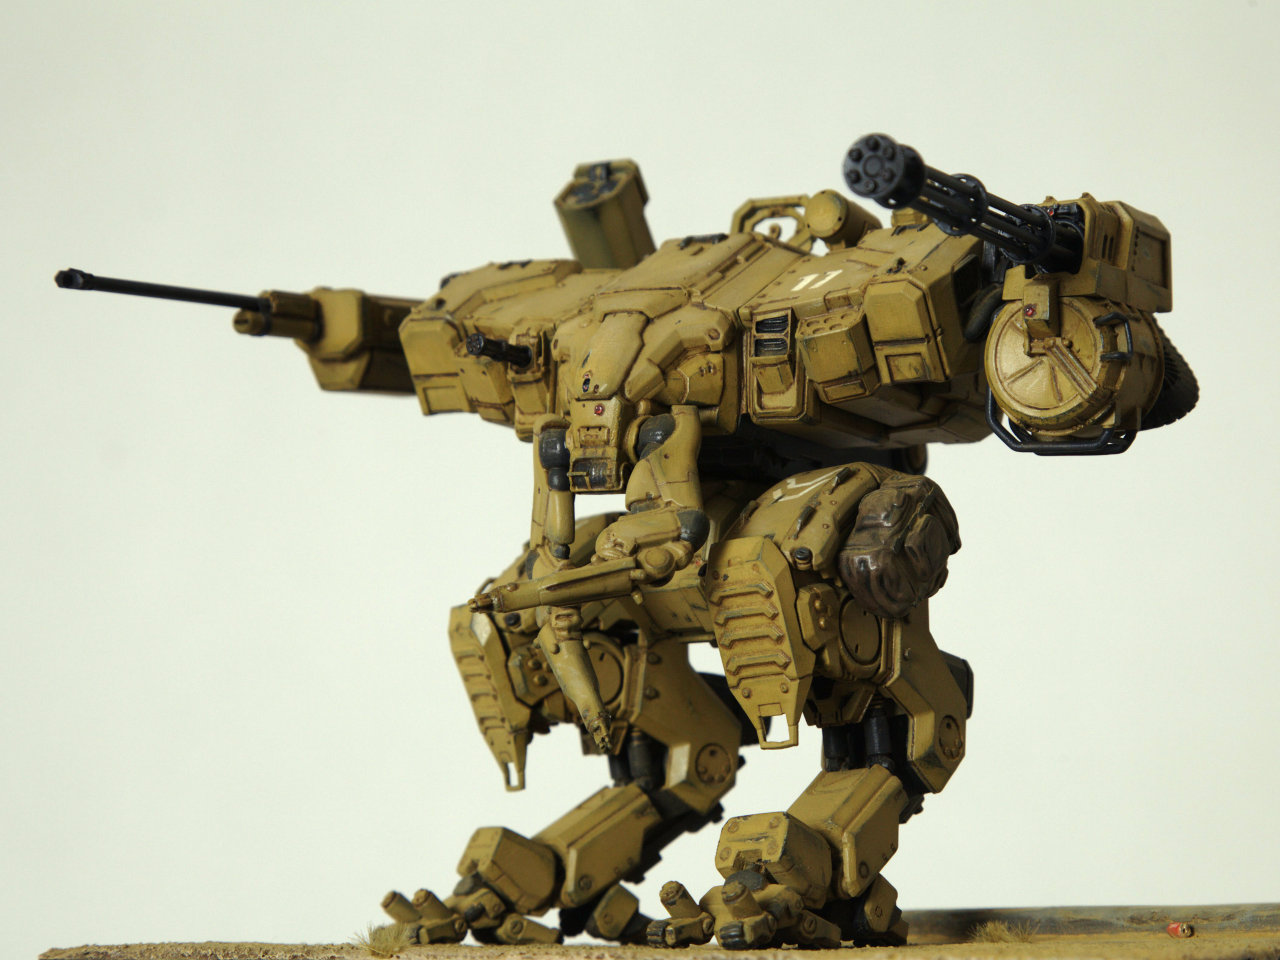
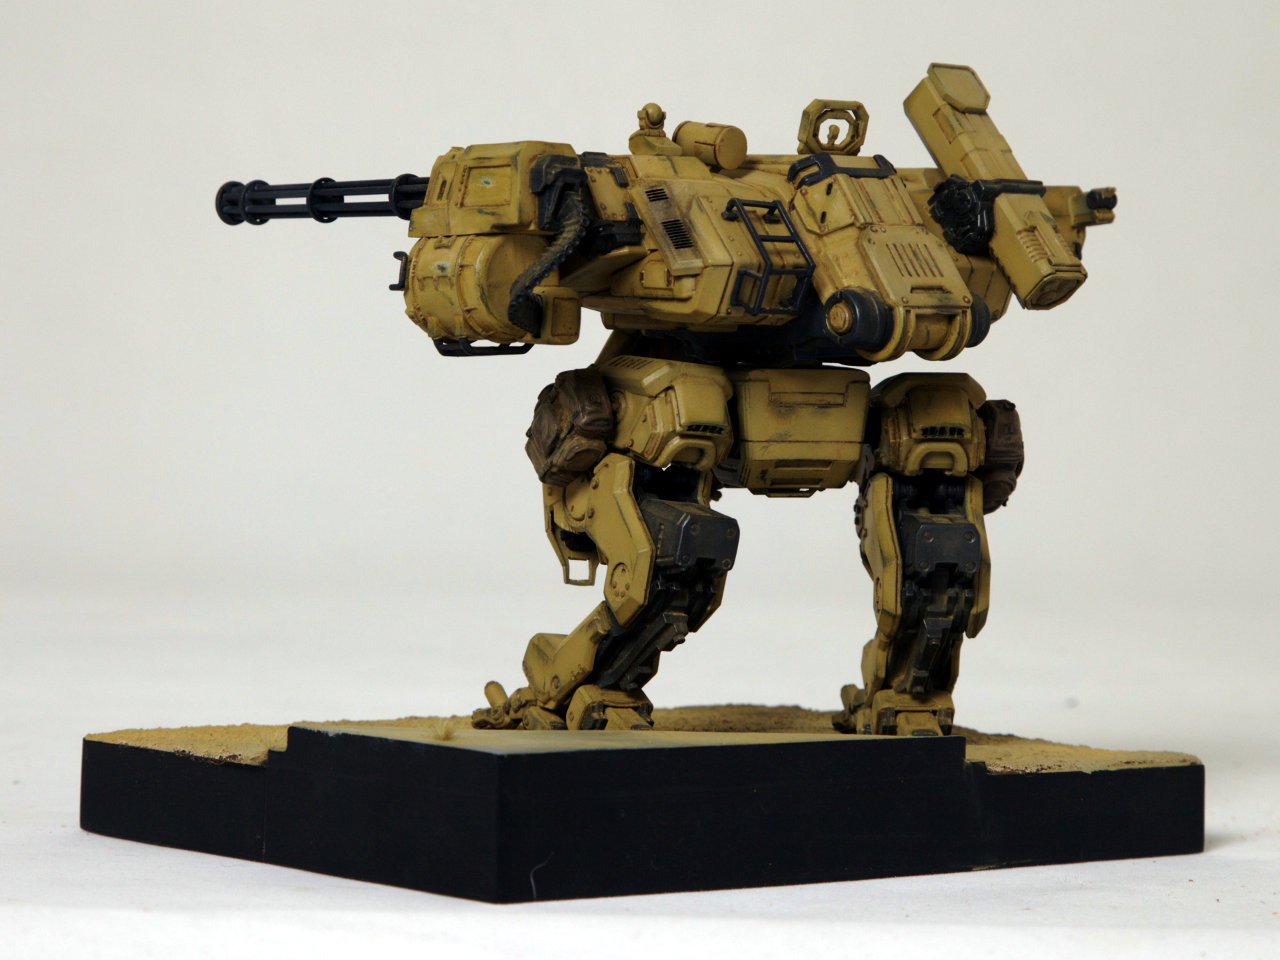
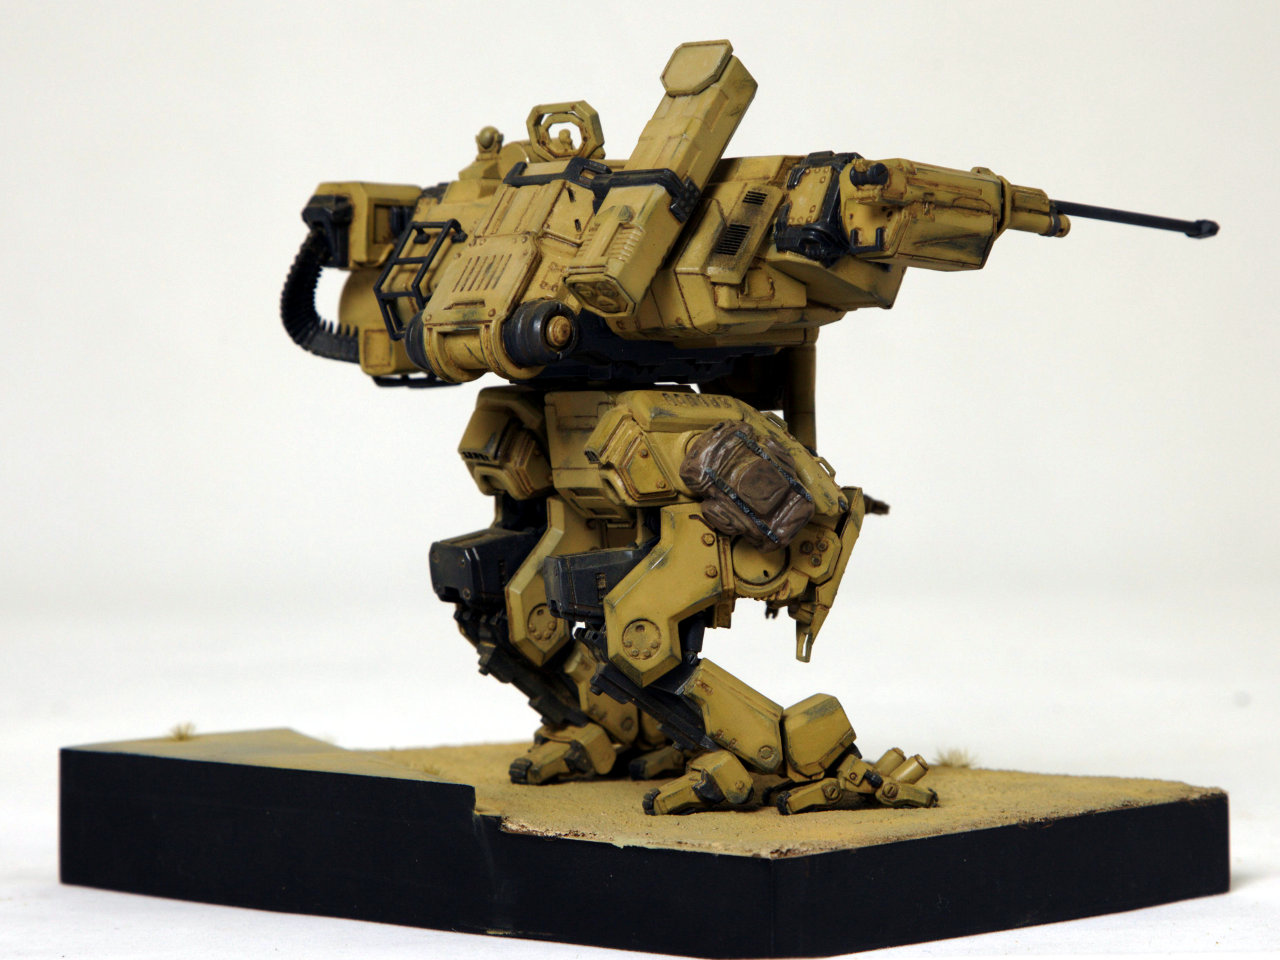
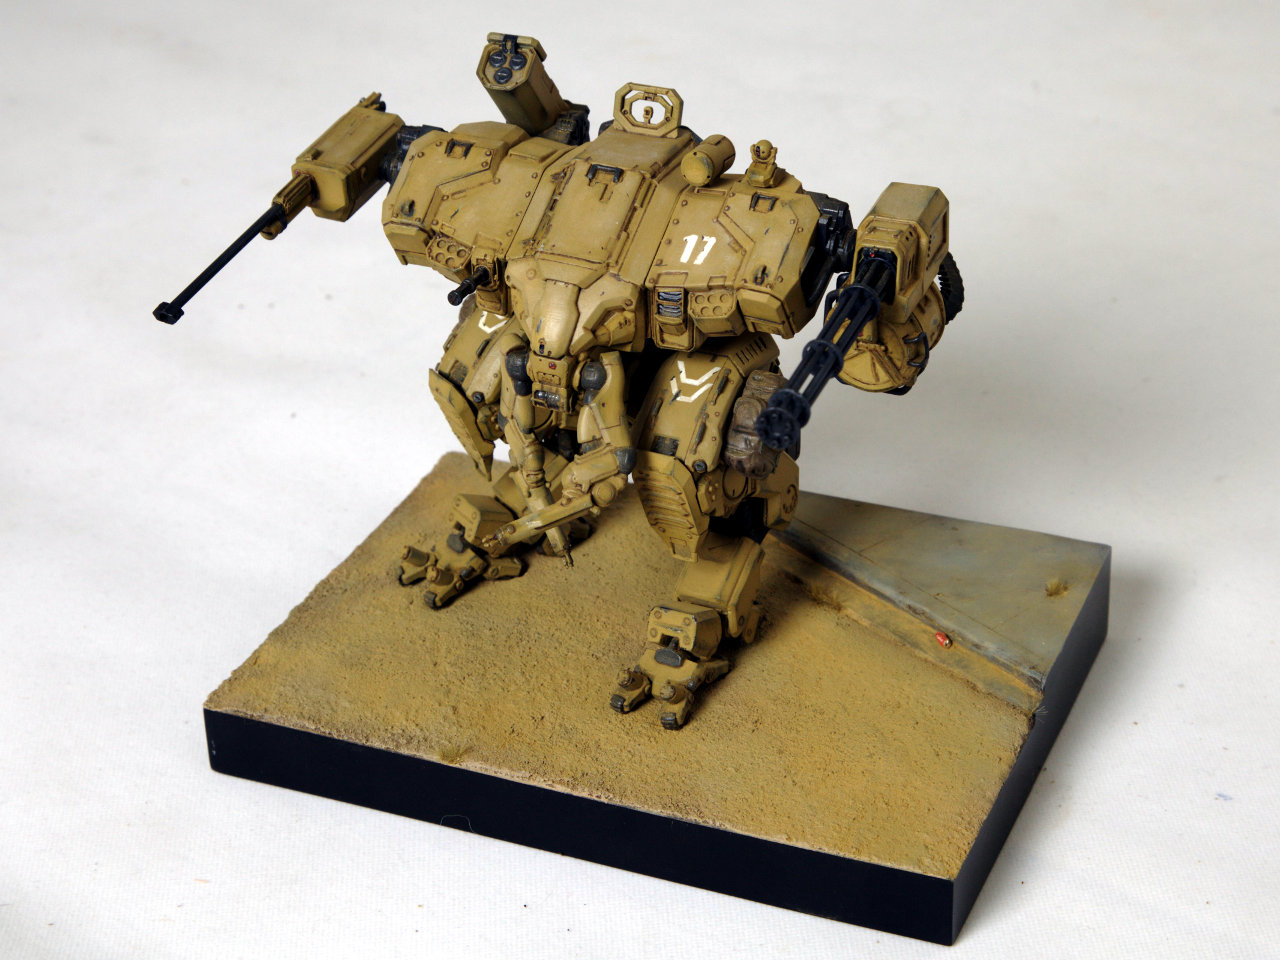
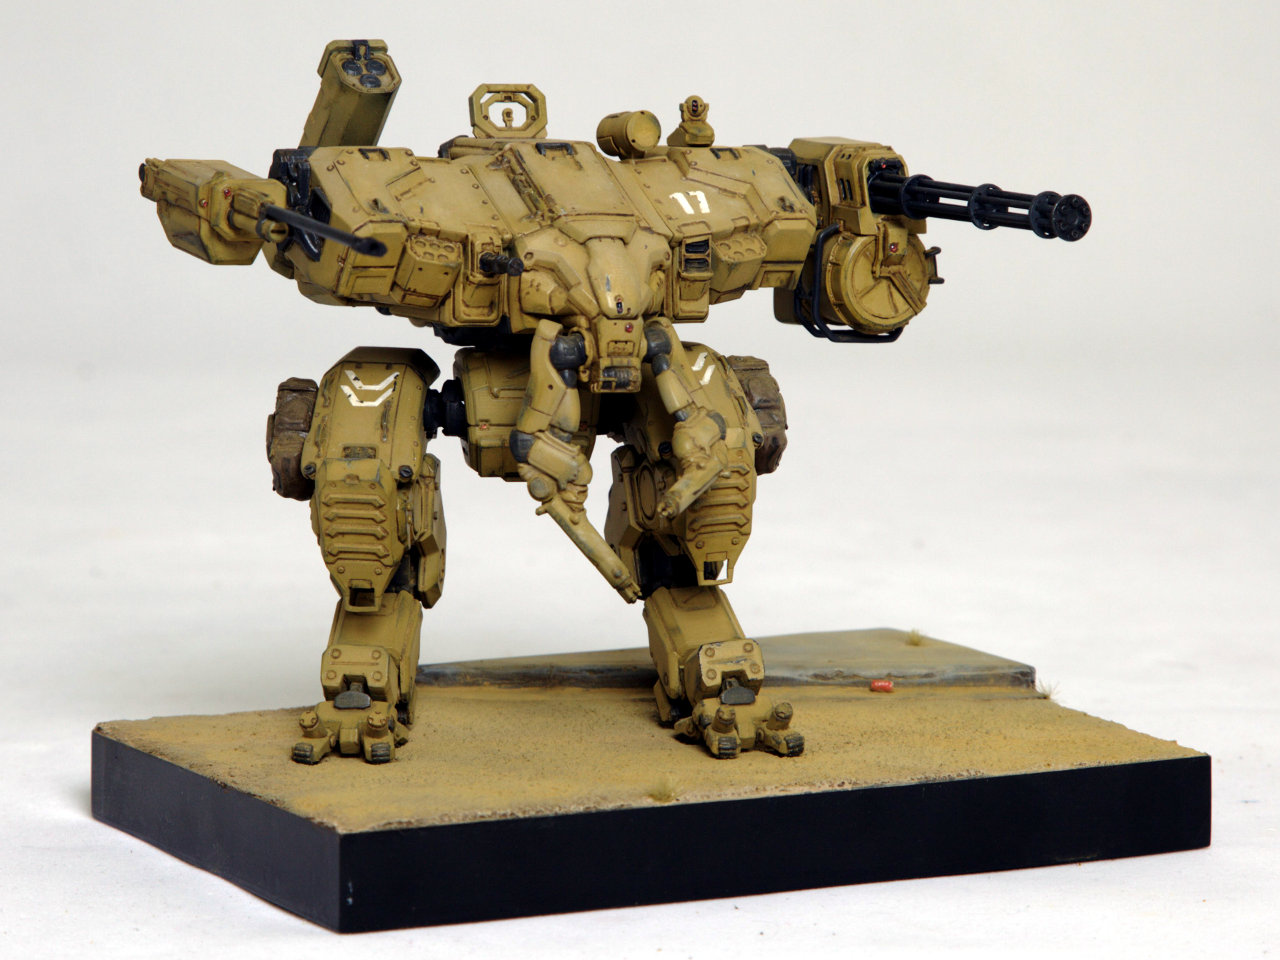
As with everything I do it took longer than planned, but the Fidder is finally completed!
I spent my long weekend finishing off the base so that I could do the pigment “dusting” to both the base and the model at the same time (to ensure the tones are correct). The base has turned out fantastically, especially after the pigments were added – they really pull everything together.
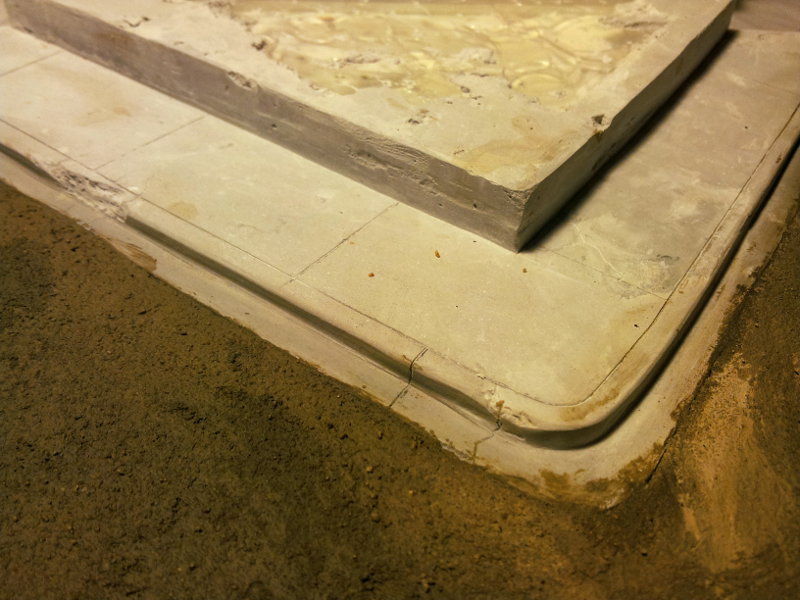
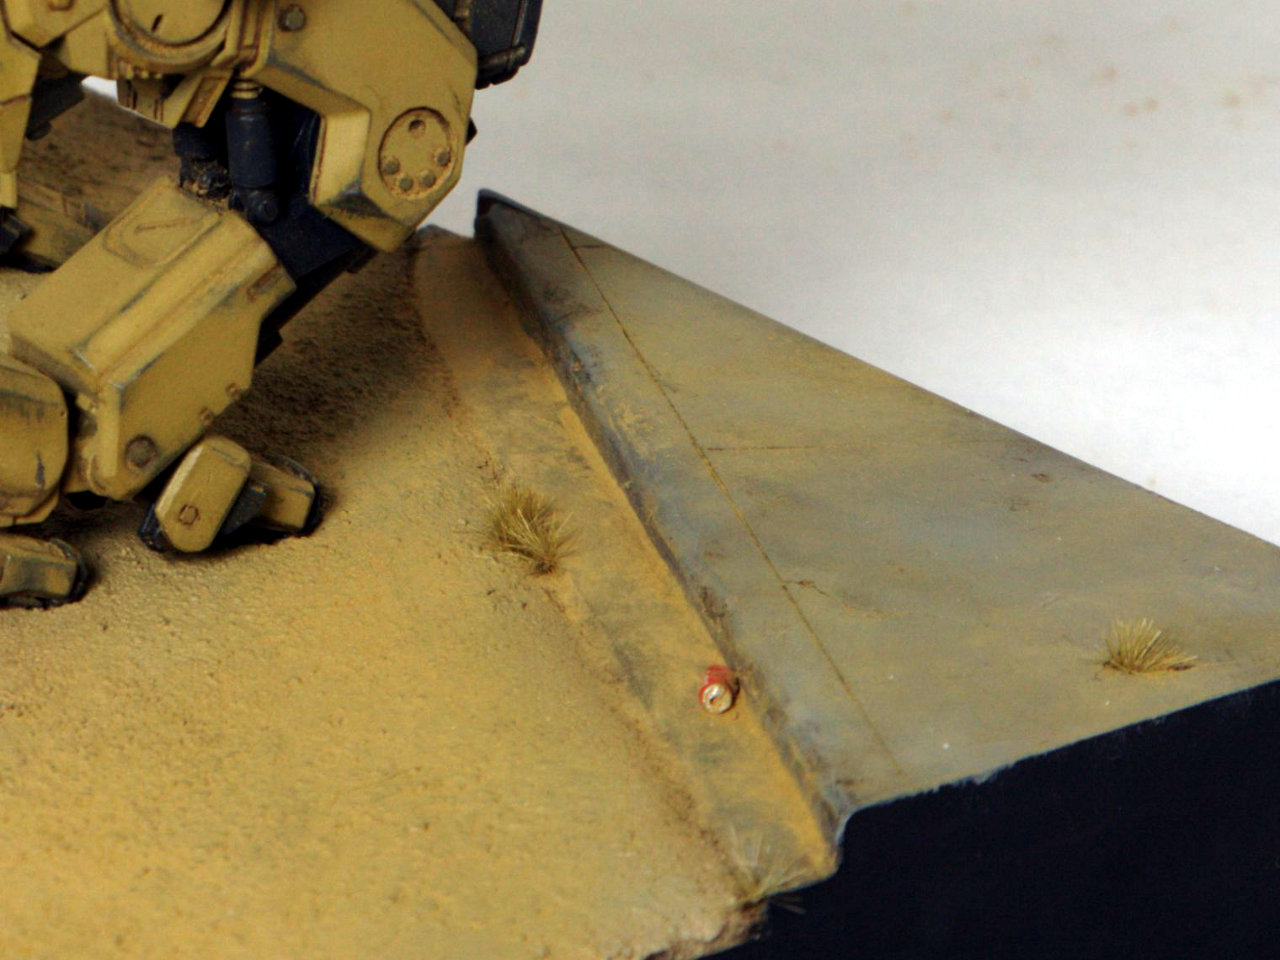
I’m very pleased with the concrete sidewalk on the base – I’ll share the technique on an upcoming post for my Warhound diorama (that’s next on the agenda). It was coloured by airbrushing with a custom Vallejo paint mix and then discolouration was applied using some oil and enamel paints. This step really makes the difference and makes it look like real, dirty concrete. A dark wash was applied to the joins between the slabs. I do have to note how much better these oil washes look than trying to achieve the same effects with acrylics. After the oils had dried I misted a light coat of Tamiya TS80 Flat Clear spray over the concrete to dull it down a bit.
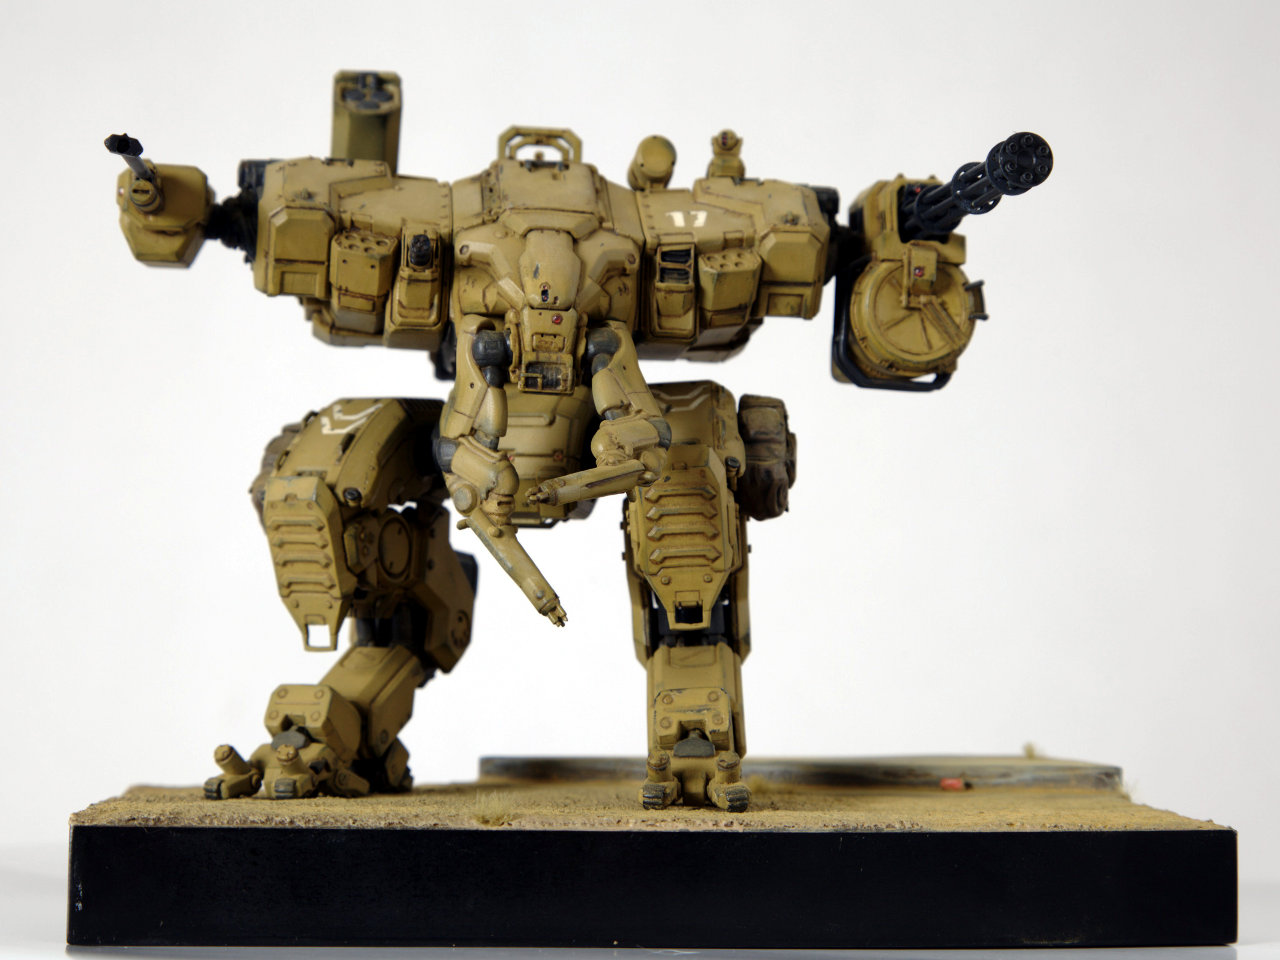
But by far my favourite detail is the Coke can in the gutter. It was a last minute addition that came to me in a moment of inspiration. It’s simply a piece of 2.5mm styrene rod with a crinkle pattern carved into one side. A small hole and a piece of microstrip make up the ring pull on one end. It was then primed and painted with Vallejo silver. The sides were given a coat of semitranslucent red (in order to retain some of the metallic sheen of the silver underneath) and finally “Coke” was painted on the side in white with my finest brush. It turned out fantastically and as my girlfriend pointed out it gives a really good reference of scale.
As I said above, it was the pigments dusting that really brought it all together. Despite the concrete looking dirty from the oil paint application, it needed to be covered in dirt to simulate the arid environment. In particular the gutter needed to be very dirty. I mixed up a nice colour using Secret Weapon Yellow Earth, Green Earth and Slate Grey pigments and applied it everywhere. It was deposited in heavy clumps in the gutter and then some Tamiya X20A thinners were dropped on top to settle it down. Once the thinners had evaporated I feathered it all out a bit and the result looks great.
All in all it’s been a very satisfying project. As always I’ve learned a lot of lessons along the way! The biggest change that I think would have helped would be to add some warning sign and other aircraft style decals in a few spots. I just didn’t have any handy when I was at that stage and didn’t want to delay things waiting for some to arrive via mail order!
I do also have a 1/35 soldier figure to add to the base but the intention is to sculpt a futuristic looking helmet/visor system for him first. I’ll get around to that one day and he can be added to the base then
On to the pics!
I’ve got to give a shout out to my girlfriend Kat for taking the pictures with her super expensive camera in her home studio. Thanks!
Posted by
Mangozac on May 31, 2013
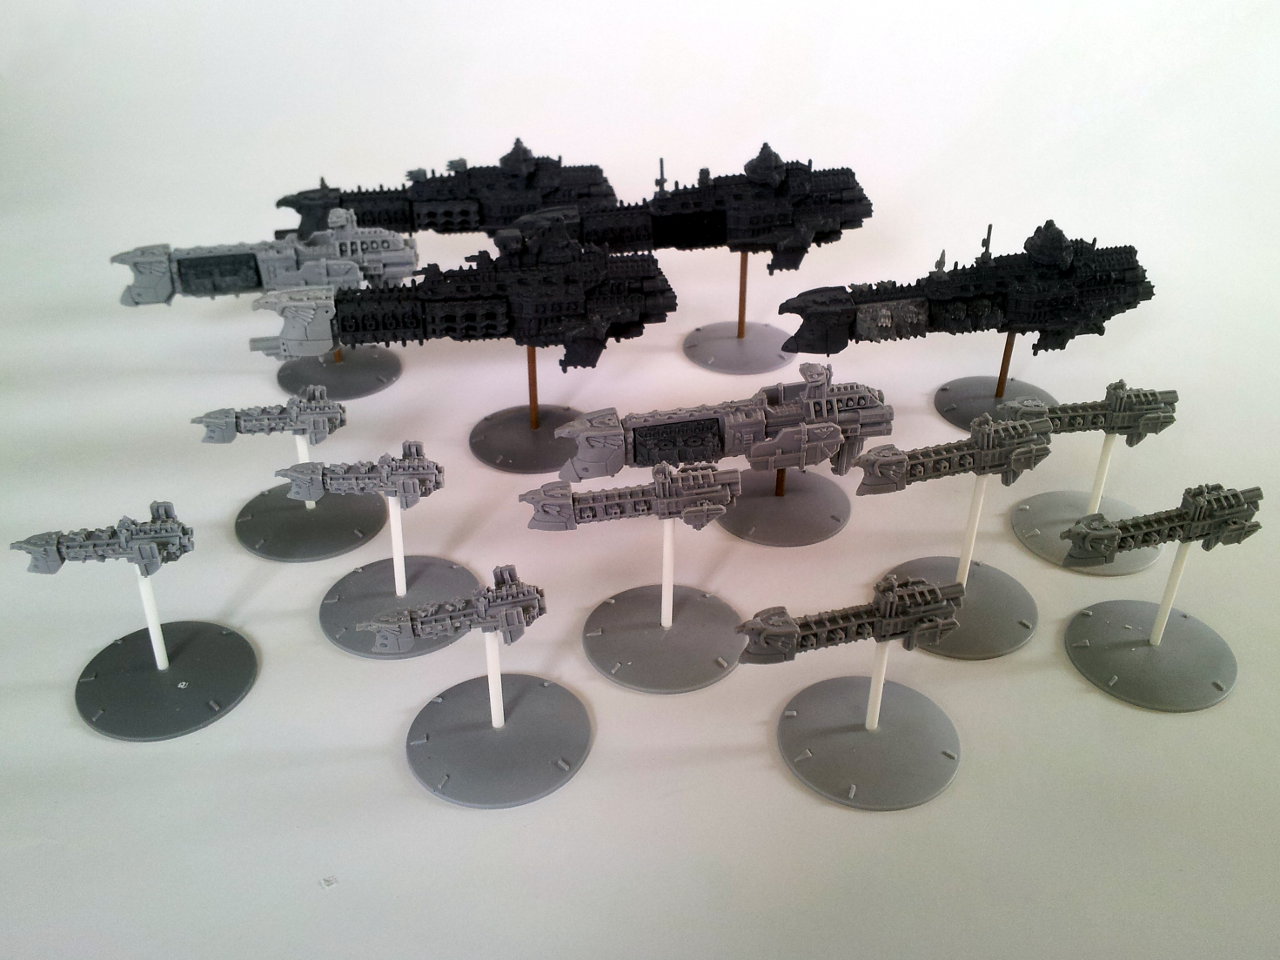
Resin Addict member and hobby friend Shane Barnbrook (Barn) suffered a lot of misfortune last year with regards to his health. Something as seemingly inane as accidentally swallowing a chicken bone resulted ultimately in a coma and paralysis! While doctors expect him to make a full recovery, it will be a very long journey. In order to take the first steps Barn needs to get out of rehab and back to his home so that he can be with his lovely wife and children. This however requires extensive and expensive improvements and mobility assistance equipment.
In order to help raise funds for Barn and his family I am auctioning off a one-of-a-kind custom Battlefleet Gothic fleet on ebay: http://cgi.ebay.com.au/ws/eBayISAPI.dll?ViewItem&item=190848743706.

Every cent from the auction will be donated to the Barnbrooks (the models, listing fees and postage are all coming out of my own pocket). Even if you’re not into BFG yourself, please spread the word so that we can get lots of bidding!
Posted under
Uncategorized
Posted by
Mangozac on May 29, 2013
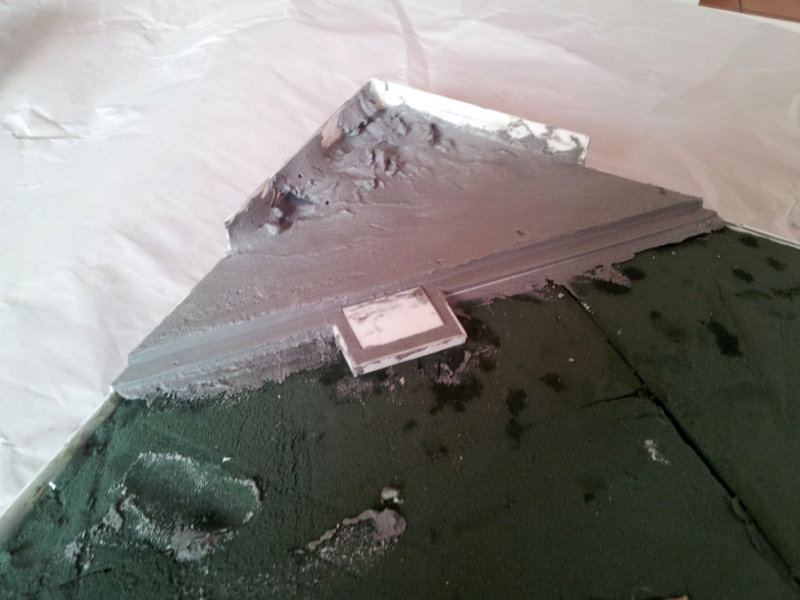
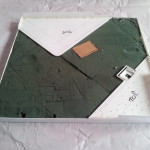
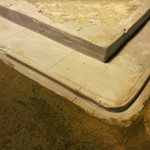
Today’s brief update is showing my progress on the diorama base. As you can see I’m going for a dirt street and section of sidewalk. The base is made from a piece of timer chopped to size and then edged with a styrene skirt. On top of this does a dirt mix and then the cement. I added too much black to the hydrostone “cement” mix so it’s a little bit dark, but that’s ok it will paint up to the right colour just fine.
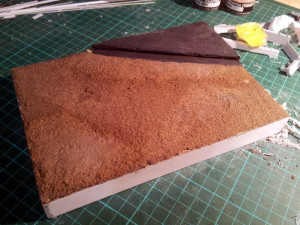
Ignore the strange effect on the dirt – I had just applied some more (a dirt and PVA mixture) on top of the base dirt coat (which is dirt, hydrostone and a glob of PVA).
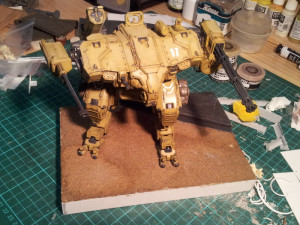
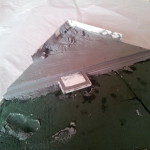
Here’s the Fiddler sitting on top to show the scale. The next step is to scallop out slightly the spots where the feet will go, fill them with a sand and gel medium mix and then press the Fiddler into it to make it look “settled” into the ground (rather than hovering slightly above it). This thing would weigh a few tonnes so it would certainly put some pressure on the ground!
Once that’s all done I’ll paint the edging in gloss black, mask it off and then paint the dirt and cement.
Posted by
Mangozac on May 26, 2013
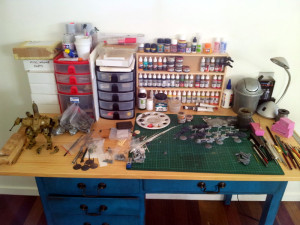
Since getting back into a lot more painting in this last year work desk space has been at a premium due to the number of paint and consumables bottles sitting on my desk. I recently realised how much of a waste of space this was and devised a shelving system to rectify it. I finally got a chance to build it this weekend and am pretty pleased with the result.
It’s pretty simple construction made from 40mm x 8mm pine strip. The size was determined by what I could make from two 1200mm lengths, however in hindsight I should have been less stingy and sprung for another length. That way I could have made it a bit wider (as constructed it’s 450mm wide), as I will be running out of space very quickly. I’d recommend 600mm wide.
The back is just a sheet of 3mm MDF.
The pieces of timber were cut to size on a drop saw. I used nails and PVA glue to fasten the pieces together, but due to how thin the pine strips are I pre-drilled all nail locations to ensure no splitting occurred.
I was quite surprised how stable the finished shelving unit is. I was expecting to have to add a base with a larger area, but in practice this is completely unnecessary.
So here’s the finished product in all its populated glory (please excuse the crappy picture – there was something weird going on with light levels):
Those with really keen eyes will see some new project on their way
Posted by
Mangozac on May 23, 2013
Let me start with a disclaimer: THIS PROJECT IS NOT MY OWN WORK
OK I don’t do this too often but every now and then I see a hobbyist with whom I can’t help but feel some affinity. It’s not necessarily solely a display of amazing hobby skills, but a combination including the design itself and the topic. In this case it’s an amazing Mars style Warlord Titan being built by Dakka member Fiorhellheart (Rory). The guy is still in his teens but his work is as professional as a seasoned veteran. I am very jealous of his clean styrene work!
A Warlord Titan is an ambitious project for anybody to undertake – hell even I’m not crazy enough to attempt one (yet)! But Rory has a very promising start by first creating his design in 3D CAD. I’m ripping off a couple of pictures from his Dakka thread to post here:


Rory has devised a beautiful design for the lower leg and foot – I love this rear view and in the particular what he’s done for the rear toe:
Like any truly devoted hobbyist, Rory is hinting at moulding and casting the model when he completes it (with the amount of work going into building those beautiful forms it would be criminal not to!). Unfortunately though the project has had to take a back seat to Rory’s studies (he’s studying physics but I think he may have missed his calling in engineering!) so we just have to stay subscribed to the thread and wait patiently for updates (is patience one of your virtues – it’s certainly not one of mine!).
Check out the Dakka thread and salivate over the scratchbuilding goodness: http://www.dakkadakka.com/dakkaforum/posts/list/0/458325.page.
Posted under
Uncategorized